Tuesday, April 9, 2019

Sunny Snapshot / Citrus Twist Kits Guest Designer

Happy Tuesday, friends!  I am excited to be the April Guest Designer for Citrus Twist Kits!  I was featured on their blog yesterday HERE, and I created this layout using mostly the April Scrapbooking Add-On Kit. 

This kit is full of the Crate Paper Maggie Holmes Sunny Days collection, and I was inspired by the three washi tapes that come in the kit.  I decided to create a circle design, so I adhered all three tapes to some white cardstock and then punched different sized circles out of it.  I also punched a few of the patterned papers in the kit, including one from Vicki Boutin and one from Paige Evans.


Punching circles is really easy, and you can use lots of papers to get a variety of colors & patterns on your page.  I machine stitched through some of the circles to add more detail and texture.  I also fussy cut some pink flowers from a Maggie Holmes paper and used them around the layout.


I layered some 3x4 cards and some Sunny Days embellishments under the photo as well as some white tissue paper.  I tucked in more orange and green die cuts under the right side of the photo as well as a leafy puffy sticker.  This "Less fluff" piece is from the Life Crafted Make it a Venti Kit, and it's an exclusive die cut.  I also used a few of the exclusive stamps.


I fussy cut "Snapshot" from another Maggie Holmes paper and tucked the letters behind the photo.  They are so large that it's still easy to read what it says.  I added "sunny" to complete the title.  I actually cut out a lot more of these big letters in the beginning to create a really long title, but ideas changed and my layout evolved into something different :)


So for the background I used another Maggie Holmes paper.  It's light pink, so I added some white gesso to it to prepare it for some spray inks.  I used a few different shades of pink Shimmerz Paints sprays to create a darker pink watercolor wash.  I also added some gold splatters and a bit of blue.


Here are a few more detailed shots of all the fun bits and pieces!


I did trim this paper down so the yellow trim was smaller.  I took a sheet of white cardstock and pained the edges a light blue color using acrylic paint.  I love the contrast of the colors!  That is the blue that I watered down to splatter onto the page.


I hope this inspires you in some way!  It was really fun creating with these kits, and I hope you'll check them out!  I do have a process video here if you'd like to see how this all came together.


Thank you to Trina, Nathalie and Emma for having me as a guest!  I had a lot of fun!

Thanks for stopping by, and I'll see you soon!

Friday, April 5, 2019

Pinkfresh Studio 5th Birthday Blog Hop

Happy Friday, friends!  Welcome to the Pinkfresh Studio 5th Birthday Blog Hop!  I'm so excited to be participating in this awesome milestone celebration of such a wonderful company.


You should have arrived here from the Pinkfresh Studio Blog.

There are so many designers taking part in this Blog Hop, so make sure you check them all out.  There are prizes to be given away...woo hoo!  There will be 3 Grand Prizes given away on the Pinkfresh Studio Blog:

  • A full set of the PFS Liquid Watercolors
  • Set of the 3 newest paper collections
  • Entire April Essentials Die Release 

Each designer is also giving away a $25 Gift Card...all you have to do is leave a comment on each blog to be entered to win one!  Easy!  The winners will be announced on Sunday, April 14th on the Giveaway Page.  You must check this page to see if you're a winner, and you must claim your prize within two weeks. 

Here is a new layout I created using the new Out & About collection.  It has really inspired me to scrap some of my travel photos.  The colors are just so pretty, and I love all the different embellishments!  I focused on the Tickets paper here, and I decided to cut a lot of them out and scatter them around my background.  I used a few more patterned papers on top of some white cardstock and added lots of the Liquid Watercolors.


These tickets reminded me of stamps.  I used an edge distresser to tear up the edges a little to give them more texture and dimension.  Some of them are raised up off the page with some adhesive foam.  I also machine stitched through some of them with white and metallic gold thread.


I love tearing paper...the edges just look so cool, I think!  I love this rainbow striped paper.  I used a torn strip of it down towards the bottom to pull in all the colors from the tickets.  I went simple with my title here, and I mixed and matched some fonts.  I used the blue script alphas from the Joyful Day collection and painted them gold.  Isn't that little airplane puffy sticker so cute?


Layering creates such awesome dimension...these tickets where perfect for that!  Awww....look at my husband way over on the other aisle...haha.  He wanted the end, I wanted a window seat and to sit by my sister, so that's how we wound up sitting...haha!  As far as the background goes, I smudged a lot of white gesso down over the patterned paper.  It turned out really bright, and I didn't want that to overpower all those colorful tickets.  So I let it dry (almost) and then smudged more white gesso over it to soften it up.  I like how you ca see it through all the tickets.


I did add lots of colored thread to this page... my favorite!


I wanted to bring in a pop of navy blue down here at the bottom, so I did that with some thread.  I also created a cluster of embellishments to the left of my journaling.


Here's the cluster.  I used Out & About Stickers, Die Cuts, Puffy Stickers...everything is so cute!


And here are a few more close-ups to finish.


I hope this inspires you in some way...I really love this collection and how it beautifully showcases any travel photos you may have.  Be sure to check out my process video here for all the details!


More news...if you do any shopping at Pinkfresh Studio, you automatically get this fun die included in your purchase for FREE!


There will also be free/discounted shipping between April 5-7 on orders over $25.  You must use the code FREESHIP5THBDAY.   Shipping is FREE in the US and $5.50 for international orders.

The next person on the list is Caly Person.

Thanks so much for stopping by and hopping with us!  Have a great weekend!

Wednesday, April 3, 2019

Sunkissed Birthday / Hip Kit Club

Hello again!  Today I have a new layout to share for Hip Kit Club.  This is my third page using the 2019 March Hip Kits, and I used all the goodies to create a birthday themed project.  Even though this looks like a typical photo, it was taken on my daughter's birthday, so it counts!  I was first inspired by the beautiful Parasol paper from Crate Paper.  I fussy cut them out and decided to scatter them around the background.  I used thick white cardstock as my background, and I coated a lot of it with white gesso after gluing down the circles.  I pulled out the Color Kit and used some of the Lindy's Stamp Gang Sprays to add some blue and pink on the background.  I used some plastic packaging mostly.  I also pulled the Shimmerz Mustard Seed from an older Color Kit to add some yellow.


I wanted to mute the colors of the rainbows, so the gesso did that.  It lightened them up a little.  I added the ink sprays right over them.  I created a cluster in the lower right corner for the title area.  I sprayed one of the small doilies from the Color Kit with the Mustard Seed and used that as a base.  The background circles were a little busy to add the title to, so the yellow base helps them stand out and makes them easily readable.  I added a cute camera die cut from the Main Kit and a butterfly that I fussy cut from a Pocket Life card.  The gold scallops are actually the washi tape from the Embellishment Kit.  I stuck it to some white cardstock and smudged white gesso over it to dull the shine a bit and then cut it out.


I layered some Heidi Swapp paper, a few Pocket Life cards and a frame die cut under the photo to create some layers.  I also tucked in another sprayed doily, a ticket-shaped die cut and some fussy cut flowers.


More goodies tucked in under the photo...an exclusive floral puffy sticker, a Crate Paper sticker and another fussy cut butterfly.


Another butterfly :)  I added a bit of the pink spray ink on this one to add some shimmer.  I also decided to add some gold splatters, so I used the Shimmerz Miner Miner 49er from an older Color Kit.


Can you spot the disaster here?  Yes...I accidentally splattered pink ink right onto my photo.  I didn't even notice it until the next day.  I decided to just go with it and not reprint my photo.  Thank goodness it didn't get on her face...haha.  I added this big Heidi Swapp vellum circle on top of the photo to cover up something busy in the background.  The pool rails were a bit distracting, so problem solved by adding this!  (Which also got some unintentional splatters on it....)


More fun close-ups...


I made sure the BIRTHDAY Thickers were glued down, and then I smudged some white gesso over them to soften up the colors.  Then I machine stitched through them for some added texture and detail with gold thread.  I love how this cluster turned out.


One more!


I hope this gives you some fun ideas and inspiration to create something awesome with your March Hip Kits!  My tip of the day:  cover up your photos before shaking and splattering with spray ink...haha!  Lesson learned (again.....haha)

Here's my process video:


Thank you sooooo much for stopping by!


Tuesday, April 2, 2019

Favorite / Paige Evans DT

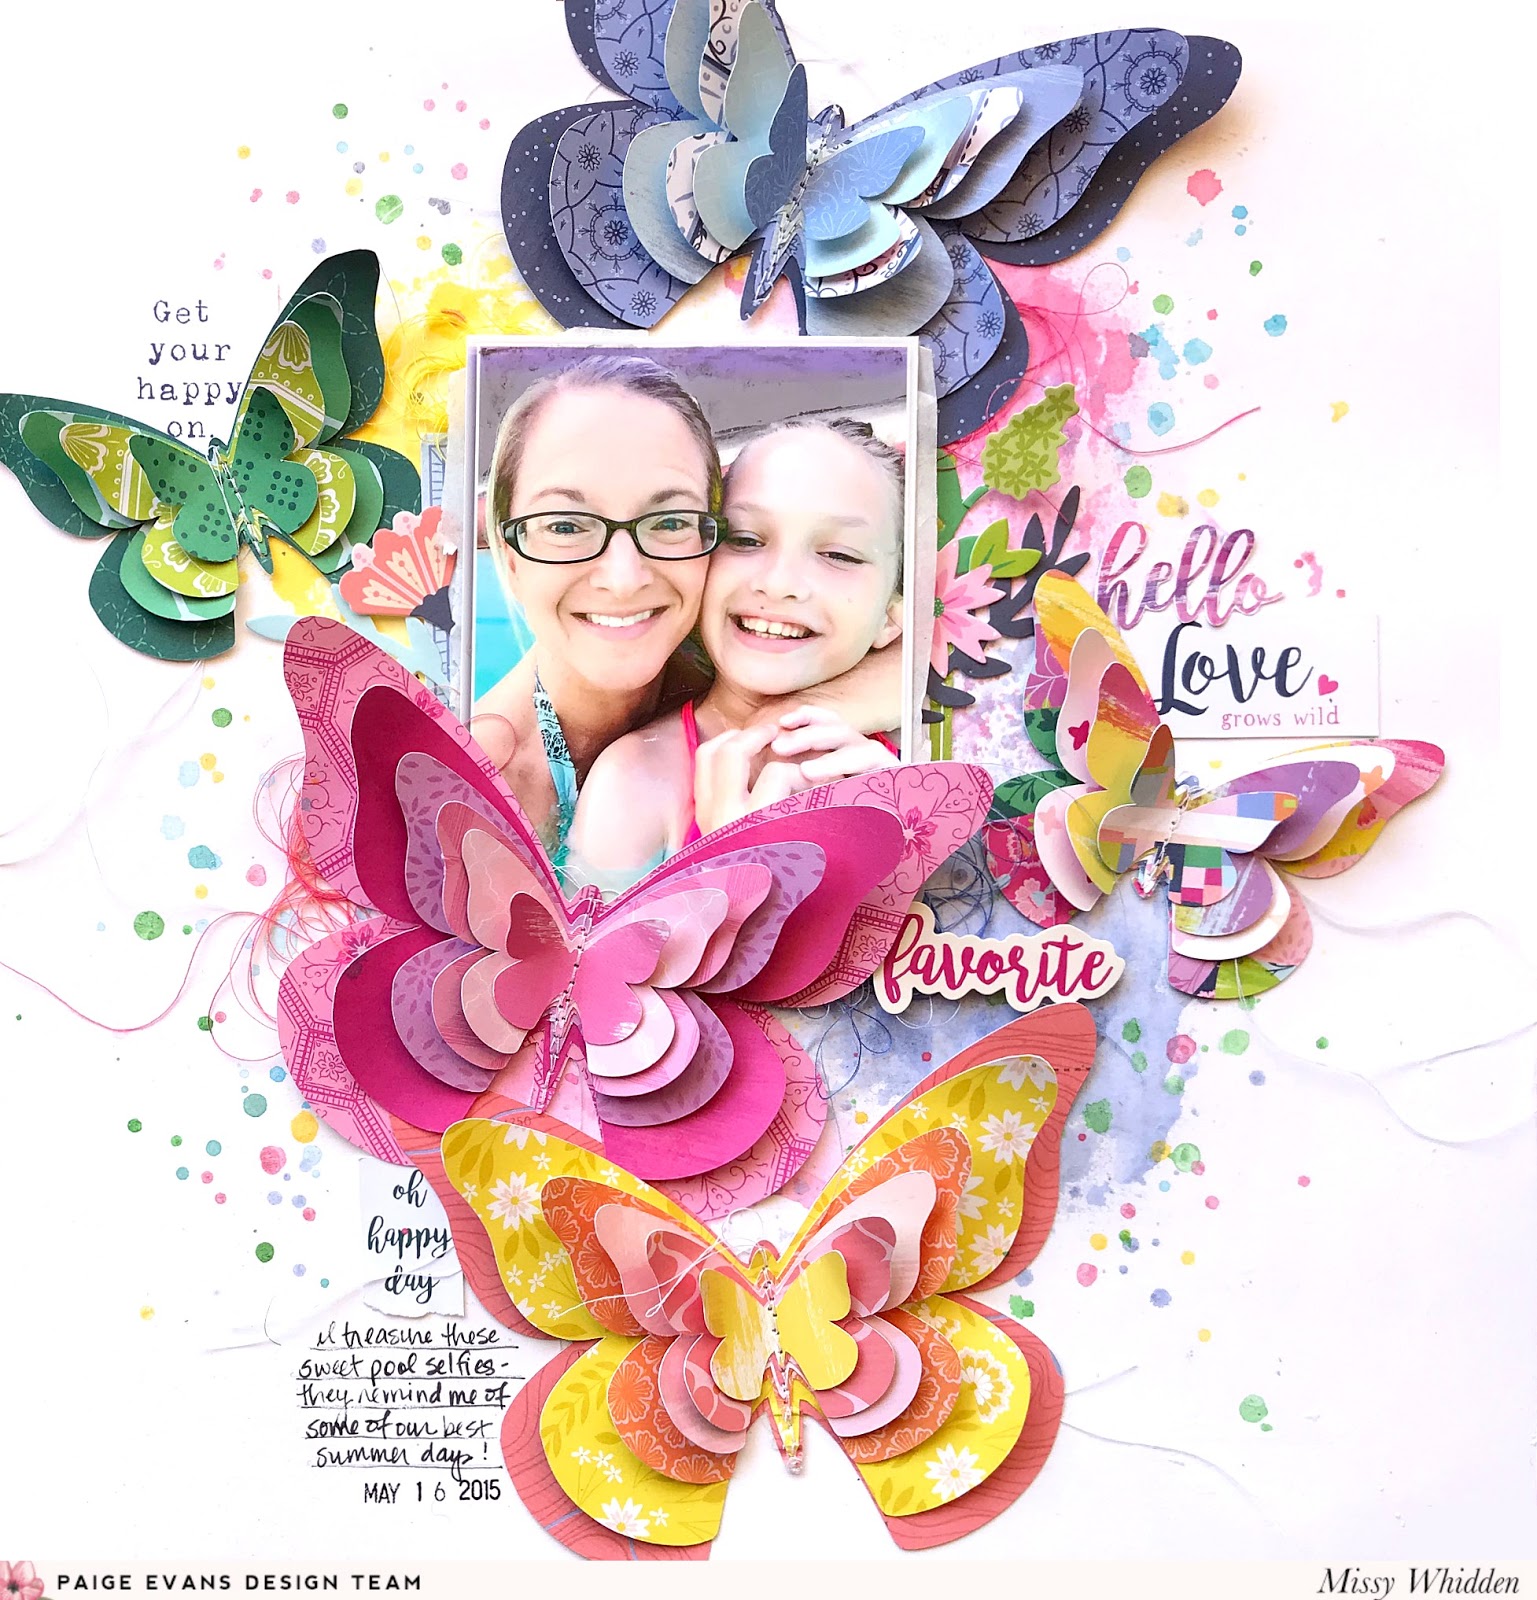
Hey, friends!  I'm back again today with a new layout for the Paige Evans Design Team using the Horizon collection and Paige’s new Layered Butterfly cut file. I can’t resist butterflies and this cut file makes some beautiful dimensional design elements! I used many patterned papers to create tone-on-tone butterflies. At first I just wanted three big ones using all pink, all blue, and all yellows/oranges. Once I cut them, assembled them, and placed them on my background, I decided to cut a few more in a smaller scale. I cut a green one and a multi-colored one using even more patterned papers. I machine stitched down the middle of them using white thread and then placed them around my photo.


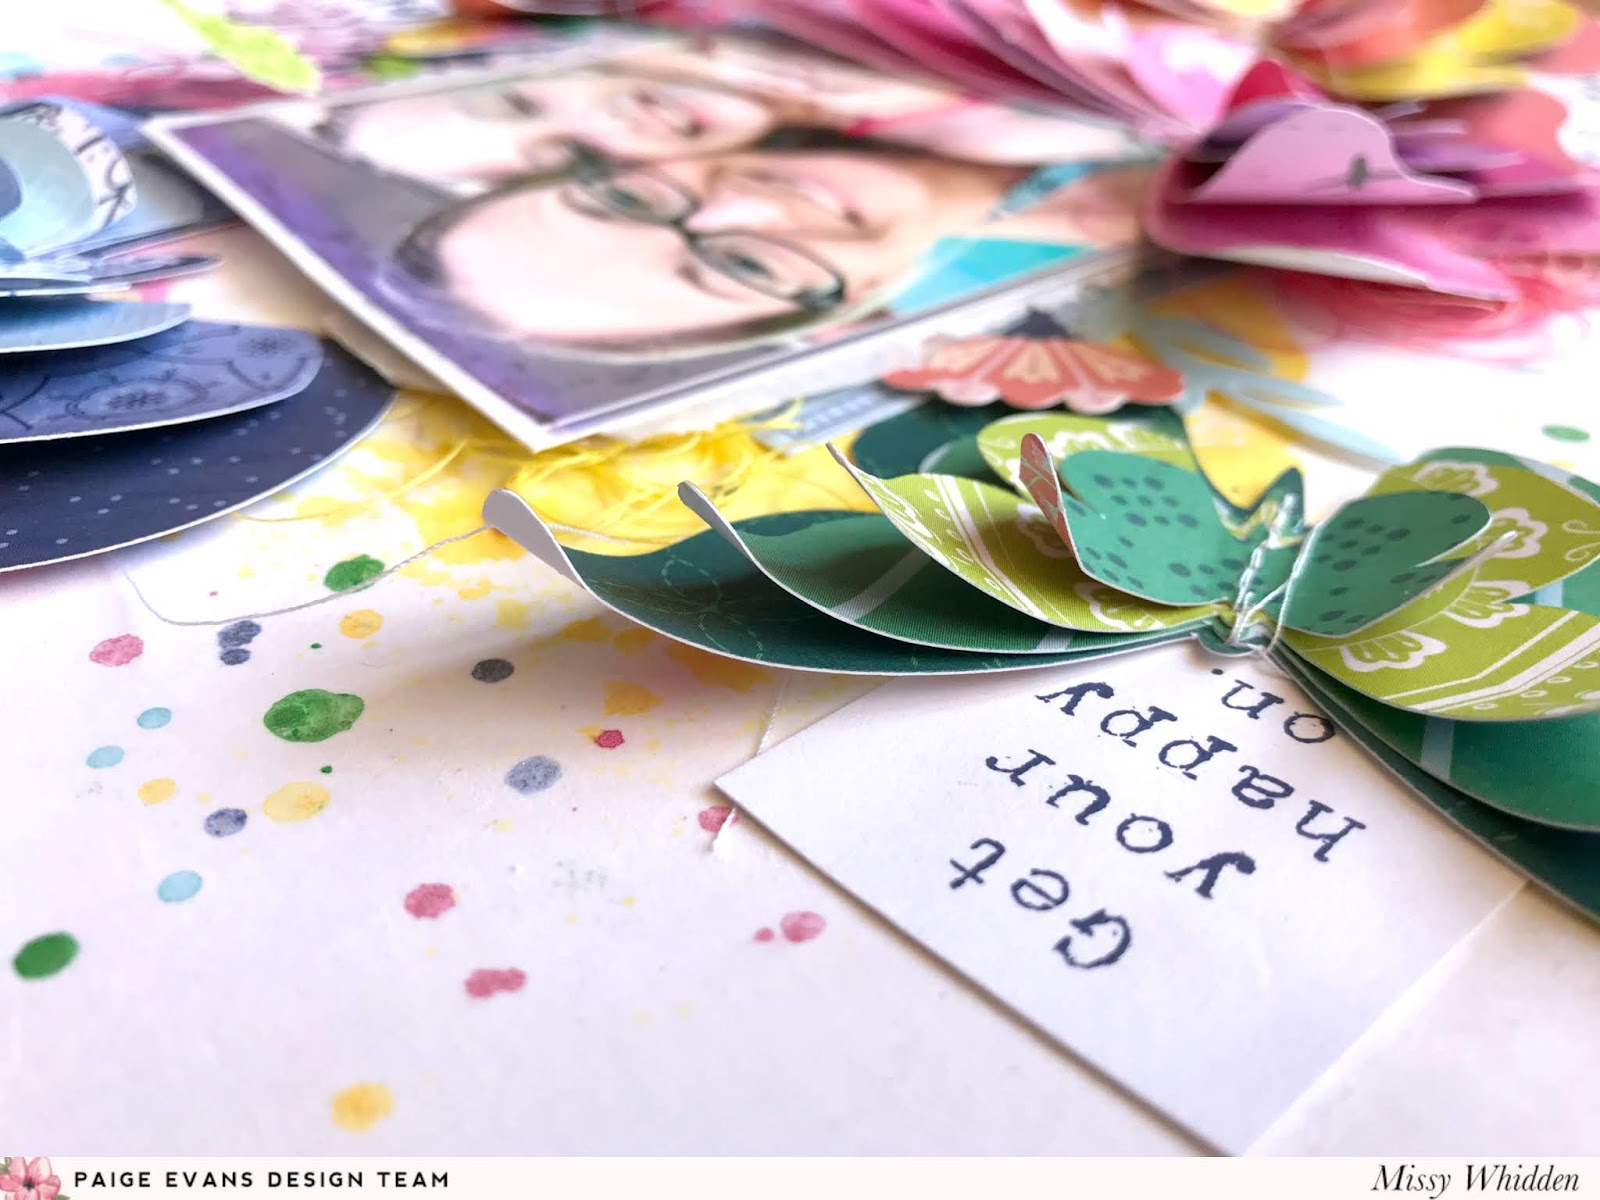
Here you can see how dimensional they are. The wings are easily curled up to give them a realistic look. I used thick white cardstock as my background and used clear gesso on it first. I used some coordinating colors of ink sprays to add some color splotches down. I used the packaging technique to spread the color around behind my photo. I also added lots of splatters. I didn’t want to go too crazy with embellishments since the butterflies took center stage. I used a few phrases from the 2x2 Paper Pads that I cut out and I went simple with the title using one of the Stickers. I also tucked in some tangled thread to add more pops of color and texture around the photo and butterflies.


I embellished a little bit around the sides of the photo. Here I used pieces from the Ephemera Die Cuts. I didn’t want to crowd up the white space and have it compete with the butterflies. I also fussy cut the “hello” from Paper 04.


These butterflies were very easy to create. It was fun going through all the patterned papers and deciding which ones to use. They definitely create a huge impact on the page and I love how easy it was to create dimension with them!


I get asked a lot about sewing through papers that I've used glue on.  I use the Scotch Tacky Glue, and it dries pretty fast.  Once it's dry, I have no problems sewing through it.  I would advise against using a tape runner where you want to stitch.  That will gum up the needle.  I love how these wings rise up off the page!  I added a bit of adhesive foam behind my title sticker and tucked in some tangled thread for more texture.


I also get asked a lot if I'm worried about this kind of dimensional layout going into a page protector.  Honestly, no, I'm not.  Everything gets smushed down anyway, so that is just part of it.  I can always pull it out and fluff up the wings if I want :)  Here you can see some of the die cuts I tucked under the side of the photo.


I loved pulling some sentiments from the 2x2 Paper Pads here for the background.  Remember, you don't have to use the papers "as is."  Feel free to trim them up or cut them up...make them work for your layout and space on the layout.


Paper 04 is just full of possible titles!  You just have to be patient for a few minutes and cut them out.  But it's worth it because they're so pretty!


Okie dokie...here are the last few close-ups.  You know I take a lot of them...haha!


I cannot stop going GAGA over these colors!  Bravo, Paige, on a stunning collection once more!


I hope this inspires you to give this Layered Butterfly cut file a try. It’s one of my new favorites! I couldn’t wait to make some pretty rainbow butterflies and the Horizon collection is just perfect for that. Be sure to check out my video for even more details!


Thanks so much for stopping by, and I'll see you again soon with more scrappy goodness!

Monday, April 1, 2019

NEW Shimmerz April Missy Whidden Color Kit + a Layout

Happy April, friends!  I'm so excited to share the Shimmerz Paints April Missy Whidden Kit with you!  It's so pretty, and I hope you'll love what we've put together!  Take a look:

The April Kit includes:

  • Vibez Jeni B Bleu
  • Creameez 1 Hot Mama
  • Inklingz Honey Do List
  • Shimmerz Bumbly Bee
  • Exclusive Paige Evans Butterfly Cut Fil
  • Six Exclusive Shimmerz Dotz


I was so excited to work with this kit, and here is what I made.  I first cut the cut file on white cardstock.  I wanted it to take up a lot of room on the background.  I used white as my background to really let all of the colors shine.  I only used the four colors from the Kit on this.

I used a few patterned papers from Heidi Swapp, Vicki Boutin and Paige Evans to back some of the butterflies.  I wanted to leave a lot of them open so the colors on the background would show through.  I first coated the background with clear gesso to prime it.  Once it dried, I used some plastic packaging to apply some of the color.  I spread all four colors around so they would show behind the cut file.


Since the cut file took up so much room and was rather busy, I went small and discreet with the title.  I fussy cut "today" from a Paige Evans Horizon paper and finished the title with some Pinkfresh Studio Puffy Alphas.  Here you can see one of the beautiful Dotz.  I decided to add a few more butterflies...I simply colored some of the butterfly shapes that came out of the cut file.


I wanted to raise the cut file up off the page, so I did add some adhesive foam behind it.  I love the dimension it creates!


I first planned on using a black & white photo, but I changed my mind and went for a pool picture.  I'm so glad I did because it matches perfectly.  There was a lot of open space on the left side, so I added a Dotz and more of the colored butterflies.  I also tucked in some matching tangled thread.


Here are some more photos of the beautiful colors.  Here you can see how the Honey Do List and Bumbly Bee really shine in the light.


The shimmer factor of some of the colors might be affected if you add a lot of water to them.  I did water down some of this Jeni B Bleu, and it did dull the sparkle just a bit.  But I was mainly going for the color here, so that was okay with me.


One last close-up of the colors, and another Dotz.


I hope this inspires you in some way!  This Kit is awesome and perfect for Spring.  It is on sale now, and you can get it HERE.

Be sure to check out my process video to see all the details of the Kit and my layout:


Thanks so much for stopping by, and have a great day!!