Monday, June 30, 2014

What Does The Fox Say? / My Mind's Eye

Hey there, friends :)  I hope you had a fabulous weekend.  Today, I'm sharing a layout I created for the My Mind's Eye blog on Friday.  I couldn't help but laugh when I first saw the Market Street Nob Hill collection...mostly because as soon as I saw the Chipboard Elements I saw the adorable fox.  I'm sure you've heard (over and over) the hilarious song "What Does The Fox Say?"  Well, there's a chipboard speech bubble that says that!

I have to say that the song was stuck in my head for a really long time.  My best friend and I spent many times goofing off to the song, and I knew I just had to record one of those crazy moments on a scrapbook page.  Call me cheesy, but these fun memories are the ones I want to remember.

I chose a crazy photo of us...no doubt making those insane noises from the Fox song.  I chose the Nob Hill Stripes paper as my background because of all the gorgeous colors.  I used gesso to fade out some of the brightness of the stripes so they wouldn't look so busy against the other papers.  Next, I used several colors of watercolors to paint rectangles.  I think it's fun to change things up like this...they almost serve as solid patterned papers or cardstock.  I built my layers on top of that, including a sheet of the song's lyrics.  Those crazy words you just can't explain, right?!


The chipboard pieces in this line are just gorgeous.  I love the really long script words, like this Awesome piece.  I layered it underneath the cute fox head.  Here you can see the green watercolor up close.  If you use some gesso over your patterned paper first, the watercolor really stands out.  I also used some of the label stickers, enamel dots and some of the Necessities metallic decorative tape.  That gold glitter is my favorite!


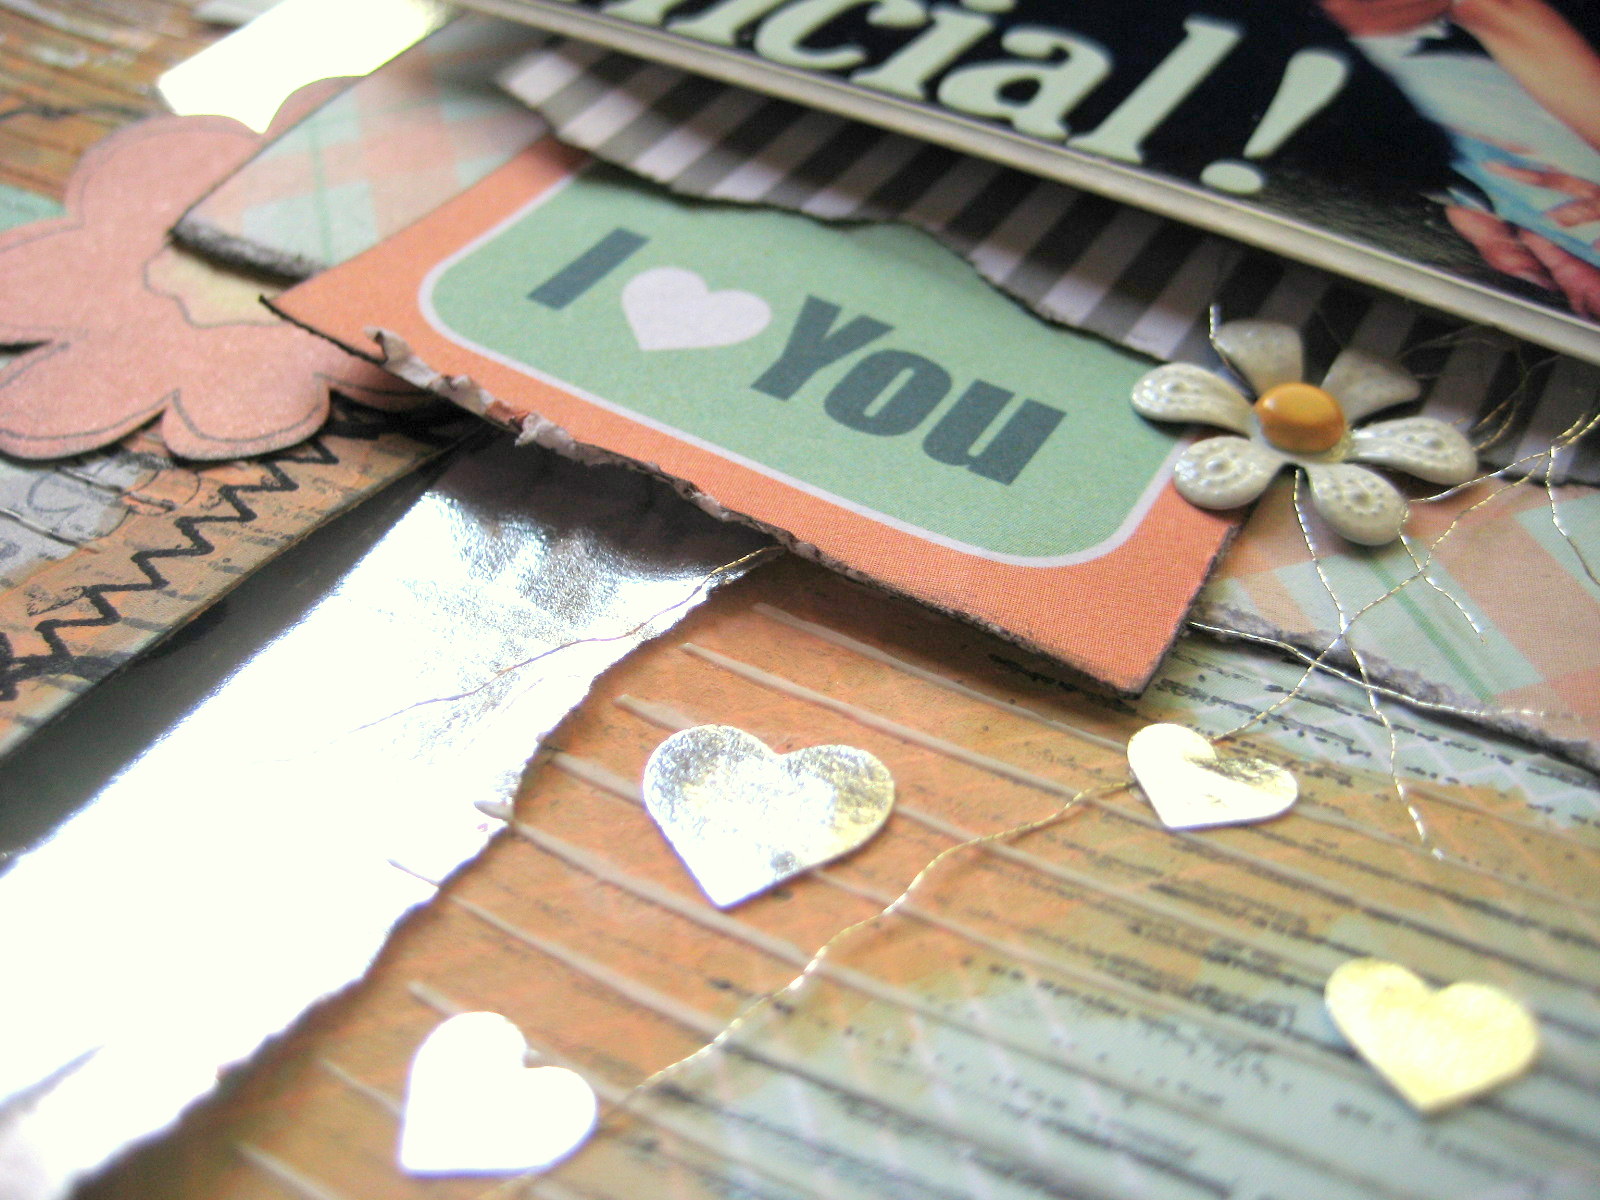
Gold chipboard hearts!  Oh my goodness...just so pretty.  I layered some of the Necessities alpha & word stickers on top of it with an enamel dot.  I love that they are ready-made words and separate letters so you can create your own words, like I did here.


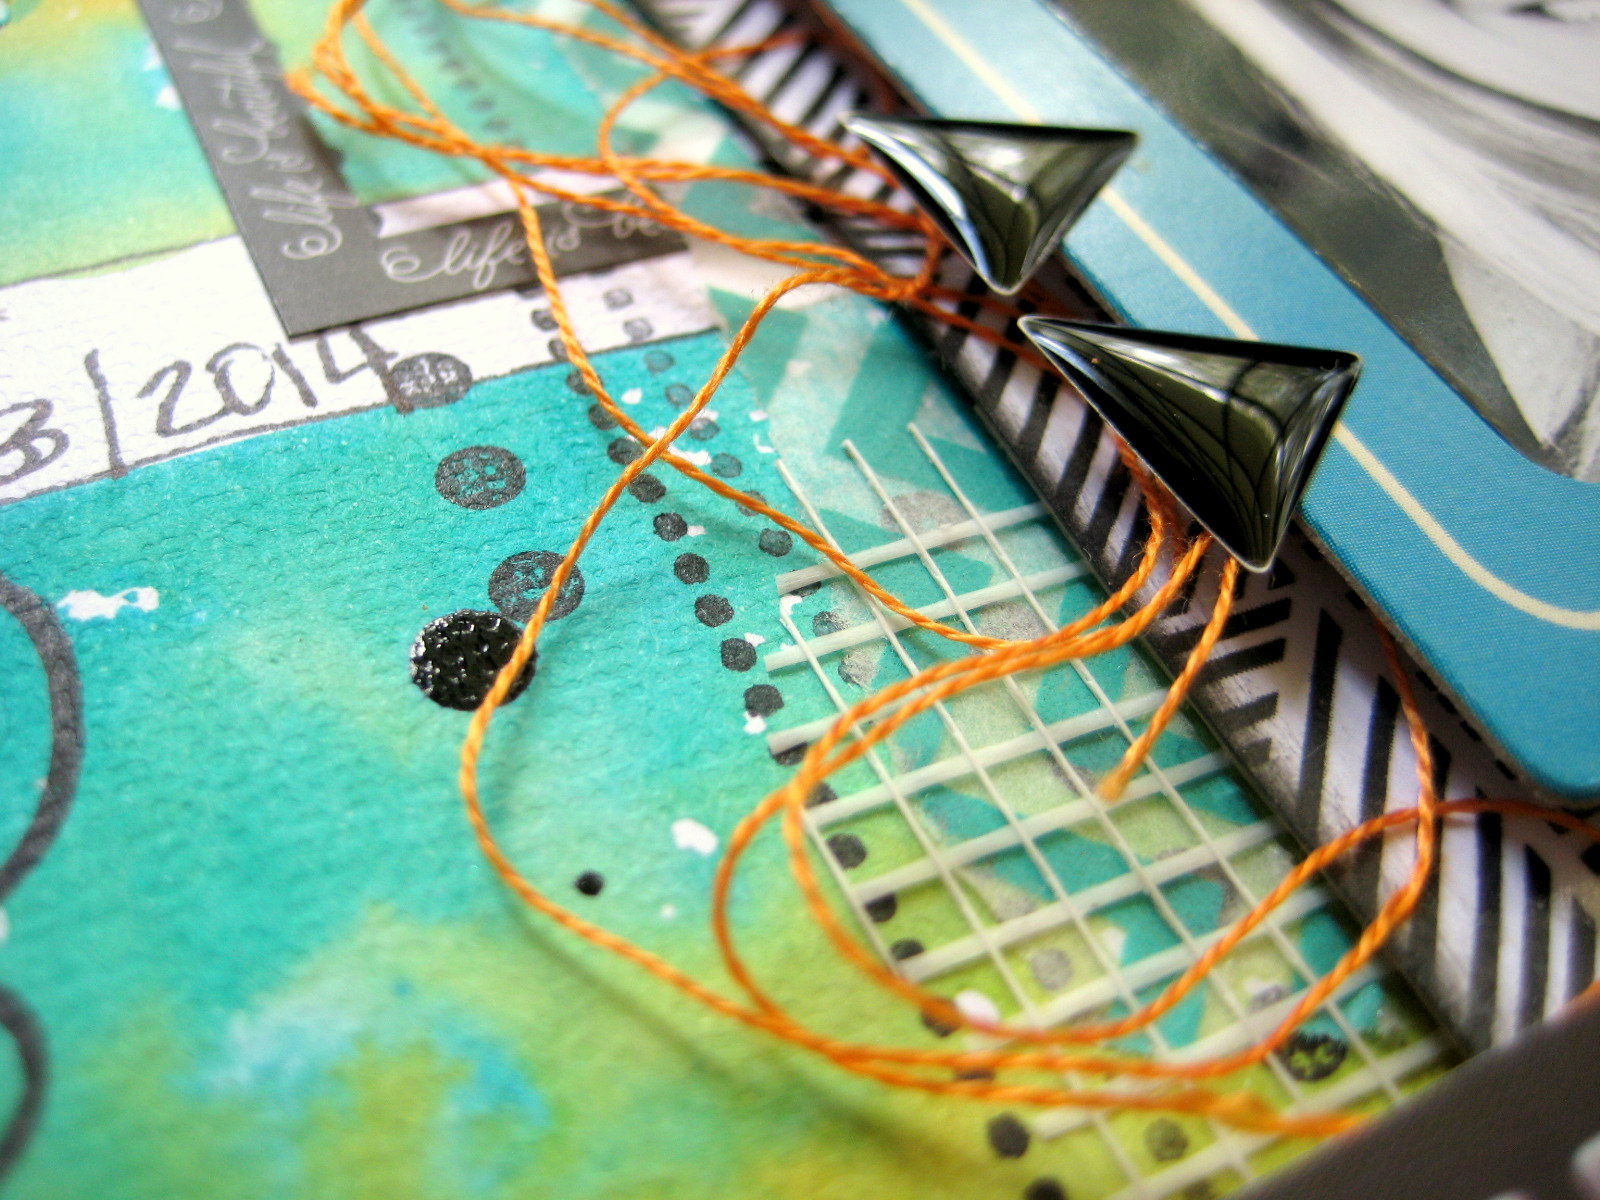
The decorative brads are also very beautiful in this collection.  There is something for everyone here...even floral patterns.  I threw in some shiny gold thread here for some extra shine against the patterned paper and watercolor layers.


I hope this inspires you to check out this stunning collection...it really is gorgeous.  And you can do so many things with it.

Thanks for stopping by today, and have a great week!

Sunday, June 29, 2014

Creative Scrappers Sketch #272

Happy Sunday, friends!  It's time for another awesome sketch from Creative Scrappers!  This one is definitely not your average sketch.  Check it out and see why...


NO PHOTOS!  I know!  I thought the same thing at first. But then I thought of this as a fun challenge and decided to create an artsy piece that I could hang or display in my scrap cave.  So I made a project that includes motivational and inspirational quotes.  And my title is the phrase that I have as my iPhone screen.....Just Breathe.  That's something I have to tell myself a lot in my daily life.  That inspired me to run with this layout :)

I pulled out some older My Mind's Eye goodies from the Find Your Wings & Fly collection.  This was the perfect project for that large scalloped chipboard piece.  I love the different phrases on it, and the colors are beautiful.  For the space behind the quotes, I used a template and some watercolors, a few torn strips of patterned paper, washi tape, stickers and some gesso to tone it all down.


For this bottom piece, I used a stencil, modeling paste, watercolors, stamps, washi tape and a black pen to outline.  I was really just going for a messy random look.  I really had no plan...I just grabbed my goodies and started making a background.  This is how it wound up.

This huge chipboard flower is from a pack that I have had for YEARS.  I honestly don't even remember where I got it.  I colored it with watercolors and then outlined it.


Here you can see the texture from the paste and the fun stamping.  I love the black against all those soft colors.


I found these awesome quotes on Pinterest and just printed them on my computer.


I hope you take on this challenge and make a fun layout / project with NO pictures.  Don't let it scare you...use the opportunity to get creative and really have fun!  There are no rules...just make something beautiful :)

Be sure to check out what the other Design Team Members created...I know you'll get some great ideas!  Our sponsor this month is the awesome Paper Camellia!  Make sure you upload your layout for a chance to win a prize pack!

Thanks for stopping by today :)

Thursday, June 26, 2014

It's Official! / Chickaniddy Crafts

Hello there!  I hope your week has been a great one :)  Today I'm sharing a layout I created for Chickaniddy Crafts earlier this week focusing on two things:  Weddings and Shiny Silver Foil Paper!  I was excited to get to create a wedding layout this month.  My husband and I were married in 2000, and I hadn't started scrapbooking yet.  It was fun to dig into my wedding photos and pull out this fun one of us about to drive away in the limo after our reception :)

I used mostly goodies from the Date Night collection.  I think my favorite parts are the shiny silver foil and that cute diamond ring sticker!  I love creating layers and textures on my pages, so I did some stamping, watercolors and modeling paste to jazz up my background a bit.  I used some of the awesome silver foil paper as part of my layers and for all the little hearts flying around.  The foil paper punches like a dream and cuts in a die-cut machine perfectly.


Here you can really see the shine from the foil.  I love the pops of brightness it gives throughout the layout.


I think these butterfly stickers added the perfect touch to this part of the page...they make me think of flying free, and that's what my "new" husband and I were about to do after getting married :)


There's that adorable diamond ring...perfect for a wedding layout :)  You can also see more of the modeling paste and stamping here as well as the layering.


I hope this inspires you to dig out some older photos and scrap them.  Our wedding photos weren't digital, so I actually just took a photo of the actual photo and edited it.  I like that it doesn't look perfect.  But the memory WAS perfect, and that's what counts.

I also hope this inspires you to give the shiny foil paper a chance.  I promise you will LOVE it!

Thanks for stopping by today!

Supplies Used: Date Night: DN140S01 Awesome Blossom, DN140S02 Dance School, CN14SP002 12x12 Silver Foil Paper, DN140S12 Plaid is Rad, DN140S05 Cutest Couple, DN14EB01 Alpha Stickers, DN14EB04 Mini Sticker Tags, DN14EB02 Sticker Sheet, DN14EB06 Brads; Other: Martha Stewart Hearts Punch, Silver Thread, Hampton Art Stamp, StazOn Ink, Golden Modeling Paste, Crafter's Workshop Template, Stampendous Ink, My Mind's Eye Stamps, Black Sharpie Pen, Recollections Stamps.


Tuesday, June 24, 2014

Love Her Smile / The Cut Shoppe

Hello there, friends!  Today I'm sharing a layout that I made just for me...no design teams or deadlines.  I haven't made a page just for fun in soooo long!  It felt good to just play and do whatever inspired me.  I was definitely inspired by a fun cut file over at The Cut Shoppe.  My dear friend Ashley Horton has her own Etsy store now with a lot of really cute and original cut files.  I saw this one, "The X File" cut and had to have it.

I cut the file onto white cardstock first off.  I have been wanting to dive into the Basic Grey Highline collection for weeks....it has been calling my name!  (I got it at the My Scraps Store).  So I took my cut file and used watercolors and gelatos to created a multi-colored look to match the colors in the collection.  Then, I decided to use the cut file in an off-centered way, so I made it crooked and ran it off the page.  Then I layered papers behind my photos and added embellishments.


I went over the cut file with a black pen just to give it some interest.  I just love these fun wooden chalkboard pieces in the BG collection!  I created my title on this piece and popped it up so I could layer things under it.


I'm so in love with these bright colors!  And they pop so well off the black background.  This cut file is so much fun!


More layers...and an actual piece of ribbon!  I have so much of it in my stash, so I pulled some out and used it.  I really need to incorporate it more into my projects.


Here's a look at the cut file.  What I love about these designs is once you open them into your Silhouette software, you can shrink them or enlarge them.  Customize to what you want!  You should go check out The Cut Shoppe HERE!  You can also visit the blog HERE.


Thanks for stopping by today!

Monday, June 23, 2014

Wedding Layout / Chickaniddy Crafts

Happy Monday, friends!  Just wanted to pop into blog land today to let you know I have a new layout up on the Chickaniddy Crafts blog.  We focused on weddings and foil this month, so I scrapped a photo of my husband and me after our wedding back in 2000.  Here's a little teaser of the page.

You can see the full layout HERE.


Thanks for stopping by today!  Have a wonderful week :)

Friday, June 20, 2014

My Scraps Sketch #85

Hey there!  If you're looking for a fun sketch to play with this weekend, then look no further :)  My Scraps Sketch Blog has another one up today, and it's a great one!  Check it out:


I flipped it on its side.  I used some of the lovely Daydreamer collection from American Crafts.  I just ooh and aahh over it every time I pull it out...it's just so pretty!  This is a picture from few years ago of Reese and one of her favorite therapists.  I had to document her on a layout since she was very special to us :)  I used a circle template and some gelatos to create some subtle circles on my background sheet.  I inked heavily around the edges with black ink and added stamping, doodling and washi tape.  I like the contrast of the black against the soft pinks, yellows and aqua.  I think this layout turned out sort of soft and feminine, yet grungy at the same time.  Sometimes I have no idea where a layout will take me...I just go with what feels right at the time.


Lots of layers here...paper, stickers, thread and a button.


I used drywall tape to cover this chipboard arrow, and then I went over it with gesso and a blue gelato.  Pretty cool effect!  I love layering chipboard, too.


The white gelato left a ring around the circles when I traced through the stencil, but I kind of like how it looks.  I added in a bit of blue for a shadow effect.


Okay, so these rub-ons don't "rub on" that well.  Lots of places refused to transfer on to my paper.  So I sort of had to color her in the rest of the way.  That's my only complaint about this collection...the rest is completely fabulous!


Head on over the Sketch Blog HERE to see the rest of the team's layouts and to upload yours!   You could win a huge Simple Stories prize pack!

Have a great weekend!

Wednesday, June 18, 2014

Pocket Cards on a Layout...

Hey there, friends!  Today I'm sharing a fun and easy page I created for My Scraps and More.  The big Summer-long Got Talent Contest is in full swing, and I created this one for a "create a grid" challenge last week.  I have tons of these Project Life/Pocket Cards from several collections, and they make it really easy to create a grid.

I pulled out some of the Record It Just Splendid cards from my My Mind's Eye collection and went to work.  I picked out the ones I liked and that matched my photos and laid them out.  I don't have a sewing machine, so I used a border stamp that looks like stitching.  I used lots of embellishments around the photos, and I made my very first pinwheel.  I really like how it turned out :)


I adhered my cut file title to transparency paper to make it easier to adhere to the layout.  I also used some stickers, brads and drywall tape to add some interest around the picture cluster.


I threw in some paint and stamping, as well...


I know these were all the rage several months ago, but I just never got around to trying it.  Turns out, it's really easy...haha!  Love the summer feel of it.


Messy thread to add more color and texture...so easy to do :)


This drywall tape is amazing!  It's easy to cut and tear, and it holds color well.  You could even use it as a mask....that's next on my list :)


You are more than welcome to come jump in at any time during the Summer if you'd like to play along with us!  There are weekly challenges as well as a big one at the end.  Come check it all out HERE!

Thanks for stopping by, and have a great day!

Sunday, June 15, 2014

Creative Scrappers #271

Happy Sunday and Happy Father's Day!  It's time for yet another awesome sketch reveal over at Creative Scrappers!  I just love how much these sketches inspire me.  They always challenge me to think differently and step outside of my comfort zone.  I always wind up creating something that I normally wouldn't, and I always love the results.

Check out the sketch:


Here's what I came up with.  I finally broke into my new Heidi Swapp Favorite Things collection, and boy is it gorgeous and colorful!  I challenged myself to use this very busy chevron patterned paper as my background.  Sometimes that's hard to do because it drowns out the photo and things tend to blend in and get lost, and it just winds up being too busy.  What I like to do is use gesso and paint to create a softer edge around my photo cluster.  It helps to separate the busy pattern from the other papers and creates sort of a border.  I think it also helps that the photo is black and white, so there aren't any random colors competing against the background.


 I used some of the Color Magic embellishments...they are SO much fun to color!  I layered this arrow on top of this heart and used pop dots to raise it up.  I added some thread under it.  That's some orange paint and gelato under the paper there, on top of some gesso.


I love all the fun stickers in this collection.  I added a few of my own from my stash, as well as some stamps and washi tape.


This took me a while.  I love the look of hand stitching, and I wanted to throw in more orange on the page.  So I added these messy circles and stitched over each one.


To win a prize from our June sponsor Noel Mignon, enter the challenges and upload your layouts using the inlinkz widget for Sketches 269-271.  You can do this HERE on the Creative Scrappers blog.

Deadline to submit your layouts is June 30 at Midnight ADT.

Thanks so much for stopping by today, and have a great day!

Friday, June 13, 2014

Me at 38 / Mixed Media Layout

Happy Friday, everyone!  Today, I'm sharing a recent layout I created for our Got Talent contest going on over on the My Scraps and More boards.  The challenge was two parts:  1--Create a mixed media background, and 2--use a photo of yourself and journal about current likes and/or dislikes.

Although this layout looks complicated, it was pretty easy to put together.  I discovered a wonderful scrapper on YouTube (Sanna Lippert) who does really pretty mixed media projects.  I did a technique I saw her do...use your distress inks on your clear acrylic blocks to create a watercolor stamp look.  You just take a few colors of your distress ink pads and blot them onto your clear block.  Then you spray it lightly with water, and then just use the block as a stamp.  You get this awesome effect!  I used an orange color and two different blues.  

Once I did that, I used some modeling paste over a stencil, added lots of stamps and washi tape, and I even added some drywall tape.  I used bits and pieces from the Echo Park Capture Life (black and white) collection.  That frame is from Crate Paper.  Some of my stickers are from various Recollections lines from Michaels.

I just love starting with white cardstock and creating a unique and fun design.  You could do this with paints or even gelatos.  It was really fun!


Here you can really see the ink and paste up close.  Look at all the texture!  I just love it!  That white checkered "stuff" on the right is drywall tape from Home Depot.  You MUST get some...it's awesome!  You can also stick it chipboard and paint it....I even used some gelatos on some the other day.


Thread is another fun and easy (and cheap) way to add color and texture.  I like to buy the thread from Michaels...it's really floss, but I like to pull it apart and create a tangle or a circle.


These enamel dots are from My Mind's Eye.  I just love the orange and blues together...what a beautiful contrast.  And the black really pops up against it.


A close up look at some of the stamping...and a sequin.


Washi tape and thread...one of my favorite combos :)


I hope you'll come join us in our Got Talent challenges this summer...we're going until August. We have a big challenge every Monday followed by a mini challenge on Thursdays.  And there are MORE challenges in between!  Great prizes to be won and lots of fun to be had, so come play with us!

Thanks for stopping by, and I hope you're now inspired to try a mixed media project :)

Have a great weekend!

Wednesday, June 11, 2014

1st Place / My Scraps & More

Happy Wednesday!  I wanted to share a fun layout with you today that I created for My Scraps and More a few weeks ago.  It was for a Tuesday Trigger challenge.  Our theme for May was GROWTH, and this challenge was to use one shape, from small to large, and repeat it over and over on your page.  I created a lot of circles in various sizes and layered them behind my photos.  I used mostly the 6x6 paper pad from the Maggie Holmes Styleboard collection from Crate Paper.  I added some gelatos and watercolor to my background from some extra pops of color.

I was actually inspired by that cute little "Perfect" ribbon in the right hand corner.  There are always those chipboard pieces or stickers that never seem to fit any of my layouts.  I see them and think, "I'll never use that...I have nothing that goes with it" or "I have no photos to coordinate with that."  Well, I thought that about this piece and the other ribbon at the bottom that says "First Prize."  I decided to create my own "competition" to make these pieces work....and this layout was born.

Clearly, these are just photos of my girls in their beds (and crib!).  However, once I looked at them, I realized they were playing, looking at books and just being silly when they should've been sleepy and going to bed.  An idea was born!  1st Place in Bedtime Stalling Techniques!  Perfect title, and a perfect way to use those ribbons :)


I've been so into using threads and fibers on my pages these days.  I like that it gives a messy feel to even a nice and neat layout.


I love the mix of patterns and colors in this collection...and these beiges and browns are so pretty to me.  I'm a sucker for mixing all of the rainbow colors together, even if they are muted and soft.  The browns contrast so nicely.


I pulled out some really old white stickers for my title...I believe they were $2 at Hobby Lobby.  I paired them with these awesome burlap Thickers.  I gessoed behind them and all around my photos.  I love the way it fades some of the color away.  To me, it helps the colors pop more.


I hope this encourages you to look through all those little embellishment pieces that you think aren't "you" and come up with a way to make them work.  I have so many more that I need to do this with.  I think I have so many mustaches that are just lying around...I'm going to challenge myself to figure out a way to use them next :)

Thanks for stopping by!

Tuesday, June 10, 2014

Tickle Monster / My Mind's Eye Enamel Shapes

Hey there!  I wanted to share a layout I created for My Mind's Eye this month.  I'm up on the blog HERE today :)

I just love all the different Enamel Shapes that come with all the My Mind’s Eye collections nowadays! For my layout today, I dug into the new Necessities collections. I used lots of the Teals and Blues, which look really great together. I decided to create a mixed media page and really focus on those fun Enamel Shapes. I started out with plain white cardstock and covered it with gesso. Next, I pulled out my watercolors and created a pretty multi-colored wash for my background. I sorted through the Teal and Blue 6x6 Paper Pads and picked various shades and patterns to create some layering behind my photos. I knew I wanted to center my cluster and then use embellishments all around it. You can see lots of the Enamel Shapes scattered everywhere, along with the cute Word & Alpha Stickers.


These hearts are my favorite! And the colors are just amazing. They can be used just about anywhere on a layout or card…I used them by my photos on these little die-cut frames I made using my Cameo.


These arrows are versatile, too. I wanted them to point towards the photos. You could use them in a totally different way and create a different shape with them. The possibilities are endless!


Here’s a different arrow. It works great here on top of my layers. I really had to stop myself from using every single shape on the sheet! They are addictive and so fun to add to your layout. Oh, and how about that royal blue glitter decorative tape! I’m resisting the urge to just stick this stuff everywhere…it’s so nice and thick and very sturdy…and just look at the sparkle! Swooning over here!


Here’s a close up of my watercolor effect, more enamel shapes and a shot of the gorgeous metallic paper! It shines so nicely, and the color is just gorgeous.


One last shot of the upper cluster…a few brads and stamping and more enamel arrows. More glitter and metallic tapes…I just can’t get enough of it all!


I hope this inspires you to try some of these new Necessities collections...they also come in wood grain, gold, red and black!  Sooooo many possibilities with them all :)

Thanks for stopping by!  Have a great day :)