Friday, April 29, 2016

Life is Better When You're Laughing / Simple Stories

Well hello there, Friday!  I've been waiting for you!  Before the weekend gets started, I wanted to share my second monthly layout for Simple Stories.  I used the Life in Color collection, and I had lots of fun with my Silhouette Cameo.  I found this awesome quote on Pinterest, and I found a fun font for it.  I enlarged it to fill most of the paper and then tilted it diagonally.

I backed the open letters with lots of different patterned papers and then went over most of the paper with white gesso.  I wanted to blend out some of the yellow and white stripes so they didn't compete or overpower the letters.  Plus I wanted to prime the paper for the watercolors.  I love how the gesso fades away patterns.  I applied it mostly in the center so you can still see plenty of the yellow stripes around the perimeter of the page.


I really love this backing technique.  It allows you to use lots of color and patterns in small doses.  I wound up using a black pen to outline each letter to make them stand out a little more.  I used my Shimmerz watercolors to create this, and I used my water brush mostly.  I also used some of the clear stickers, and I did some machine stitching.  I combined some chipboard pieces and some die cut florals as well.


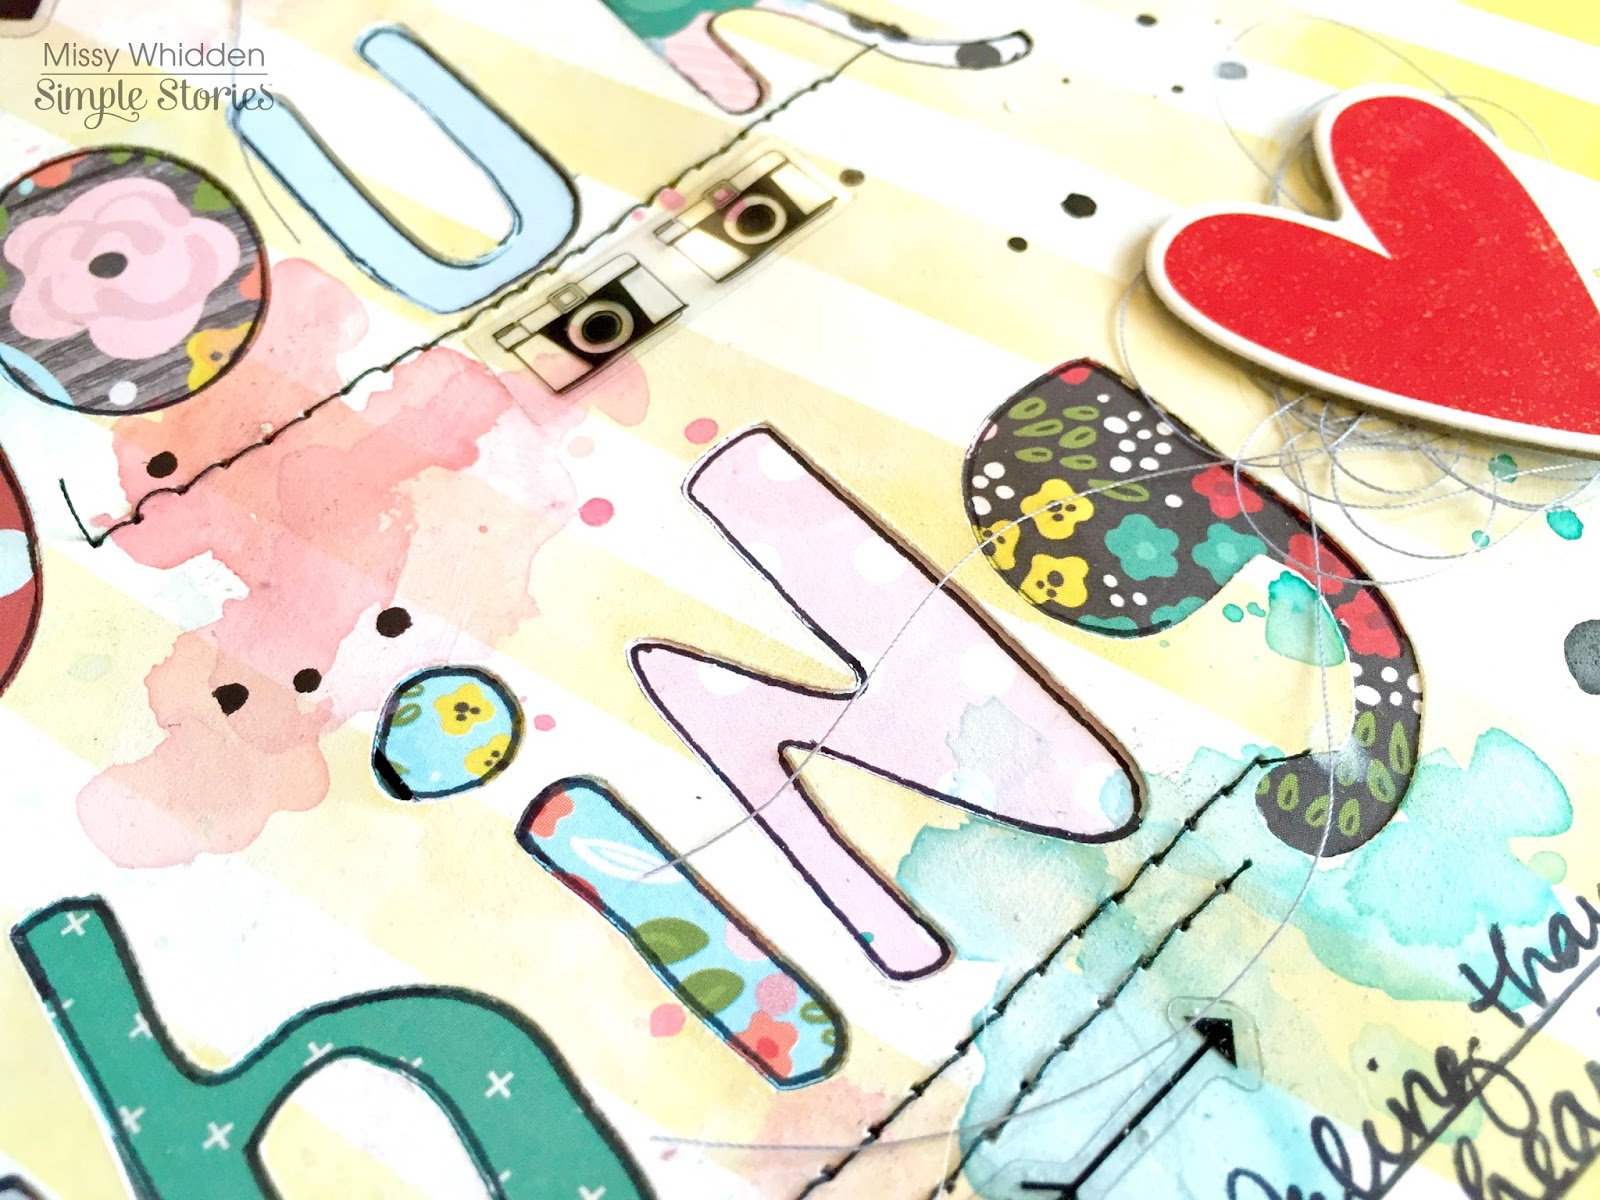
Here's another angle of the page.  I love these fun and bold colors mixed with pops of black.  I wanted to show how you can make these colors stand out with a light background.  I love how this red heart contrasts with the yellow.


I used a few papers behind my photo as well as some tissue paper from my stash.  I added a few stickers and some grey tangled thread.


Here's one final close up...I used a few more clear stickers, chipboard and die cut stickers.  I love those brush stroke stickers...so fun!


Thanks so much for stopping in...have an awesome Friday!


Thursday, April 28, 2016

Dream XOXO / Hip Kit Club

Hello again!  I'm back today with a layout for Hip Kit Club.  I created this with the 2016 April Hip Kits.  The kits are gorgeous, as always, but I have to say that this was not one of my most favorite layouts.  But now that I've had some distance from it, I think I like it a little bit more.  For some reason, I just had a lot of trouble putting it together.  I don't know if it was the color scheme or what, but I just struggled.  I love the products.  I love the photos.  I just wasn't feeling the "mojo" while I was creating it.  Does that make sense?

Obviously I did a lot of mixed media work on it.  I used Ashley Horton's geometric heart cut file, and I backed it with lots of the patterned papers and even a Project Life card.  I tried to stay with the blues and corals color scheme to play on the Shimelle Starshine look.  I used white gesso on the heart once all the spots were filled, and then I used some blue gelatos to create that pretty blue watercolor.  I created a strip of photos, and I used one of the Shimelle stickers in place of a fourth photo.


I used the "dream" sticker for my title.  I used some paint to color the Simple Stories XOXO wood veneer.  I added a strip of the think Amy Tan washi tape here, and I fussy cut that camera from a PL card.  I added some of the Shimelle floral stickers under it to give it some contrast.


To make my photos stand out against that busy background, I anchored them on some of the mint cardstock.  It gives them a solid base and separates them from the background patterns.  I also stitched around the border of the big heart.


Here you can see the watercolor up close.  I also added dark blue tangled thread under the heart for added texture and interest.


I love this cute wood veneer paper clip!  It works like a real one, and so I added it to my photo strip.  I also added more of those pretty Shimelle floral stickers to my photos.


Here's the process video if you'd like to see how I struggled my way through making this!  They can't all be your favorite pages...but the process should always be fun!  Sometimes we forget that.  I hope you enjoy watching!


Thanks for visiting me today, and have a great Thursday!


Wednesday, April 27, 2016

Love You / Citrus Twist Kits

Hey there again...it's me!  I have another layout for Citrus Twist Kits to share today.  I used the April Main "Santorini" Kit for this, and a few pieces from the Embellishment Add-On.  I decided to use that beautiful Pinkfresh Studio bird and branches paper in a different way for this page.  I took some time and fussy cut some of the branches and leaves.  I used watercolors to give the leaves and flowers some color.  I knew my photo would look great right in the center, and I love how the birds are in the perfect spots!

I used the packaging technique and some blue watercolors to create the "sky" on the background.  I just love how this turned out!


I used my Shimmerz watercolors and my water brush to color the leaves and flowers.  Those cute yellow acrylic stars are exclusives this month.


Here I combined the Pinkfresh yellow puffy alphas with the Basic Grey alphas.  I used the watercolors & gelatos to color them.  I added one of the Pinkfresh puffy stickers and then used pink ink to stamp "This I Know."  I love the exclusive stamps each month!


Here's another look at the fussy cutting and watercoloring.  I used a few of the patterned papers as  layers behind my photo, and that pink heart is part of the Basic Grey alpha set.


I used one of the exclusive cut apart labels for my date.  I love how it looks like she has a flower in her hair!  I didn't even plan that...it just happened :)


Thanks for stopping in today...I hope you have a great day!  Be sure to check out all the awesome kits over at Citrus Twist!

Tuesday, April 26, 2016

Hey Cuteness / Shimmerz Education Team

Hey there!  I have a new layout for Shimmerz to share today.  I created a fun and bright layout featuring lots of washi tape and Shimmerz goodness.  My color scheme was inspired by the package of washi tape I used to create this page.  It's a pack from Michael's, and they are all rolls of beautiful & bright watercolor tape.  I pulled out several Shimmerz products that matched the tapes.

I've created a few layouts like this before, but not with washi tape.  I took a spare piece of white cardstock and covered it with strips of the washi.  I covered most of it with a light coat of white gesso and then started adding Shimmerz.  I added some Vibez, Coloringz and Shimmerz Paint.  After it dried, I punched several sized circles out and placed them around my background.  I decided where I wanted my photo and then I had my design ready to go.

I used clear gesso on my background cardstock and then used a small circle stencil with the Mari-Gold Digger Texturez.  I love the pretty orange color, and it was the perfect shade that matched the orange in the washi tapes.


Here you can see the washi tapes and the Shimmerz on top of them.  I used the packaging technique with some Pretty in Pink Coloringz here.  The smaller orange circles were made by smoothing some of the Texturez onto scrap cardstock and punching them out with a 1-inch punch.  I also machine stitched with gold thread through all the washi circles.


I love the texture from the Texturez!  It's very gritty and looks so dimensional on the paper.  To contrast that, I added some green thread.


More beautiful colors!  I added a few Amy Tangerine clear stickers on the layout, including this teal flower and the cute cameras.  That gorgeous blue is Vibez in Jeni B Bleu.


Here's one ore close-up.  I added some splatters of Vibez Sunset Strip. I also added a few flair buttons, and my title is a few glittery green Thickers mixed with a Heidi Swapp puffy sticker.


You can check out my process video to see how I put this layout together from start to finish...it was super fun to create!


Thanks so much for stopping by, and have a great week!


Products Used:
Coloringz -- Pretty in Pink, Don't Citron Me
Vibez -- Jeni B Bleu, Sunset Strip
Texturez -- Mari-Gold Digger
Shimmerz -- Royal Red, Magenta


Monday, April 25, 2016

Smile / My Mind's Eye

Happy Monday, friends!  I hope you had a great and restful weekend :)  Today I'm sharing my latest layout for My Mind's Eye.  I used the On Trend 2 collection.  I wanted to create a rather simple layout, so I started with some Snowbound Canvas Cardstock and did a little bit of mixed media work.  I've had this really neat scribbly circle cut file in my Silhouette library for a while, and so I decided to cut it on that beautiful triangle paper.

I used some of my Shimmerz watercolor products to create the background.  I wanted to pull the pretty light pinks from the paper and make the blue from the photo really stand out.  I layered a few Journal Cards behind the photo as well as that cute flamingo die & striped tag.


I think these pinks, corals and light minty teals are so pretty together.  I fussy cut these pretty flowers from patterned paper and layered them up.  I couldn't resist adding gold thread since almost everything has touches of gold on it!  That chipboard heart is my favorite!  I also layered a few sticker labels under the title.


I love these labels.  I added a strip of patterned paper here to bring in a few more pops of color, and that cute brad finished it off.


I did go over the big cut file with some white gesso just to make it look a little faded. It also allowed the watercolors to blend on top of it.  I love how the flamingo looks like he's looking at the photo :)


One more close up here...the mixed media work.  I love how you can still see the pattern on the paper through the watercolor.  I love what gesso can do!  If you keep adding layers of it, you can block out the pattern if that's what you're going for.


Thanks so much for stopping by, and have a great day!

Saturday, April 23, 2016

Live Colorfully / Scrapbook Circle Guest Designer

Happy Saturday, friends!  Today I am sharing my third and final project for my Guest Design spot over at Scrapbook Circle this month.  I had tons of fun creating with the April Main "One Fine Day" Kit and the two Embellishment Add-Ons.  A huge Thank You to Jenni for inviting me!

I started this layout with the Pinkfresh Studio Washi Tapes.  I created a grid-like frame on the left side of the cardstock for my photo.  I just love all the bright colors and fun patterns on the tapes.  On the right side, I cut apart the Webster's Pages paper and layered a few of the cards together.  They match the Pinkfresh colors just perfectly.  I did add some clear gesso to the background and on top of the tape so I could add some mixed media products.  I needed lots more blue, so that's what I added to the background.


I love how the background turned out.  I used lots of Shimmerz Vibez and Coloringz from my stash.  Here, you can see how pretty the WP cards are...such dreamy colors!  I layered one of the Crate Paper fringe hearts, an Elle's Studio die cut piece, some tangled thread and a small cut apart from the Dear Lizzy 6x6 Paper Pad.


Isn't this tape just divine?!  I love it, and I hope PFS continues to add this to their future collections.  I added a few Simple Stories brads on the page and I did lots of machine stitching in grey.  I think the grey anchors all those other bright colors and echos the grey tones in the photo.


Here's another angle looking at the tape.  I used another Elle's Studio piece at the top of the photo.  I really love how the Shimmerz looks on top of the tape!


I added my title at the top here...it's a Dear Lizzy piece.  Again, the colors match perfectly!  I added a DL sticker and a SS brad above it, and then added a few more strips of DL paper at the top.


I had lots of fun making this, and I did film it!  So here's the process of this layout coming together if you'd like to see it.


Thanks so much for watching and visiting me today!  Have a great weekend!

Friday, April 22, 2016

Snapshots of a Happy Life / Simple Stories

Friday is here again...yay!  Let the weekend begin!  Today I wanted to share one of my April layouts for Simple Stories.  I finally broke into the Life in Color collection.  There are bright and bold colors mixed with soft and light colors, and I love the mix of them together.  There is also black added in, so I thought it would be neat to start with a black background.  I'm so glad I did because these colors really pop against it!

I started with some light blue acrylic paint.  I smudged it on the black cardstock with an old gift card and then watered it down a bit and splattered it with a paint brush.  I cut a few frames from one of the patterned papers to add to the sides of the photos and layered even more papers behind them.  My title was actually the first thing I created, and I used a lot of the washi paper tape to do it.


Making this title was fun and pretty easy.  I stuck down a bunch of the paper tape onto some white cardstock.  I created this "snapshots" title in my Cameo software and then just simply cut the cardstock.  It worked great, and I love how it looks!  Lots of fun patterns and colors!  I finished off the longer title with some alpha stickers, some hand-drawn & fussy cut letters (happy) and a "life" sticker.


I love mixing and matching products.  Here, I used a few die cuts layered on top of the photo and each other and a brad.  I also added some tangled thread, and I machine stitched around the frame.  I love those little details!


More fun die cuts and fussy cut flowers layered in here.  I love how the blue paint looks here...it looks like it has a really next texture.  I stitched through it just to add more interest.


Here's a look at the bottom cluster.  I combined some fussy cut flowers & leaves with some washi paper tape, strips of paper, flower & word stickers, paint and stitching.


Here's one more look at the title area.  I really want to try this idea for a big title again soon!  Using the paper tape was a lot of fun, and it looks awesome!


Thanks so much for stopping by!!  Have a wonderful weekend, friends!


Thursday, April 21, 2016

Best Friends / Hip Kit Club

Happy Thursday!  Today I have another layout for Hip Kit Club to share.  This is my first layout using the 2016 April Hip Kits, and let me tell you...they are SOOOO pretty!  I know I say that every month, but it's true.  I can't gush enough about these bright colors and fun products!

I based this layout off of this month's sketch by Ashley Horton.  It features a large ampersand like this, and I used Kim Watson's FREE cut file to create it.  I used the sketch pens to draw it and then I did lots of inking and mixed media work on it.  I used lots of Shimmerz from the Color Kit to create a blue, green and yellow watercolor mosaic of color.  Then I just fussy cut it out, and it quickly became the focal point of the design.  I used a black and white photo since I had so much color going on everywhere else. 

Our theme last week was "Friends" so this photo is of me and my best friend Jennifer.  We were waiting in line to meet Norman Reedus (Daryl from The Walking Dead) at MegaCon last year.  We had a blast and made lots of fun memories :D

The background paper is from Pinkfresh Studio, and I LOVE those hearts!!  It comes in the Main Kit & the Paper Kit.


Here's a close-up shot of the watercolor.  I used the packaging technique and my water brush.  I love how the colors blend together...so so pretty.  After I cut it, I stitched through it with pink thread.  I used a few Amy Tangerine Rub-Ons around the ampersand and topped it off with some Elle's Studio black alphas and a Simple Stories wood veneer.


This beautiful yellow butterfly is from one of the Project Life cards.  I fussy cut HELLO from the new exclusive cut apart sheet designed by Kim Watson.  I added pop dots for extra dimension and some tangled thread.  That blue butterfly sticker is from the Shimelle Starshine sticker sheet.


I just had to use this cute camera...it's also Shimelle.  I used some of the Pinkfresh Studio washi tape and the Shimelle die cuts.  That diagonal striped paper is one of the Kim Watson exclusives.


I used some patterned paper, cardstock and a Project Life card to layer behind my photo.  I used pink tangled thread since I didn't have any of that color in this area.  I'm seriously loving these flower rub-ons...they went on so smoothly, and the colors are so bright!


One last close-up here...I combined the Pinkfresh clear words (BEST) with the American Crafts transparent alphas.  I love that they're finely striped and have a bit of shading.  So pretty!  I added a few Shimelle die cuts & stickers and more Pinkfresh washi tape above the title.


Here's the process video if you'd like to see how I created all of this.  I hope you like it!


Thanks so much for stopping by!  Have a great day :)

Wednesday, April 20, 2016

Summer Beach / The Cut Shoppe

Hey, friends!  I have a new layout to share today for The Cut Shoppe.  I'm totally in love with the new Open Letter Alpha Cut File!  The possibilities are endless here, and I couldn't wait to create a large title with these.


I traced each of these letters and then overlapped them.  Then I welded them together, and that's it!  I cut my photo to fit behind the A.  I wanted the picture to pop, so I used light colored papers and paint to showcase it.  I used papers from Crate Paper, American Crafts, Elle's Studio and Echo Park.  Quite a variety there :)


I chose this background paper because it reminded me of sand.  I smudged some white gesso on it first and then used some watercolors to give the look of water and sand.  I used a lined stencil and some gold texture paste to create those messy lines.


I love these light colors...so pretty!  I also added pop dots under the big title, and I think the dimension looks so neat.  I easily added a few colors of tangled thread under it.  These cute sequins are from Cocoa Vanilla.


I fussy cut this yellow flower from a Crate Paper patterned paper, and that Summer chipboard piece is from the Pool Side collection.


I love these sunglasses!  They were the perfect touch to the E...it kind of looks like the E is smiling :D


Here's the process video showing how I created this page...I hope you enjoy!


Thanks for stopping by, and have a wonderful weekend!