Hey friends! I'm here with a new layout for the Paige Evans Design Team featuring Paige’s Splendid collection. I began this page with the Acrylic Stamps to create a watercolor background. I used the large flower stamp with Distress Oxides on thick white cardstock. I coated the cardstock with clear gesso first and after stamping the flowers, I used a brush and water to smudge some of the color around. I love the “left out in the rain” effect. The flowers run and blend but they’re still visible in areas. I also used a few Shimmerz sprays to add a bit more color in a few areas, but not enough to cover up the flower shapes. I cut strips from Paper 19 and created layers. I arranged my three black & white photos and then started embellishing with lots of flowers and stickers.
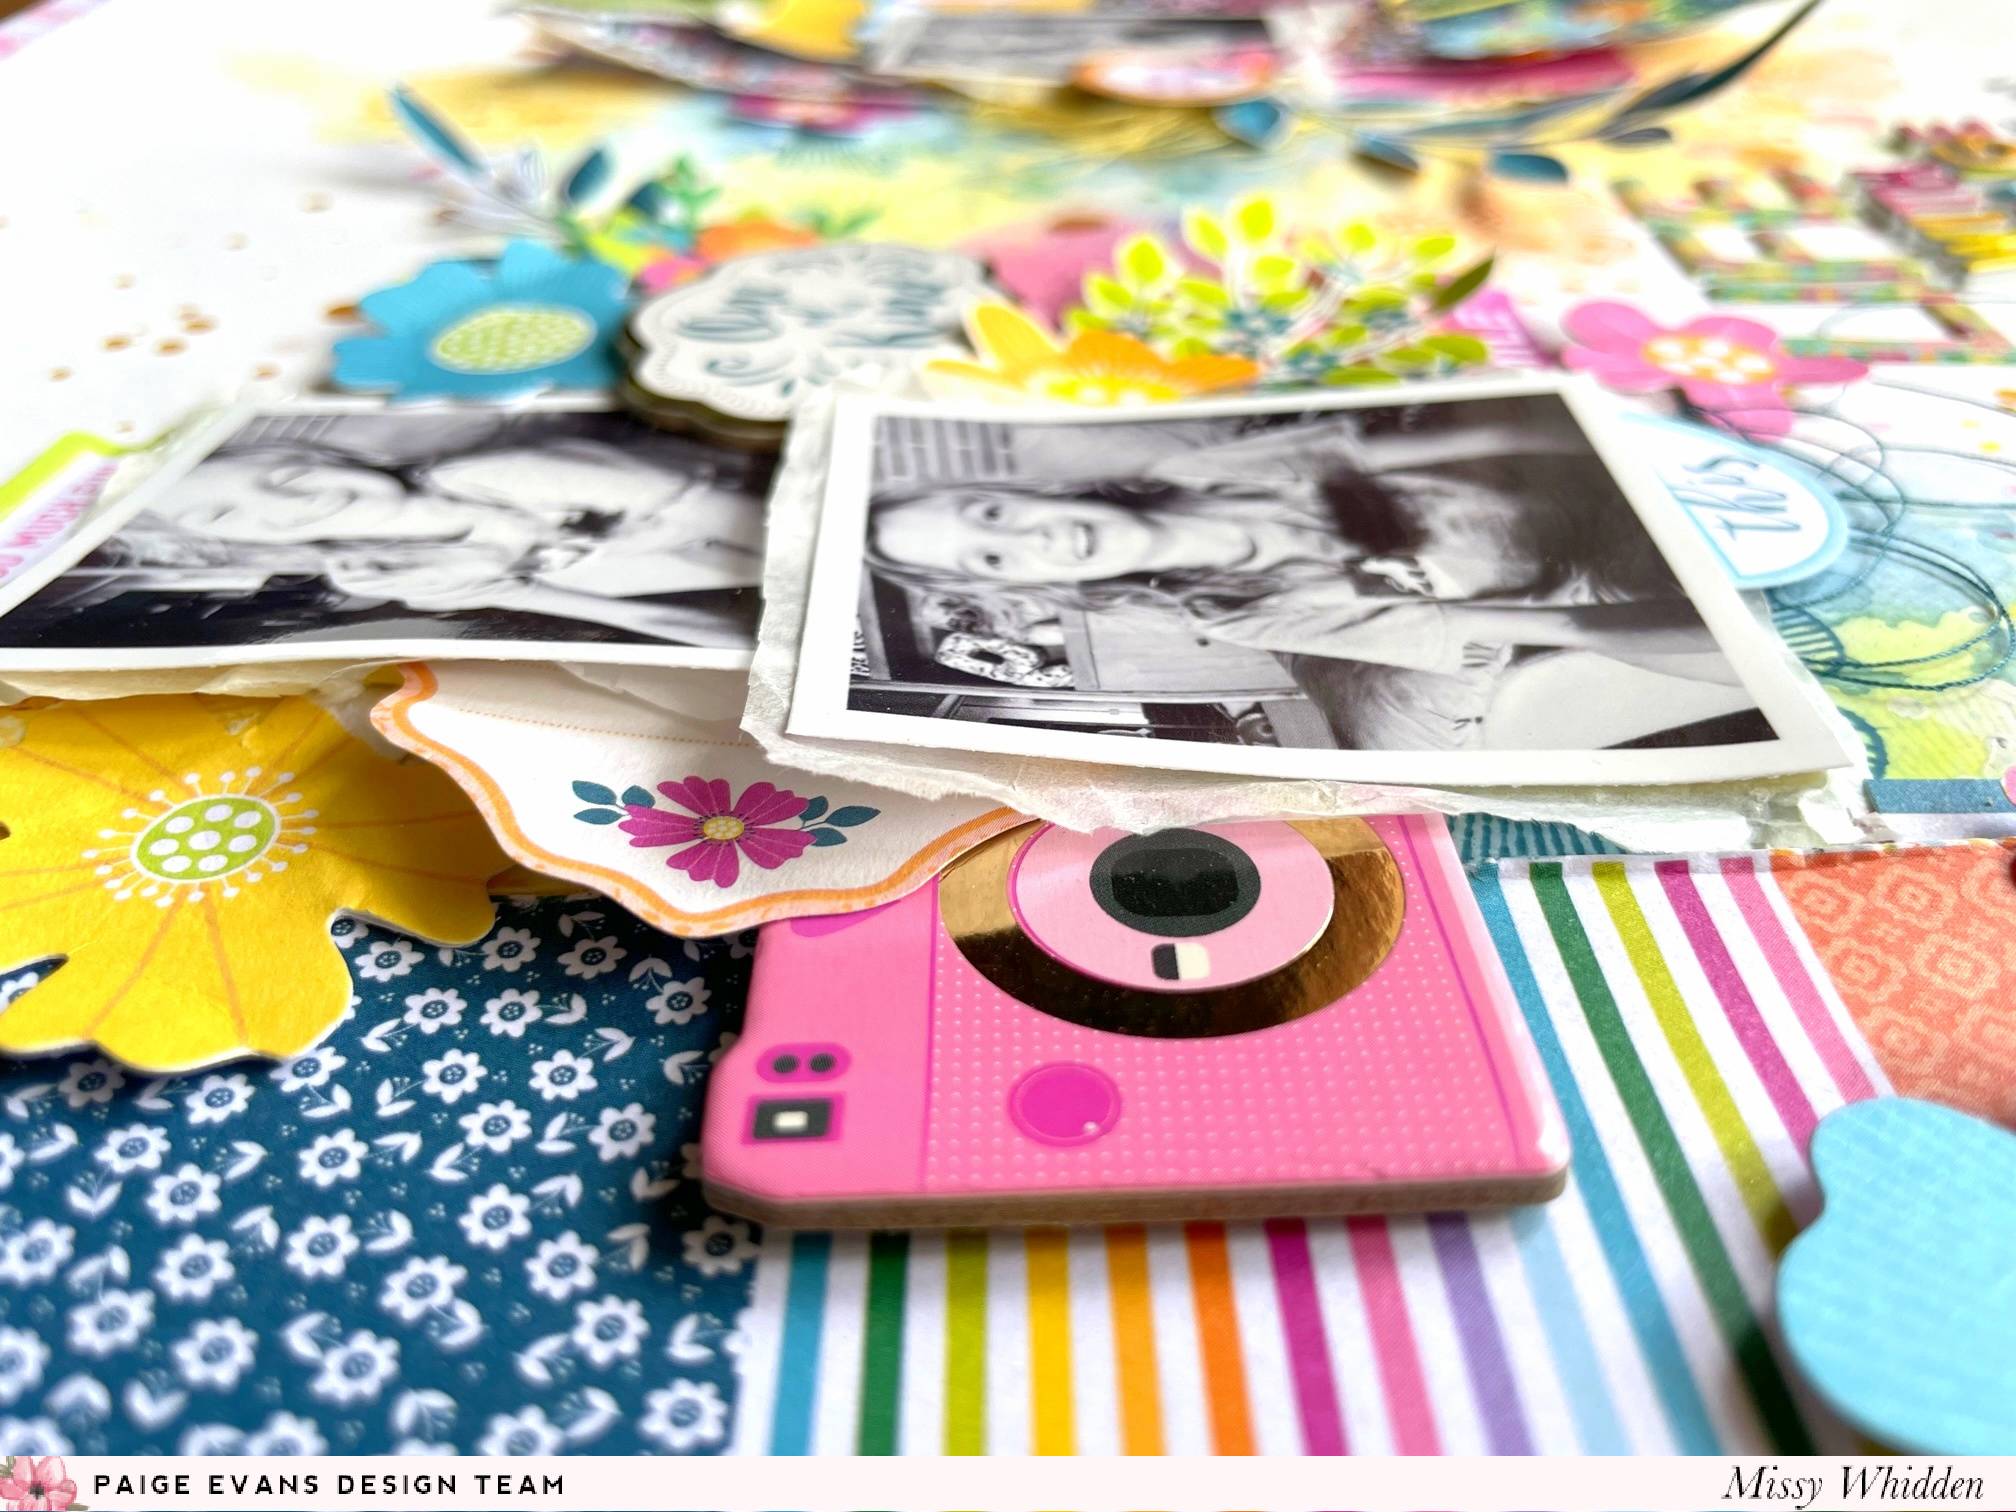
This stamping technique is a lot of fun. It still gives you the stamped image, but the water makes the edges blend and run. The key to this working so nicely is using the gesso first and then stamping with Distress Oxides. I used lots of flowers from the Cardstock Stickers, Floral Die Cuts, and Layered Bouquet Stickers. I used a few stickers from the 8-Page Sticker Book and I fussy cut a few blue leaf stems from patterned paper. I also tucked in a Chipboard Sticker and blue and yellow thread. So much fun dimension and texture!
I love these colors in the papers here. I always love a dark blue mixed with orange and pink. Here I layered in half of a pink label sticker from the 8-Page Sticker Book. I also used a piece for layering from a 2x2 Paper Pad. My favorite part here is the yellow Heart Paper Clip - those are addictive! I also used another Layered Bouquet Sticker here. I took it apart and just used the flower cluster from it.
It's a lot of fun to layer the stamps. You can see more in my process video, but letting the first layer of stamping and ink dry and then adding more stamping on top of it creates a really cool effect.
I continued the bright multi-colored theme and mixed and matched my title. I used the "LIFE" Epoxy Stickers and paired it with the colorful mini foam Thickers. I staggered the words to make it gel with the big leaf stem and the background flowers. I added my journaling under that using a black fine-tip Sharpie.
This little flower cluster here is actually one of the Dimensional Stickers--the little bouquets. I took it apart and just used the flowers. I've learned over the years that is OKAY to dismantle embellishments to make them work for you. :D
I love this cute pink camera Chipboard Sticker. I also fussy cut a few shapes from one of the 2x2 Paper Pads to layer under the photos.
Here's a good close-up of the stamping. If you aim for it to be messy & imperfect from the start, you can't "mess it up" LOL.
I took lot of detail photos, so here they are :)
I love how colorful this turned out! It was a lot of fun to put together and I hope it inspired you in some way today. Don’t be afraid to create a fun messy background with Acrylic Stamps!
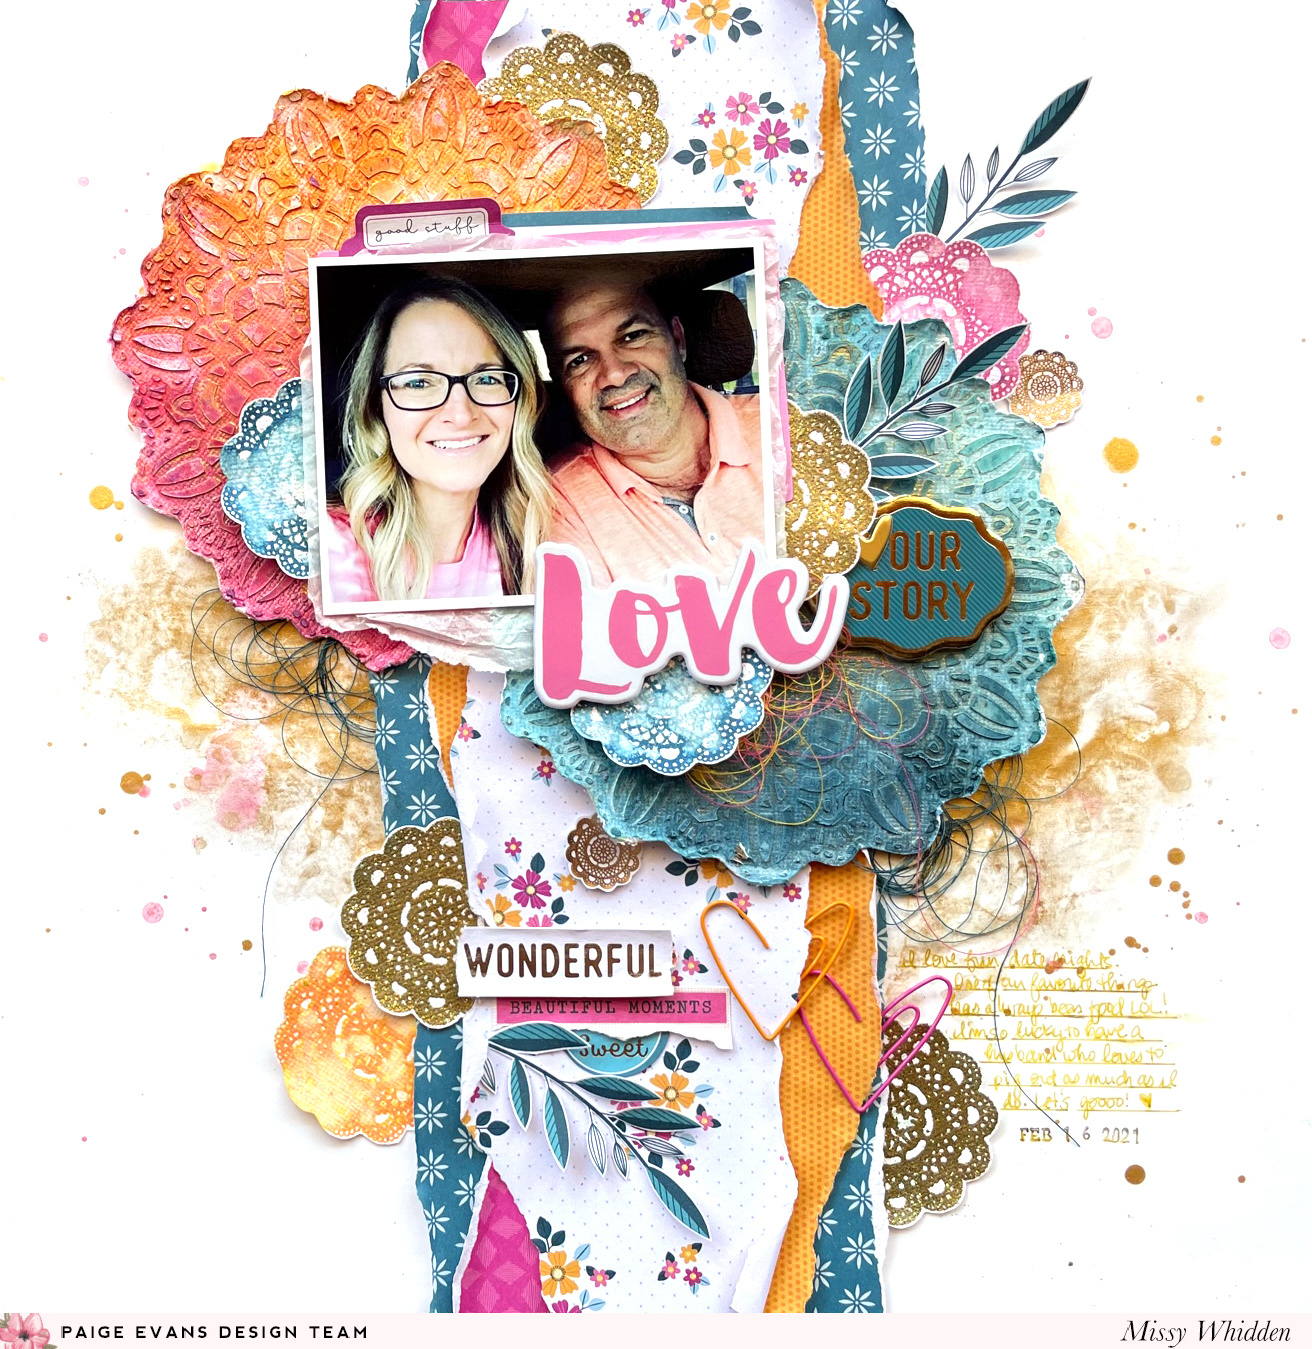
Happy Thursday, friends! I'm back with another new layout for the Paige Evans Design Team featuring her Splendid collection and lots of mixed media. I began this with Paige’s Doily Stencil (as an alternative to the sold out stencil you can use her Doily Cut File). I made two large doilies by scraping modeling paste over the stencil onto textured white cardstock. Once it dried, I used Distress Oxides and Shimmerz sprays to create a pink/orange one and a blue one. I let them dry and then cut them out so I could use them as large die cuts. I chose patterned papers from the 12x12 Paper Pad to match those three colors. I used the doily stamp from the Acrylic Stamps to make even more die cuts. I stamped with Distress Oxides and then I embossed a few of them with gold embossing powder. I cut all of those out so I could place them around the layout. I used thick white cardstock for the background and after using clear gesso first I used a bit of Gold Glitter Spray to create a shiny gold watercolor effect. I tore strips of the patterned papers and arranged everything around my photo.
This texture turned out so nice! I distressed the edges of the large doilies and layered my photo on top of them. I tucked in a few of the stamped doilies here as well as a large Epoxy Sticker I used for the title and a Chipboard Sticker to finish it off. I mixed orange and pink thread here and tucked blue thread under the large doily. I fussy cut a few blue leaf stems from Paper 1 to use in a few places.
This shiny gold makes me so happy. I highly recommend embossing with your stamps! For the stamped doilies, I used Distress Oxides and then used a wet brush to smudge the color a bit. I did stamp on cardstock that I coated with gesso first. This helps the color to run like this. I used a few bits here from the Ephemera Die Cuts and 8-Page Sticker Book. I tore the edges of the papers to create a messy and uneven look and the curled up edges create awesome texture. Add in all the bits layered in and it creates even more depth!
I couldn’t resist using a few of the Heart Paper Clips. They’re perfect for adding that extra last detail like this. I used a metallic gold pen to write my journaling over on the right side.
I love using products in different ways--like stencils. I usually don't create a shape and then cut it out. Most of the time I use them directly on the background and build the page on top of it. It's fun to change things up and think outside the box. This technique works great depending on the stencil. You could still do this with a large background stencil and then cut or punch shapes out of it. I love layering bits together, so this worked out nicely.
I used some of the Ephemera Die Cuts and 8-page Sticker Book bits here behind the photo as well as some white tissue paper.
I fussy cut a few blue leaf stems from a patterned paper to tuck in a few places. I also used two small doily stickers that matched the doily stamp. I love using different sizes of the same shape.
Gold! Need I say more? :D I also tucked in some blue, orange & pink threads in a few places.
Here are a few more close-ups of all the details.
I hope this gives you some fun mixed media ideas to try on your next layout. I forgot how awesome embossing is! I need to do it more often. Be sure to check out my process video for all the details.
Thank you so much for stopping in today! Have a great day :)

 This stamping technique is a lot of fun. It still gives you the stamped image, but the water makes the edges blend and run. The key to this working so nicely is using the gesso first and then stamping with Distress Oxides. I used lots of flowers from the Cardstock Stickers, Floral Die Cuts, and Layered Bouquet Stickers. I used a few stickers from the 8-Page Sticker Book and I fussy cut a few blue leaf stems from patterned paper. I also tucked in a Chipboard Sticker and blue and yellow thread. So much fun dimension and texture!