Tuesday, March 31, 2015

This is So You / My Mind's Eye

Hey, friends!  I hope your week is going well...Spring Break is in full effect here, and the weather is just gorgeous.  We did have a few cooler days this past weekend, so our pool is cold again...and I'm not one for just jumping into it.  The kids, on the other hand, don't seem to care that it's still freezing...haha.  More power to them! :D

Today I'm sharing my latest layout for My Mind's Eye.  I have so much MME tapes in my stash from the past few years of being on the team, and so I decided to use A LOT of them.  You know I love rainbows, so I pulled out tons of those colors and just created strips to cover the whole white cardstock.  I love tearing it so it's uneven.  Some of the strips are straight...I mixed it up.

After all the tape was down, I smudged some white gesso all around where my photo is.  The slick texture of tape itself wouldn't be able to hold watercolors or gelatos, so the gesso gives it some grit...something for that color to hold on to.  I used gelatos here to add smudges in the coordinating colors around the picture.


I went through all of my MME collections and pulled out a few stickers and chipboard pieces that matched these bright colors.  Some are from newer collections, like Jubliee, and some are from older ones, like My Girl.


These cute banner pieces are from My Girl.  I can't believe I hadn't used them yet!  They were perfect for this happy-go-lucky layout.  I just wanted to add random things here and there to add more interest and pops of color.  I did lots of stitching in different colors, too.


I think this "Live It Up" piece from the Jubilee line is perfect for the photo because that is exactly what she's doing in the the photo :)


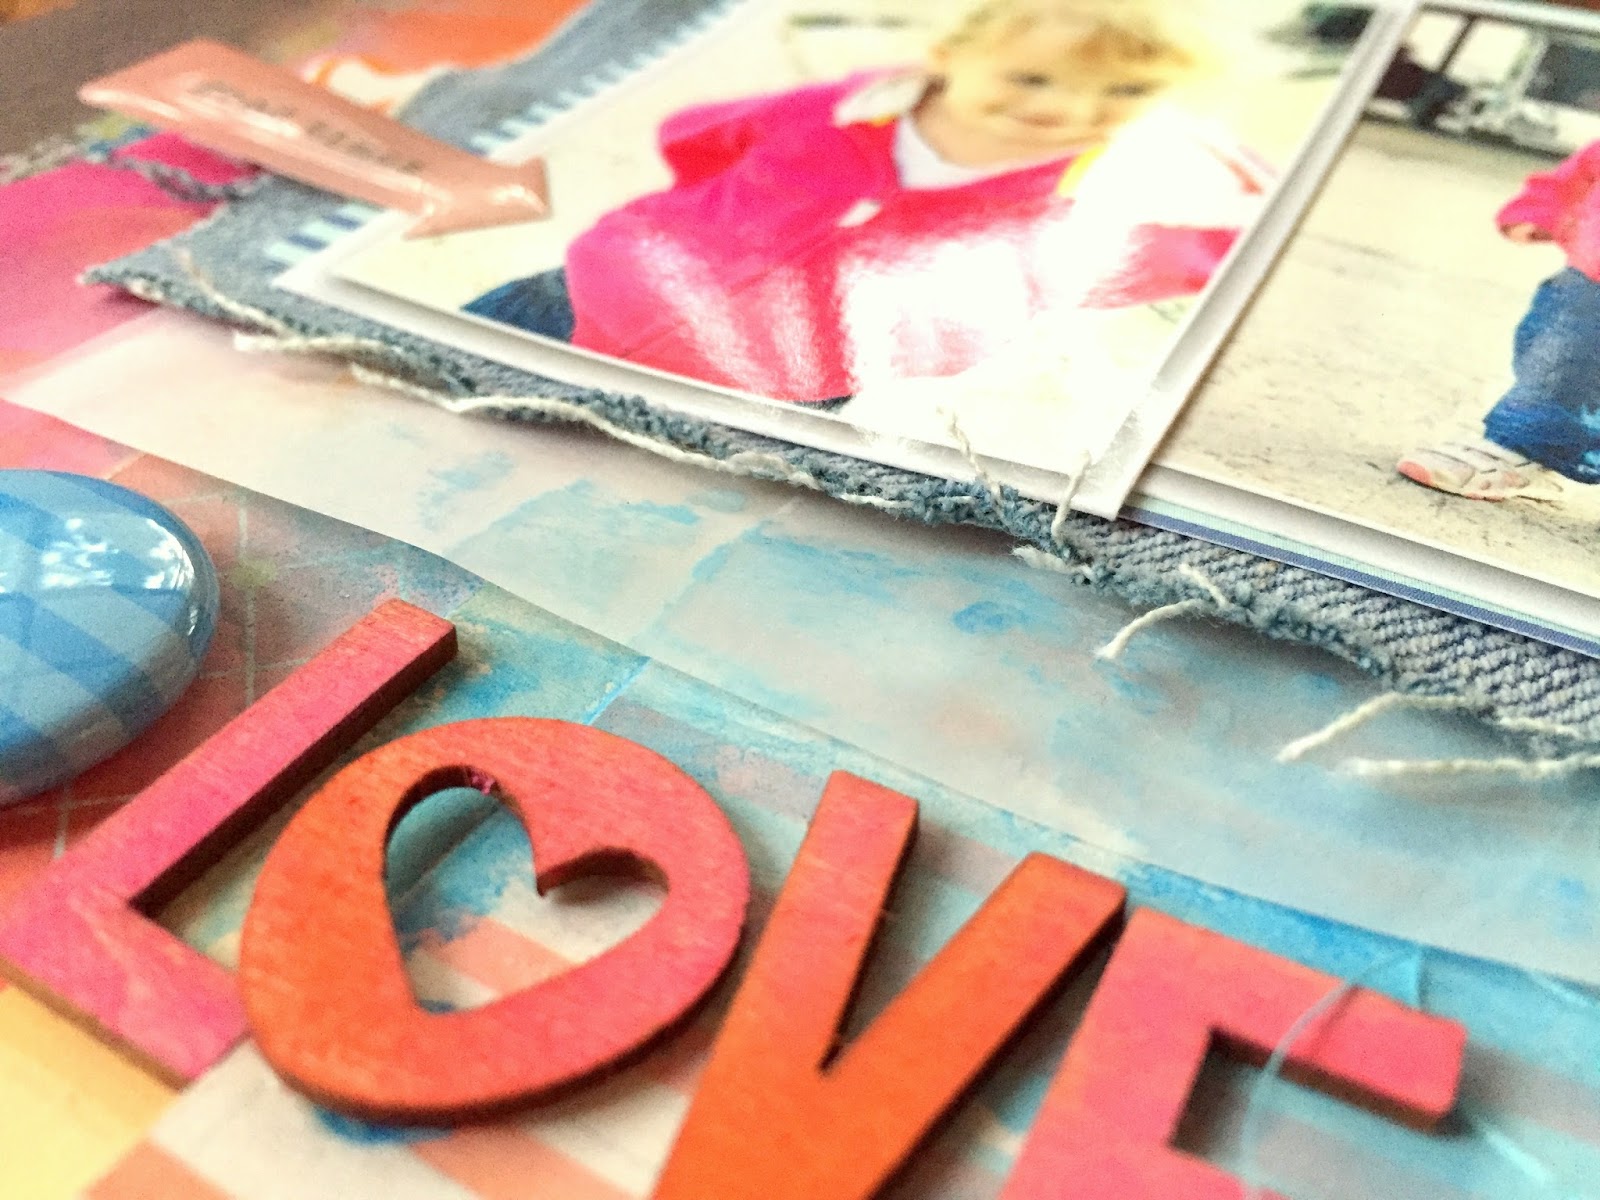
A few more pink pieces from Jubliee and I believe Sweetest Thing...and I used a clear overlay on top of my photo from one of the Record It lines.  I love how they look on top of pictures!


So if you have a huge stash of tapes and you know some of them just don't coordinate with much, pull them out and use them to create a background!  Add some mixed media to it to blend them all together.  It's fun, fast and easy....just don't think about it too much.  Find a color scheme you like and just stick them down!

Thanks for stopping by, and have a great day!

Sunday, March 29, 2015

Cat Photobomb / Hip Kit Club

Happy Sunday, friends!  I hope you're having a great weekend.  This is the first weekend of Spring Break, so I'm looking forward to a week of slowing down, catching my breath and relaxing!  No school schedule for the kids....yay! 

So this is my latest layout for Hip Kit Club...and it makes me laugh.  I was trying to get some cute action shots of the girls out on the patio one afternoon, and the cat wouldn't stop crashing the pictures.  Paige kept chasing him and trying to grab his tail...she has no fear.  The biggest picture is so funny because you can see his little head on the lower left...he was literally laying down on his back and his eyes are open wide.  He looks dead, but he's not.  It just looks like he photobombed the picture.  Silly cat!

All of these gorgeous products are in the 2015 March Hip Kits.  I started with this Crate Paper wood grain paper and added some of the yellow Dylusions using some plastic packaging.  I didn't add the blue color until much later...and I go into lots of detail about this in my process video, which you can see down below.  You can see this layout up on the Hip Kit blog as well.


I really love the look of the yellow and blue mixed together on this wood grain.  I threw in some pops of pink as well.  I wanted to play off the yellow in her shirt.  I used four smaller photos at the bottom because they were all too cute not to use!  I backed the second one and raised it up to break up the monotony of four photos right together.  I added some stitching, some tangled thread and a Project Life card that I tore in half.


You know me....I love layers of things, and this one is no exception.  You can tell my journaling is kind of sketchy.  That's because the clear gesso I used (by Liquitex) is really gritty.  It's hard to get my pen to write smoothly over it.  It's not a huge deal, but it does sort of mess my pens up.  Once this bottle is empty, I'm going to try a different brand.  This cute camera circle is one of the exclusive die cuts made just for Hip Kits!  That gold circle is from an MME sticker sheet.


Isn't this such a pretty blue?  I got this color by mixing the Calypso Teal Dylusions from last month's Color Kit with this month's Cracked Pistachio Distress Paint.  It matched perfectly!  I also added a few Pinkfresh Studio die cuts and some Crate Paper chipboard arrows.


One last close up of the title work....a Cameo cut mixed some kraft Thickers.  This font is awesome because the letters are tall and thin and are great for long words....like Photobomb.  :D


I hope this inspires you to create a page using lots of photos!  I think the key is making them small.  Sometimes you have a series of photos that are all good, and you just want to include them all.  I say go for it!

Here is my process video showing how I put this layout together from start to finish.  Enjoy!


Thanks for stopping by, and have a great day!

Friday, March 27, 2015

Using Triangles on a Layout / Chickaniddy Crafts

Hey there, friends!  Happy Friday!  I hope you've been enjoying our month full of scrapbooking trends over on the Chickaniddy Crafts Blog.  This layout was up on the blog last week featuring triangles.  This is really simple to put together...all you need is your paper and a square punch.

I chose to scrap this cute photo of my husband and daughter about to go for a 4-wheeler ride.  I like the brown and pink in the photo, so I chose various papers from Twirly Girly, Date Night and Scrumptious.  I love how they all look so pretty up next to one another.

Supplies Used:  Twirly Girly--Alpha Stickers TG14EB01, Sticker Sheet TG14EB02, Tea Party TG140S03, Itty Bitty Ballerina TG140S08, Paper Posies TG140S05 Grandma's Quilt TG140S10, Never Grow Up TG140S11, Piggy Tails TG140S12, Sentiment Mini Stickers TG14EB05; Date Night--Brads DN14EB06, Sentiment Mini Stickers DN14EB05, Tags Mini Stickers DN13EB04, Plaid is Rad DN140S12, Cutest Couple DN140S05, Awesome Blossom DN140S01, Sticker Sheet DN14EB02; Scrumptious--Frolic in the Leaves SC140S11, Fall Bouquet SC140S01, Autumn Haze SC140S06, Check Please SC140S09; Other--cardstock, Silhouette Cameo, Coats Thread, Heidi Swapp Color Shine, Heidi Swapp Archival Ink, October Afternoon Date Stamp

Here's a look at how I created those triangles:

1.  I took a 2-inch square punch (but any size will work) and punched a bunch of squares out of all the patterned papers I chose.  Then, I used scissors to cut them in half diagonally.  Easy!


2.  Next, I just started arranging them onto my page in no particular pattern.  I just made sure the lines matched up and turned them this way and that way until I was happy with the large design of all the triangles together.  I then glued them all down.

3.  The rest was easy...adding a few layers of papers under the photo and adding stickers and embellishments where I wanted them.


4.  I added stickers and fussy cut some flowers from this sheet (Awesome Blossom):


One more look...I really didn't need to add a whole lot more to this with all the different colors and patterns going on.  I did add a few mist splatters to finish it off.


I hope you'll give this a try!  It's really fun, and it's an awesome technique if you don't have a die cutting machine or just don't feel like using it.

Thanks for stopping by!

Thursday, March 26, 2015

Hello Lucky Girl / The Cut Shoppe

Hey there, friends!  I hope you're having a great day :)  Today I'm sharing my latest layout for The Cut Shoppe.  I know St. Patrick's Day has come and gone, but I wanted to create a fun and festive layout using the new Lucky Charm cut file.  I was inspired by the rainbow and knew exactly what I wanted to do with it.  I have a process video at the bottom if you'd like to see how I created this layout :)


Here is what I came up with.  I enlarged the rainbow and gave it some color with gelatos.  I wasn't sure at first what I wanted my background to look like, but in the end I decided to create an abstract landscape with a blue sky, green grass and bright yellow sun.  I coated the cardstock with clear gesso and used a circle stencil with gelatos first...they blended in when I started adding watercolors.  You can see exactly how I did this in my video.

I didn't use any particular collection for this...it's mostly white cardstock with a few pieces of random patterned papers thrown in...they are both Recollections brand from Michael's.  There is also a piece of vellum in my layers as well.


I also cut the word "lucky" from this file.  I first traced it with a gold pen and then decided to scribble in the space.  I figured I need gold touches on a rainbow layout, right?  I also used gold thread to stitch.  I colored that wooden veneer "hello" with gelatos, paint and a bit of ink spray.


I love the dimension of the rainbow.  I didn't lay flat, and I actually like that.  I added some yellow stitching on the sun's rays...my needle got sticky at one point and made little tiny holes....you can see it here.  It doesn't bother me, though...it's not that noticable.


I cut these cute shamrocks from the file, too.  I simply colored them with green watercolor and added touches with a green gelato.  I layered some flair buttons in there, too.  I used gold foil on the wooden hearts....I showed how I did this in my video.  Super easy and fun!


One more close up of the layers and the cute shamrocks.  I topped them off with some rhinestones.


I hope this gives you some ideas on how you could use this file to scrap your St. Patty's Day photos!  I love combining gold with rainbows...they just seem to go together.

Here is my video...I hope you enjoy it!


Thanks for stopping by, and have a great day!

Wednesday, March 25, 2015

Peace & Quiet / Shimmerz

Hey there, friends, and Happy Wednesday!  Today I'm sharing my latest project for the Shimmerz blog.  I was in the mood to create a nature-related layout, and so I went with this photo of my daughter sitting on a bench examining some leaves she collected at a local garden near our home.  I wanted to echo the feel of nature, so I started with some wood grain patterned paper and went from there.  The papers and embellishments are from American Crafts, Heidi Swapp, Simple Stories, Crate Paper, A Flair For Buttons and The Cut Shoppe.

I pulled several Shimmerz products in various green tones and then decided to add in some aquas to match the colors in her shirt.  Once I decided to add in the flower die cuts, I added in the peachy tones to give it a Springy feel.  I started with some white gesso and a Crafter's Workshop square stencil.  I used the Coloringz in Keep Palm to begin and then came in with Well Blue Me Down and Heidi Ho Blue.  I used another CW stencil with these colors blended with some modeling paste to create those lines on the background.


Here you can see the lines more closely.  You can get an endless amount of colors when you mix your products together!  It only took a couple of sprays of each of the Coloringz mixed with the paste to get this gorgeous aqua color.


I used my finger to smudge on some of the Dazzlerz in Dreamsicle to color these flowers, and the peachy tone is gorgeous!  The leaves are so shiny in person.  I dabbed some of the Shimmerz in Green Olive on them and they are so pretty!


I used a few of those Coloringz on this Heidi Swapp Color Magic die cut...I love the light bluish-aqua color, and it looks so nice paired up with the peachy tones.


Here's another shot of the mixed media work.  That Keep Palm Coloringz is a great color for matching photos with leaves or trees or anything nature-related.  Very pretty.


One last shot of my left cluster...some stitching, flair, die cuts, stickers and wood veneer.  The perfect touch for the layout, I think.


I hope this inspires you create something nature-related and use some earthy tones  mixed with some brights and pastels.  I would never have thought I would've liked this color combo until I started experimenting with it.  Turns out, it's beautiful all put together!

Products Used:
Coloringz--Keep Palm, Well Blue Me Down, Heidi Ho Blue
Vibez--Jeni B Bleu
Shimmerz--Green Olive, Jilted Jade
Dazzlerz--Dreamscicle

Don't forget to visit the Shimmerz store and check out all the gorgeous products!  If you mention my name at checkout in "Notes to Merchant," you can score some free product!

Thanks for stopping by, and have a great day!

Tuesday, March 24, 2015

I Am So Lucky / My Scraps & More + a process video!

Hey, friends!  Happy Tuesday :) I hope you're enjoying your week so far!  The layout I'm sharing here was for last week's Mix It Up Monday challenge over on the My Scraps & More forum.  The challenge was to use a die cut or cut file, something with stripes and flowers.

I used the new Simple Stories I Am collection, and boy is it gorgeous!  I had a hard time narrowing down which pieces to use.  I seriously wanted to use ALL of it at once.  I started with the background cut file.  You can find it for FREE in the store HERE.  I always have to jazz up my backgrounds, so I added some paint.  You can see how I did it in my process video down below!  (I just started a YouTube channel sharing my process videos, so I hope you'll check it out!)


Here's my stripes element....this border sticker from the sticker sheet. I layered it under the die cut and over the painted background.  You can also see my tangled thread and stickers layered here.  That arrow  is a stamp.


I added some washi tape, some stitching and a few flair buttons.  I love how the cut file doesn't lay completely flat...it gives nice depth.


Here's a shot of the top...it's a mixture of tape, stickers, stitching, chipboard....and a date stamp.  I used another flair button here as well.

I really love how the title turned out.  I paired some of the stickers from the collection with this Lucky die cut.  I used a sheet from the 6x6 paper pad to cut it.  I really love this font...it's called Mf Queen Leela.


 Here's the video if you'd like to see how my crazy brain works when I'm scrapping :)


I hope this inspires you to try one of our challenges!  Every day brings something new and fun.  Hope to see you there!!

Thanks for stopping by, and have a great day!

Sunday, March 22, 2015

Sweet Reese / Hip Kit Club + a process video!

Happy Sunday!  I'm so excited to share my first layout using the 2015 March Hip Kits from Hip Kit Club!  They are so gorgeous...everything is just so well put together.  I did make a process video showing how I created this layout, so you can watch it and check that out if you'd like.

I started off with white cardstock and the goodies from the Color Kit.  I created the circles using one of the Dylusions stencils and some of my own gelatos.  The green colors are from the Distress Paint included in the kit.  I mixed in some teal watercolors for the darker drops.  For some reason, I was in the mood to create a banner, so that's what I did.  I grabbed my triangle punch and a few of the patterned papers and made one.


I recreated the mixed media from the top of the layout here on the bottom portion and made sure each of the colors was represented.  I added a flair button, one of the cute exclusive die cuts, some puffy stickers, some Crate Paper sentiment stickers, some patterned paper, some alphas and my journaling.


Here's a close up of the banner.  I used my machine to stitch it down and flipped up the points.  I also used the paint to color that "Cutie" wood veneer.


Here's another angle of the bottom...I did add some gold stitching and some tangled white thread for added texture.


I can't get enough of the shiny gold in the kits!  It just adds some pizzazz to the page, I think.  That "Hello Everyday" card is from the Project Life Kit.


I hope this gives you some inspiration on what you can do with the items in the kits!  Here's my video if you'd like to check it out:


Thanks for stopping by, and have a great day!

Friday, March 20, 2015

Bundle Up, Darling! / My Scraps & More

Hey, friends!  Happy Friday :)  Today I'm sharing another layout I created a few weeks ago for the Cabin Fever Crop over at My Scraps & More.  This challenge was to include something wood grain, some fabric and layers...all of those things that remind you of keeping warm in a house during Winter!

I used some American Crafts wood grain paper to start.  I used other patterned papers from American Crafts, Studio Calico and Crate Paper to create layers.  I knew I wanted to pull the bright pink from her jacket in my papers and embellishments.  The oranges and blues were afterthoughts....mainly after I decided to use an actual piece of denim as a layer.  Yep, those are my husband's old jeans :)  That's my fabric part of the layout (and the burlap Thickers).


Here you can see the jeans really well.  I distressed the edges after I cut out this square.  I added a bit of gelato smudges and some vellum for extra interest.  I also added that cute heart cut file from The Cut Shoppe and colored it with a few blue gelatos.


That's an Elle's Studio wood veneer that I colored and a flair button from a Michael's collection.  I used some watercolor to splatter some blue around the page.  I was happy with how it pops off so brightly against the brown of the wood grain.


More Elle's Studio wood veneer...it just used more gelatos to color it pink and orange.  You can do so much with gelatos.


I finally used this American Crafts rub-on.  As you can tell, I almost waited too long because all of it didn't rub off.  I've found that some rub-ons definitely have shelf life and dry out if you don't use them pretty quickly  I used a pink pencil to help fill in gaps.  I like how it looks, though.  And the bold colors are just awesome!  I used a gold pen for my journaling.


I hope this has inspired you in some way...be sure to check out the forums for new challenges every day!

Thanks for stopping by, and have a great weekend!

Thursday, March 19, 2015

Hello Spring / CREATE Magazine

Hey, friends!  Today I wanted to share one of the layouts I had published in the March issue of CREATE Magazine from Scrapbook Generation.  I really love how it turned out.  The theme was pretty obvious....Spring!  I started from scratch with white cardstock and a few cut files from The Cut Shoppe.

I used lots of inks, paints and gelatos to create the background and to color the clouds and flowers.  I didn't want to take away from the bold colors of the photo with a lot of patterned papers, so I tried to recreate a sky somewhat and a few flower accents.


These flowers are actually from a background cut file, but I just cut a few and gave them some color.  I added some big yellow brads to the center.  I love how the watercolor turned out here.


I added a few strips of washi tape, some sequins, a Studio Calico butterfly and a Freckled Fawn arrow paper clip.


I love smudging gelatos with my finger...and I love how the texture of the cardstock shows through!  I stitched through the clouds and then pulled them up a little bit to make them stand out.  Finally, I added a cute sunburst button from A Flair For Buttons.


I hope this gets you in the Spring mood since I know many of you are still experiencing Winter!  It has been in the upper 80s here the past two weeks....and I'm loving it!

Thanks for stopping by, and have a great day!