Thursday, August 31, 2017

Sisters Love / Precious Remembrance Shop

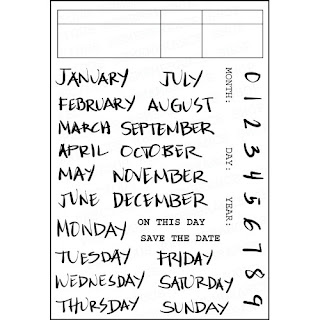
Hello again, friends!  I have a new layout to share for Precious Remembrance Shop using stamps from four different stamp sets.  I combined the Blossom Stamp Set, the Fall Colors Stamp Set, the Happy Art Stamp Set and the Date Stamp Set on this page.  Here are all the stamp sets:


Blossom
Date
Fall Colors
Happy Art

I began with the flower stamps from the Blossom set, some black Archival Ink and a scrap sheet of white cardstock.  I created several flowers and then added color to them using some Prima Watercolor Pencils.  I fussy cut them all out and arranged them around my photo as separate embellishments.  I used a light pink cardstock for the background and played off several shades of pink throughout the page.  I used a few random patterned papers as layers behind my photo and tucked the flowers in around it.  On the background, I added a bit of white gesso first and then I used a few stamps in a random way along with some gelatos.


Check out how awesome these flowers turned out!  They’re from the Blossom Stamp Set.  Cutting them out and using them as embellishments really creates some nice dimension.  It was really easy to color them in with the colored pencils.  You could do this with any type of mixed media products and any color scheme.


Here you can see the stamping on the background.  I used a messy grid stamp from the Fall Colors Stamp set, and I just held it in my hand instead of sticking it to a stamping block.  I was going for a bit of messy texture, and this stamp worked great.  I traced a big circle behind everything and machine stitched around it.  I also added some black tangled thread behind the photo and layers.  I embellished with a few Me & My Big Ideas stickers, and my title is from the Crate Paper Cute Girl collection.


Here’s another look at the flowers.  I really love how they turned out.  There are stems with leaves in the Blossom Stamp set as well, so you could add those to the flowers and get a totally different look.


Down at the bottom I used the grid stamp again.  I also used some of the small open triangles from the Happy Art Stamp Set to create some subtle shapes on top of the big circle.  I used a pink Prima chalk ink for those.  I drew some lines and added my journaling down below everything.


I think it's fun to go monochromatic sometimes and limit yourself to different shades of one color.  It limits what you can use and so you don't have to spend lots of extra time wading through all of your products to find things to use!  I'm glad I mixed in the black...I think it really pops.


Here's one more close-up of the top area.  I like how the circle looks...something very simple that makes a fun design element.


I hope this inspires you to mix and match your stamps!  And don’t be afraid to use them in a different way.  It’s fun to get creative with them!  I hope you’ll check out my process video to see how I created this.


Thanks so much for stopping in today :)  Have a great day!

Monday, August 28, 2017

I Look at You / Hip Kit Club

Hello again, friends!  Today I wanted to share my newest layout for Hip Kit Club.  I used the 2017 August Hip Kits.  My theme for last week was to use lots of the alpha stickers.  I used a sweet photo of me and my little goosie :)

I used one of the Maggie Holmes patterned papers as my background.  It's pretty busy, so I covered a lot of it with white acrylic paint to fade out a lot of the circles.  I used some of the Shimmerz Paints from the Color Kit to add color to the background.  Once I knew where my photo was going to go, I went to work with the alpha stickers.  I found this cute quote on Pinterest and recreated it here by mixing and matching all the fun alphas.  I cut "sunshine" on my Cameo using white cardstock.  I colored it with the Pretty in Pink Coloringz and a dash of Heidi Swapp Gold Color Shine.


All these fun alphas are from a mix of the kits.  There are metallic gold Thickers, a few different exclusive alpha stickers, and some Crate Paper stickers.  I also used some of the Maggie Holmes Carousel chipboard and die cut ephemera.


The Maggie Holmes chipboard banner was a perfect fit under my big title.  I curved the "sunshine" to make it sit above the curve of the banner.  I also added a sticker banner under this one over on the right, and I tucked in a fussy cut flower here on the left side.  I layered a few patterned papers under my photo, and that's a Maggie Holmes puffy sticker on top.


Look how shiny the metallic gold is!  Gotta love that :)  I added in a chipboard pennant at the top mainly because it looked really cute, and it was perfect for a pop of yellow.  Sometimes you add something simply because you "like the way it looks" :D


Here you can see the layers under the photo.  I also tucked in a Project Life card and a piece of a die cut with gold glitter on it.  Let's not forget the thread...haha!  I also made a little heart cluster using chipboard and puffy stickers, both from Crate Paper.


Here's the top of the layout.  I love how chipboard gives such great depth without even trying!


I just had to use this adorable chipboard camera.  It fit just right in this spot.  I tucked in another fussy cut flower cluster and added some pink thread.


I love how this piece turned out!  The pink color mixed with the gold looks so pretty up against the teal and yellow background.  And that banner was the perfect length.  I couldn't have done that again if I tried...haha.


I hope you guys enjoyed this page.  It was fun to make!  I hope you'll check out my process video to see how I created it.


Thanks so much for visiting me today, and have a great Monday!


Sunday, August 27, 2017

Love This / Cocoa Vanilla Studio

Happy Sunday, friends!  Missy here, and I have a fun and festive Summer layout to share today for Cocoa Vanilla Studio.  I mixed and matched papers and embellishments from the Hello Sunshine, Wild at Heart, Make a Wish and You Rock collections to create a fun rainbow of colored banners.  I used a triangle punch to create a bunch of triangles and then glued them all to some cord.  I used a fun pool photo that had lots of blue in it to coordinate with all the bright colors.  I used some white cardstock for my background and gave it some color and texture using some Shimmerz Paints and some modeling paste through a circle stencil.  I folded the tops of each triangle over the cord a little bit to create some dimension and then layered them on the page.


I am just obsessed with how awesome these banners turned out!  I love how they look overlapped like this.  I went through all the stickers and chipboard pieces from all the collections and chose a few that matched each color.  I stuck them to the banners for some extra detail.  The tone-on-tone look is so pretty.  And the modeling paste showing through turned out really nice :)


To the left of the photo, I tucked in a beautiful ombre pink and white vellum heart from Make a Wish as well as some tangled thread.  This cluster of embellishments is from Hello Sunshine.  I went simple with the title and used some of the patterned alpha stickers from Make a Wish.


I added the modeling paste to the background for some added interest and texture.  Since it’s white, it sort of blends in and just creates a subtle statement.  I also added a bit of yellow thread here.


I added color coordinated stickers and chipboard on each banner.  This piece here is from Wild at Heart, and the sticker is from Make a Wish.  It’s just amazing at how pieces from each collection match so well together.


Here you can see the dimension from the banners.  They turned out really great!  I tucked my photo under the top banner and added some embellishments on and around it.  I used a fun sun die cut from Hello Sunshine as well as an Accessory Sticker and a Puffy Sticker.


I hope this inspires you in some way!  It was a lot of fun to put together, and you can't go wrong with a rainbow color scheme.  I do have a process video, so check it out if you'd like...


Thank you so much for watching!  I hope you have a great week :)

Friday, August 25, 2017

Vicious Attack Cat / Thermoweb

Hello, friends! It's Friday...yay!!   Today I’m sharing a fun layout for Thermoweb.  We celebrated our pets this week over on the blog.  I used some of the Gina K. Designs Foil Mates and Gina K. Designs Fancy Foils to create some fun circles.  I love creating fun mixed media backgrounds to showcase my photos, and circles are such a fun design element.  I added a fun circle die cut to my white cardstock background first and then added some clear gesso to prime the page.  I used some blue and green ink sprays with some plastic packaging to create those watercolor splotches.


To create a foiled effect on the Foil Mates, you do need a laminator.  You simply place the foil on top of the Foil Mate, place them on the inside some parchment paper and then feed it through the laminator.  When you peel away the foil, you’re left with a gorgeous page of shiny circles!  I loved how the actual foil looked after I pulled it off, so I cut circles from that and added them to the page, too.  I love how this foil turned out.  The photos don’t do it justice.  When it hits the light it just shines!  It’s super easy to machine stitch through them to add some extra silver shine.  I used some papers from older American Crafts and Studio Calico lines.


I created a fun cluster over to the right with patterned paper, stickers, a flair button and more of the foiled circles.


I tucked in more foiled circles at the top of the page.  I mixed and matched my title using some older silver glitter Thickers, some Crate Paper Oasis alpha stamps, and some older dark grey Studio Calico alpha stickers.  You can really see the beautiful shine on the Foil Mate here.


You can see how different the foil looks in different lights.  That is the beauty of it…it changes from every angle.  I really love how this color scheme turned out.


Here’s a close-up of the title area and the top Foil-Mate circle.  Again…gorgeous shine!


I tucked in a doily die cut here at the bottom and then added some journaling down at the bottom.


I hope this inspires you to find fun and unique ways to use the Foil Mates and Fancy Foils.  They are super fun and the results are amazing.  Be sure to check out my process video to see how this all came together.


Thanks so much for stopping by, and have yourself a great weekend!

Thursday, August 24, 2017

Altenew August 2017 Release Blog Hop Day 2 + Giveaway


Hello friends!  Happy Thursday :)  I'm so excited to be participating in the Altenew August 2017 Release Blog Hop Day 2 + Giveaway event!  You can start the Blog Hop over on the Altenew Blog.  You should have arrived here from Lydia Evans' Blog.

To celebrate this release, Altenew is giving away a $50 gift certificate to THREE lucky winners! Please leave a comment on the Altenew Scrapbook Blog by Thursday, August 31st at 11:59pm EDT for a chance to win. The winners will be announced on the Altenew Scrapbook Blog on Saturday, September 2nd. 

Here is the Blog Hop order:


 I received a few awesome goodies to play with for my layout, and here they are:


Here's my layout.  I also used the gorgeous Altenew Reflections Kit.  I am swooning over all these amazing colors!  They're so rich and beautiful.  I used this pretty patterned paper that already had a floral watercolor effect on it.  I used some blue spray ink to add another pop of color to the background.  I didn't feel like it needed a lot more since it's gorgeous as it is.  I cut some of the Rose Filament pieces on white cardstock using my Cuttlebug.  I sprayed some of them blue and tucked them under my photo strip.  I used a few ink colors and stamped a few sentiments from the Circle Sentiments Stamp set and used them around the page as embellishments.


I used this really large and colorful chipboard flower as an embellishment here and tucked the die cut roses under it along with some tangled thread.  I cut out the circle stamp here and glued it right on top of the photo.  I also added a wood veneer button over on the right.


My title stickers are also part of the kit.  Over on the left, I created a cluster.  I fussy cut a few flower clusters from patterned paper and layered in a few more of the Rose Filament Die Cuts.  I stamped "This" and tucked it in at the top.


I love all this dimension!  When I sprayed the floral die cuts, the leaves curled up and created instant depth.  I tucked in another floral cluster and some thread.


I'm so glad I used black & white photos because they look so striking up against all the rich and bright colors!  The photos are from our living room at night on my iPhone, so they're kind of grainy.  But I didn't care because I love the memory of what was happening.  Sometimes you don't need perfect photos to create a great page :)


Here's one more close-up of the top area.  I added in another stamped circle and added some black ink splatters.


I hope you gained some inspiration from this! And I hope you hop along to the next designer...Dana Gong.  Don't forget to leave a comment over on the Altenew Scrapbook Blog for your chance to win!!

Thanks so much for stopping by, and have a great day!

Tuesday, August 22, 2017

Everyday Cuddle Fest / Paige Evans DT

Hey, friends!  I'm back today to share my newest layout for the Paige Evans Design Team.  This week we are focusing on the beautiful Turn the Page Washi Tape Book. This collection is just stunning and the Washi Tape is so colorful and versatile. I decided to create a circle design. I adhered several strips of the washi to a scrap piece of white packaging. I used a few different sized circle punches to create the circles. I used paper Paper 18 as my background - the gradient pink is so pretty! I used some white gesso to create even more of a white-to-pink gradient and then used some Shimmerz sprays to add watercolor splashes. I layered all the circles under and around my two photos which are of me and my sweet girls doing one of our favorite things… couch cuddles!


One of my favorite strips from the Washi Tape Book is this gorgeous row of gold flowers! I cut it into pieces and used it in a few spots around the page. I used a piece from the Ephemera Die Cuts under the bottom photo and a Journaling Spot under the top photo. I added dimension with some adhesive foam. The small “happy” tag is from the Sticker Book.


The punched washi circles turned out so well and the colors are just fantastic. I added a bit of machine stitching through some of the circles with metallic gold thread. Then I cut out a fun speech bubble from Paper 21. I also added in a yellow scalloped circle from the Journaling Spots and that fun “magical” arrow from the Ephemera Die Cuts. I think all the bright colors really stand out against the black & white photos.


I created a little title cluster to the bottom left. I combined the “Everyday” Ephemera Die Cut with some of the small alpha stickers from the Sticker Book. I tucked it all in and around the circles and then finished off the area with a few butterflies from the Chipboard Stickers.


I really love how all these fun colors look together.  I love how layering all these circles created such fun texture and dimension, and the stitching adds even more.


I just love all the rose gold mixed in with everything.  It adds such a fun pop of shine, and I think it goes with allll those bright colors so well.  I did add some adhesive foam behind my photos for some extra height.


These arrows are the cutest, and this one worked perfectly right here.  You can see how just by layering you get some awesome shadowing and depth.

asdf

I honestly can’t get enough of this collection! It’s truly beautiful and so much fun to play with. I hope this inspires you in some way! I have a process video here if you’d like to check it out:


Thanks so much for stopping by, and have a fantastic Tuesday!