Wednesday, December 19, 2018

You Better Not Cry (or Pout) / Shimmerz Education Team

Hey, friends!  I'm back today with a fun Christmas layout for the Shimmerz Education Team using lots of Shimmerz Paints.  As soon as these pictures were taken a few weeks ago, I knew right away what my title would be for this layout :)  My daughter had a random meltdown at the Christmas Tree lot, and there were lots of sad faces.  I wanted my title to be big, so I made it using a cut file.  These letters are from the Out of Line Alpha cut file from The Cut Shoppe.  I cut them on white cardstock and backed them with papers from a few Bella Blvd lines...Santa Stops Here & Holly Jolly Christmas.  I used those colors as inspiration for my Shimmerz selections.

I used a patterned paper background and coated the majority of it with white gesso.  This fades out some of the pattern and creates a white space to work on.  I used Vibez Blue Jeans to match the colors in the photo.  I also used Spritz Cotton Candy, Vibez Jeni B Bleu, Creameez Ride the Tide and Shimmerz Christmas Cheer.  I used the packaging technique and a brush to apply the colors.


I really love how these colors look together.  It's fun to use non-traditional colors on a Christmas page.  I used a brush to add some Blue Jeans to the blue papers in the letters since that color wasn't in the papers.  I arranged the title where I wanted it, glued it down and machine stitched through each line with gold thread.  I LOVE the glittery shimmer from the Christmas Cheer!


I fussy cut some tiny trees from a patterned paper and created a little forest in this open space.  I created some ground for them with more stitching.  Here you can see the faded dots from the background through the color but they are very subtle.


This Spritz Cotton Candy pink is one of my favorites!  I love how it looks with the red here.  And again, that gold shimmer!


I always say my backgrounds are a hot mess during the making process, but once everything is situated on top of it....the whole thing changes.  I love how the white in the letters pops against all the background color.  To make the letters stand out a bit more, I lightly traced around them with a gold pen.


I added a few Bella Blvd stickers that were a bit sarcastic for the photos...haha :D


I fussy cut this tree from patterned paper, and this cute little Santa is actually a sticker.  I stuck it to some paper and then fussy cut it out.


Here are a few more close-ups...


I really had a great time putting this together!  I hope it gives you some fun ideas to try.  Do you ever use your patterned papers as a guide for choosing your Shimmerz colors?  It's fun to build a color palette that way :)

Here's a process video showing how I created this if you're interested:


Thanks so much for stopping by, and have a great week!


Supplies Used:


Monday, December 17, 2018

Colorful Christmas / Paige Evans DT

Happy Monday, friends!  I have a new Christmas layout to share for the Paige Evans Design Team.  Have you made any holiday layouts yet with the Whimsical collection? I love the challenge of using non-holiday products for a Christmas project. Last year we had a rainbow of colorful goodies under our tree and this collection was perfect to document that photo. I used Paige’s Christmas Tree Background cut file and cut out lots of tiny trees using multiple Whimsical patterned papers. I wanted to mimic all the bright colors in the photo and also create a modified landscape with little hills of trees. I drew some wavy lines and then glued down trees on them. I machine stitched under the trees with green thread.


I applied clear gesso to the background first and then used a few green spray inks to create a watercolor effect behind where the photo would go. I also added a bit of soft blue inks and then brought in several other coordinating colors for splatters. Later I decided to add a bit more green under each row of trees to create a grass effect and a bit of soft blue for a sky. I took it a step further and added snow by splattering some watered down white acrylic paint. I used some of the spare bits of patterned paper from the cut file as layers under the photo and used Puffy Stickers and Rub-Ons in several places.


I just had to use this tag from the Stickers because it reminded me of a gift tag. I also added in more Stickers as well as some Chipboard Stickers and more Puffy Stickers. I also wanted a bit more of a blue pop around the photos so I tucked in tangled thread.


I really love the effect of the white paint splatters for making "snow."  It's so easy, fast and it dries very white.


Do you machine stitch or hand stitch on your layouts?  I love the effect of the stitching here under the trees.  It gives them some "ground" to sit on.  I also love how it emphasizes the curves and allows me to curve the sentiments under it.


All of these ink splatters remind me of Christmas lights :)


Here are a few more close-ups of all the colorful trees :)


I even curved my journaling...I love how it turned out.


I knew from the start what my title would be and the colorful Foam Mini Thickers were perfect. I curved the title along the wavy hills in rainbow colors. I didn’t do a lot more embellishing because I thought the trees mixed with all the colors were enough. Sometimes less is more and since I had so much color on the page and in my photo, I didn’t want to overload the layout.


I hope this inspires you to create a holiday page with the Whimsical collection. I think this is one of my favorite Christmas layouts I’ve ever made and I love thinking outside the box and using all of the colors while still conveying the idea of a Christmas page!

Be sure to check out my process video if you'd like to see this layout in action:


Thank you for stopping by!

Friday, December 14, 2018

Trees / Hip Kit Club

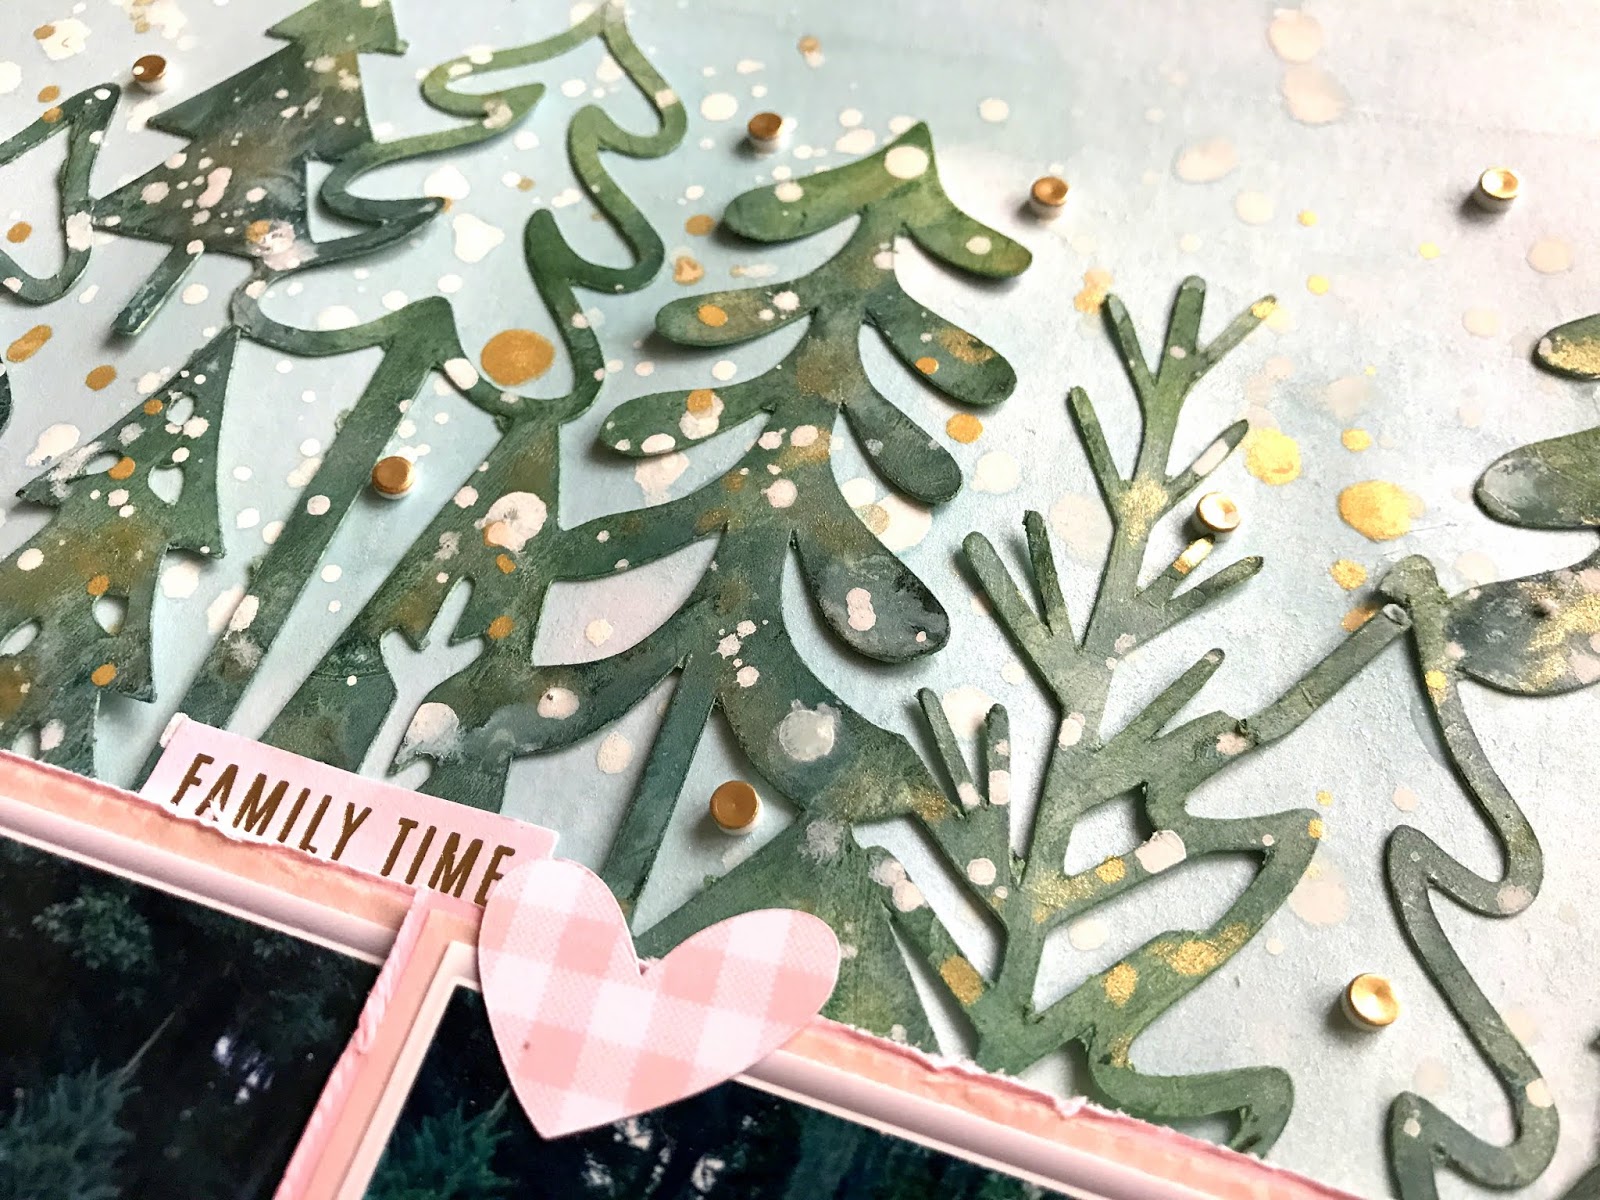
It's Friday...yay!!  Today I'm sharing my newest layout for Hip Kit Club using the 2018 November Hip Kits.  The December Kits have been shipped and are on their way.  I'm stalking the front porch!  My assignment for this week was to use cut files, so I chose this awesome forest of trees.  This is one of the Freebie 12 Days of Giving cut files available over on the Hip Kit website.

I cut the trees on patterned paper but wound up covering up most of the pattern.  I added some white gesso first and then used some green Shimmerz sprays from my stash.  I added the Vibez Deep Blue Sea from the Color Kit, and that mixed with the greens created the perfect dark forest green color.  I wanted to match the deep greens in the photos.  My background was pretty simple to create.  I coated the white cardstock with clear gesso first and then used Shimmerz Creameez Ride the Tide to create a light blue color wash.  I wanted a light sky behind the trees.  I watered down some white acrylic paint to splatter down some snow.  Even though we live in Florida...haha.


I also splattered on some of the Inklingz Miner Miner 49er for a pop of gold shine.  I wanted to go soft with embellishments to contrast against the dark green, so I used some light pink pieces from the kits.  I used a Project Life card behind the photos and added a heart die cut.  I also added some of the small gold dots from the Thickers sheet.


I created a cluster beneath the photos here.  I love these Heidi Swapp stencils...I fussy cut this flower from one.  I wanted some color under it, so I tucked in a few Heidi die cuts as well as some of the blue exclusive acetate leaves and pink & blue thread.  I also tucked in a few exclusive puffy stickers and some Heidi gold foiled stickers.  I went simple with the title and kept it short since there really was no room left for a big one.


Gold shimmer!  I will never get tired of that :)


I tucked in another tree here...this is the cardstock I cut them on, and this one here is one of the negative pieces.


Even though it doesn't snow here, I love creating it on my winter pages.  Plus it's so easy to splatter acrylic paint!


I also added one of the exclusive banner die cuts here on top of the photos as well as some of the gold Thickers.  I love those leaves!


Ahhhhh texture and dimension is the best!


And one more close-up...


I hope this inspires you in some way!  It's a fun challenge to make a Christmas page out of non-Christmas products.  I do have a video here if you're interested...


Thank you for dropping in!  Have a great weekend!

Wednesday, December 12, 2018

Holly Jolly Holiday Hop / Holly Jolly

Hey, friends!  I'm excited to be participating in Ashley Horton's Holly Jolly Holiday Hop over on YouTube.  A bunch of crafters have holiday layouts up on their channels today, and there is so much awesome inspiration.  Ashley is offering this adorable cut file set, and you can find the link to get it on any of the designers' channels.  My video is HERE


Here's my layout :)  I pulled out some older stash from my shelves.  This is the My Mind's Eye Sugar Plum collection.  I used a lot of the washi tape to back the big Holly Jolly cut file.  I also used a few washi tapes from my stash.  I simply applied the tape to some scrap cardstock and cut it to fit behind the letters.  I used some clear gesso and lots of pink and gold Shimmerz on the background.


I love how a messy mixed media background looks behind a cut file like this.  It has such a cool effect when you can see it peeking through.  I added some adhesive foam behind the cut file to create some dimension and added a bit of thread here and there.


I wanted a bit more gold, so I machine stitched around the O here before attaching it to the background.  I also added some glittery gold enamel dots.


This beautiful "believe" piece was part of a print meant for framing, but I fussy cut it out and used it as an embellishment.  I love all the glittery gold!  And the font is awesome.


I fussy cut these trees from one of the MME patterned papers.  I also added a sticker and more patterned papers behind the photos as well as some green thread and enamel stars.


I love all this dimension!  I added a chipboard piece down at the bottom and then wrote a bit of journaling in gold pen.


More trees, thread, stickers and stars on this side :)


Look at this kid's face...haha!  She is the silliest little thing.  She makes me laugh with her goofiness!  I added a cute chipboard piece here between the photos and added some thread at the top.


Here are a few more close-ups...I always take too many :)


I really had a great time making this...I hope you are inspired!  I hope you use this awesome cut file on your next holiday page.  Be sure to watch my video here, and then hop around and watch all the videos.  I have all the links listed in the description box below my video on my channel.


Thanks so much for stopping by, and have a wonderful day!

Friday, December 7, 2018

Happy For Christmas / Hip Kit Club

Happy Friday, friends!  It's the weekend...yay!  I'm back today with a non-traditional Christmas layout for Hip Kit Club using the 2018 November Hip Kits.  I like using pinks and golds for the holidays, and so that is where I began with this page.  I fussy cut some of the large flowers from one of the Heidi Swapp patterned papers in the Main Kit and used some of the Shimmerz from the Color Kit to paint them.  I used the Good Ol’ Summertime and Sunflower and added in a few other colors.  I also painted some of the leaves using some green inks from my stash.  My background went through some changes.  At first I tore some patterned paper strips and glued them down.  I covered it all with white gesso and then decided I didn’t really like it.  So I pulled up the paper strips, and they tore.  It left a really cool texture on the background, so I went with it and added more of the Shimmerz to it.


The fussy cut flowers turned out so shimmery, and I love how the edges curled up when they dried.  I tucked my photo in between the flowers, overlapping the leaves on top of it.  I also tucked in a few of the wood veneer leaves and pink acetate leaves.  I used an exclusive puffy sticker here as well as some of the acetate leaf stems.  This cute Christmas tree cut file is a FREEBIE!  I cut a few of them on vellum and layered them in.


Here you can see some of the fun background texture that I created by mistake…haha.  I used one of the large gold foam Thickers for my title under the photo.


I also used a few of the black clear exclusive stickers in a few places on the layout.  I really love how the dimension turned out…so many details popping off the page in different places.


Here are a few more close-ups of the details…


I finished the title by adding in some of the small exclusive puffy alpha stickers and then wrote my journaling in metallic gold.


I did add one of the Jen Hadfield dimensional stickers here on top of the photo.


Do you enjoy making non-traditional Christmas layouts?  Or do you prefer using red and greens?  I like to do both, honestly.  This one was fun to make, and I hope it inspires you!  I have a process here if you’d like to check it out:


Thanks so much for stopping by, and have a fabulous weekend!