Thursday, September 27, 2018

Amazing / Hip Kit Club

Happy Thursday, friends!  I'm back today to share my newest layout for Hip Kit Club.  I used the 2018 September Hip Kits as well as one of the exclusive cut files.  I was first inspired by the beautiful floral clusters on one of the Pinkfresh Studio papers.  I had to fussy cut them right away and arrange them on the sides of the cut file.  I knew I wanted to tuck my photo into the big A and embellish around it.  Using a large cut file and big embellishments like this makes a layout come together quickly because it limits where you can put things.


I have a ton of close-ups here :)  The Pinkfresh Studio papers made this layout beautiful all by themselves.  I layered in some of the matching chipboard pieces as well as some dark blue tangled thread.  I also fussy cut some of the gold foiled leaves from the Maggie Holmes specialty vellum in the Paper Kit.


I also used some of the Pink Paislee Auburn Lane Rub-Ons here and there...they matched perfectly.  I also used some of the PFS Enamel Dots and Phrase Stickers.


I have a huge crush on vellum...especially shapes like leaves on this Maggie Holmes vellum.  They add just the right amount of detail and they tuck in under things very well.  Here I added in some pink thread, a few Phrase Stickers and some Die Cut Ephemera (all from Pinkfresh Studio).


Here I used another rub-on and sticker, and I added my journaling underneath the cut file using a gold metallic pen.


Here are a few more close-ups of all the details :)


About the background:  I did NOT use any gesso...I know, shocker.  I used a brayer to "roll" the color on.  I used some of the thick white smooth cardstock from the Cardstock Kit as my background.  I sprayed some of the Shimmerz sprays from the Color Kit onto some plastic and then rolled the brayer through it.  I just rolled it back and forth across the paper, and it creates a thin layer of color.  My paper didn't warp at all since not a lot of liquid was used.  If I had planned on blending and smudging the colors, I would've used gesso.


I hope this inspires you in some way...it was a ton of fun to create :)  Be sure to check out my process video to see exactly how I put this together.


Thanks so much for stopping by, and I'll see you soon!


Tuesday, September 25, 2018

Her Own Paradise / Paige Evans DT

Hey, friends!  I have a new layout to share for the Paige Evans Design Team.  I decided to dig into some of my favorite papers that I’ve been hoarding from Paige’s Fancy Free collection. This was her very first collection with Pink Paislee and it’s still one of my faves. I began with Paige’s Poppies cut file and decided to go with a tropical feel. Sometimes I just make it work, and that’s what I did here. I absolutely love Fancy Free Paper 10.  The colors and abstract design is just gorgeous and I used it to back the three large flowers. I used Paper 12, which is an aqua color, to back the leaves. I spritzed a bit of green ink spray on it to get a little bit of a color variation. I added a nice pop of blue with my pool photo.


I love the tropical feel of these flowers. I added a Fancy Free Button to the center of each one with a bit of embroidery thread tied through them. I tucked my photo under the flowers and added even more flowers around the outer edge of the cut file. Most of those came from the 30-page Paige Evans #StickerBook. I also fussy cut some of the fun circle phrase pieces from the Fancy Free 6x6 Paper Pad and used those in a few spots.


I used some of the white Pick-Me-Up Mini Thickers for my title and I added some blue ink and a bit of gelato to the bottom to make them pop off the white background. I layered a few of the 30-page #StickerBook stickers under it. I fussy cut a few of the gorgeous Fancy Free flowers and added them to the right side of the photo along with some leaves and a Fancy Free Tag. Those flowers are from Paper 07.


I added clear gesso to my white cardstock background first, and then came in with matching colors of ink spray.  I used the packaging technique and added lots of splatters.  I used a few of the acetate pieces from the Fancy Free Ephemera Die Cuts. Here and in a few other spots I added a few Pick-Me-Up Rub-Ons.


I love the detail that the buttons bring to the flowers.  I think they finished them off nicely and added some fun dimension.


Adding foam underneath things like this makes it easier to tuck bits and pieces underneath it.  And it creates some nice shadowing that makes everything just jump off the page.


I wanted a pop of blue here in this area of pink and green, so I added some thread under the light pink flower.  I love what a bit of tangled thread can do :)


One more close-up just because :)


Do you still have any of the Fancy Free collection? It was fun to revisit some of these beautiful papers and play with the embellishments again!


I hope this inspires you in some way. Thanks for stopping by!


Thursday, September 20, 2018

Love This Man / Hip Kit Club

Hey, friends!  I'm back today to share a new layout for Hip Kit Club :)  This is my first page using the 2018 September Hip Kits, and they are really beautiful.  There is a ton of the new Pinkfresh Studio Indigo Hills 2 collection, and I'm really excited that it has a lot of dusty purple in it.  The only thing I used on this page that isn't from that collection is the Vicki Boutin stamps.

I knew I had to fussy cut this beautiful leaf wreath out from patterned paper!  All the papers are in the Main Kit and Paper Kit.  I wound up cutting it in half and sort of overlapping them to create a banner of leaves...even though it's hard to see the the half circle shape.  It created the perfect place to add my photo.


Look at how pretty these leaves are...they look watercolored.  I love the shading and the messy outlining on them.  We received some gorgeous Shimmerz in the Color Kit, and they match perfectly.  The dusty purple color I used is an original Shimmerz Paint and it's called Wisteria Lane.  I also used the Spritz Cotton Candy, which is a baby pink.  I pulled the Inklingz Oakie Bear Blue and Miner Miner 49er from last month's Color Kit as well.


I mixed and matched the title, and all of these pieces are from Pinkfresh Studio.  The "Love" piece is a die cut from the Main Kit, and the others are puffy alpha stickers.  The small ones are in the Project Life Kit.  I created a little cluster under it with some more die cuts, stickers and a puffy sticker.


I layered some tissue paper and exclusive Project Life cards under the photo as well as a gorgeous scalloped die cut frame.  To add more pops of the dark blue, I tucked in some tangled thread from my stash.


I think this leaf wreath would look gorgeous no matter how you used it...it's just so pretty.  Here you can see the leaf stamp I used on the background.  It's from Vicki Boutin, and it's in the Color Kit.  I used a gold ink pad from my stash to stamp it around the page in a few places.


One of my favorite things about using leaves or flowers on a layout is how easy it is to pop the edges up.  I especially love it when I can overlap them onto the edges of my photo like this.  It just creates some very nice dimension and keeps everything from looking flat.


I really love this leaf vine puffy sticker...I almost didn't use it because I wanted to hoard it...haha.  But we all know that hoarding does no good if it's just sitting there in your stash.  At least this way I can actually see it on a page :)


I hope this has inspired you in some way.  You must get your hands on the September Hip Kits if you haven't already...they are gorgeous!  I have a process video here if you're interested:


Thanks so much for stopping by, and have a great day!


Monday, September 17, 2018

Pinkfresh Studio Liquid Watercolor Video Hop / Life With You

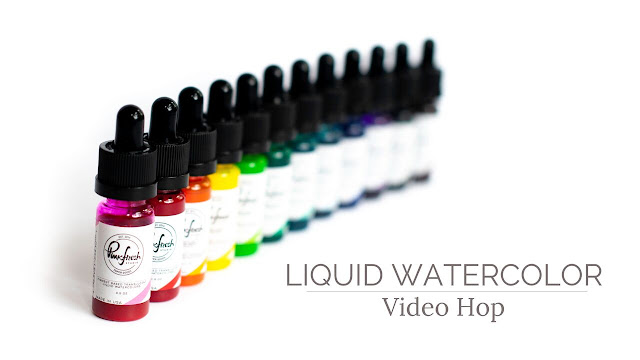
Happy Monday, scrappy friends!  I'm so excited to be part of the Pinkfresh Studio Liquid Watercolor Video Hop today!  This is happening over on YouTube, and there is a long list of wonderful ladies participating.  You can find all the information over on the Pinkfresh Studio Blog and start there. 

Here is the layout I created.  I mixed and matched a few collections here.  I began by using the watercolors to paint some of the flowers you see here.  They are part of a patterned paper from the Simple & Sweet collection.  I painted them and then cut them out.  My background paper is from the Live More collection, and I coated a lot of it with white gesso first.  I used some pink, red and aqua watercolors with some plastic packaging to create some color behind my photo.  I also used the black to add some splatters.

I cut all the circles from another Simple & Sweet patterned paper and arranged them in sort of a vertical design with the flowers.


I love using gesso first because it allows the paint to blend and move around before drying.  I pulled some embellishments from the Simple & Sweet and Be You collections.  I was going for a fun rainbow color scheme all around the page.


I really love how the flowers turned out.  These watercolors are very vibrant, so you really don't need  a lot...just a small drop goes a long way.  I love how the pink and red make a darker pink color.  I decided to write my journaling in this yellow circle since it had lines on it.  I also added a few phrase stickers and machine stitched through them with black thread.


This cute dimensional sticker is from the Let Your Heart Decide collection.  It was perfect for this side of the photo, and I love how it easily overlapped the photo.


I added some yellow puffy alpha stickers on top of my photo and a phrase sticker as part of my title.


More of the same on the top portion of the layout...more circles, flowers and layering.  I tucked in a big LIFE die cut above the photo for the first word in my title, so it will read Life With You is Beautiful.


Here are a few more close-ups of all the layers and pretty watercolors!


I hope this inspires you to give the Pinkfresh Studio Liquid Watercolors a try...they are awesome and very pretty.  If you follow along and watch all of the participants' videos AND leave a comment, you will be eligible to win a $25 Gift Card to Pinkfresh Studio!  That's a fantastic prize!

Here's my video:


And here is the list of designers:

Pinkfresh Studio https://www.youtube.com/channel/UCDB4...
Amanda Baldwin https://www.youtube.com/channel/UCqpN...
Audrey Yeager https://www.youtube.com/user/audreykit1
Carissa Wiley https://www.youtube.com/user/carissaw...
Elsie Robinson https://www.youtube.com/channel/UCtoO...
Erum Tasneem https://www.youtube.com/erumtasneem
Heather Hoffman https://www.youtube.com/channel/UCGnY...
Kathleen Graumuller https://www.youtube.com/channel/UCpRW...
Laura Bassen https://www.youtube.com/user/laurafad...
Lea Lawson https://www.youtube.com/c/LeaLawsonCr...
Missy Whidden https://www.youtube.com/channel/UCU5r...
Paige Evans https://www.youtube.com/user/PaigeTay...
Yana Smakula https://www.youtube.com/user/ZrobySama

Happy Hopping, and good luck!!  Thanks for stopping by, and have a GREAT week!

Friday, September 14, 2018

Gym Shenanigans Mini Album / Paige Evans DT

Hey, friends...it's Friday!! Yeah!!  I have a fun mini album to share today for the Paige Evans Design Team.  I combined my two favorite things into my project for today:  scrapbooking and exercising! I made a fun little mini album using Paige’s Folded Hexagons Mini Album cut file to showcase a few photos of me and my sister exercising (goofing off) at the gym. It’s something fun we love to do together and we always have to document it.


For the cover I used a piece of paper from the Pick-Me-Up collection and made the title using the Pick-Me-Up Chipboard Thickers and Mini Thickers. I smudged some white gesso along the bottom of the letters to make them stand out against the background. I added some gold stitching and a row of yellow star stickers from the 30-page Paige Evans #StickerBook.


I first cut the base of the album on white cardstock using my Silhouette Cameo and then chose several papers from the Pick-Me-Up 12x12 Paper Pad to cut the smaller inside hexagon pieces. I covered a lot of the album with white gesso and added a bit of spray ink to mostly the middle of the album. I machine stitched around most of the hexagons for added texture. I sorted through all the bits and pieces from Pick-Me-Up that had to do with exercise, motivation, and accomplishments and began to work with them. I have three visible photos and three hidden photos.


Here you can see the three hidden photos. I added lots of Pick-Me-Up goodies on the backs on the photos: Ephemera Die CutsRub-Ons, fussy cut women from Paper 09, and lots of stickers from the 30-page #StickerBook. I used some of the Pick-Me-Up Washi Tape Book strips to attach the photos so they’d flip open like a book.


I used lots of the fussy cut women all around the album and the center piece is from the 12x12 Paper Pad. I love that those papers have gold foil on them! I used a few pieces from the cut apart paper because the sentiments were perfect for this.


I have a lot of close-ups of each hexagon here. I treated each one as a mini layout and embellished them all differently.


This folds up very nicely. There are slices on the center hexagon to add a ribbon for a closure and I used some Turn the Page Ribbon.


Since I did add things to make the album a little chunky, some of the hexagon edges didn’t line up perfectly. I just added some watercolor to the edges and I love how the uneven pages look so colorful! That’s what makes it look even more homemade I think. It closes together perfectly with this ribbon.


This was so much fun to make! And it was easy since I had the cut file base to start with. Paige really makes it easy to create a mini album so if you’re hesitant to try one, grab this cut file!

Here's my process video...go check it out!


 Thanks for stopping by and have a great day!