
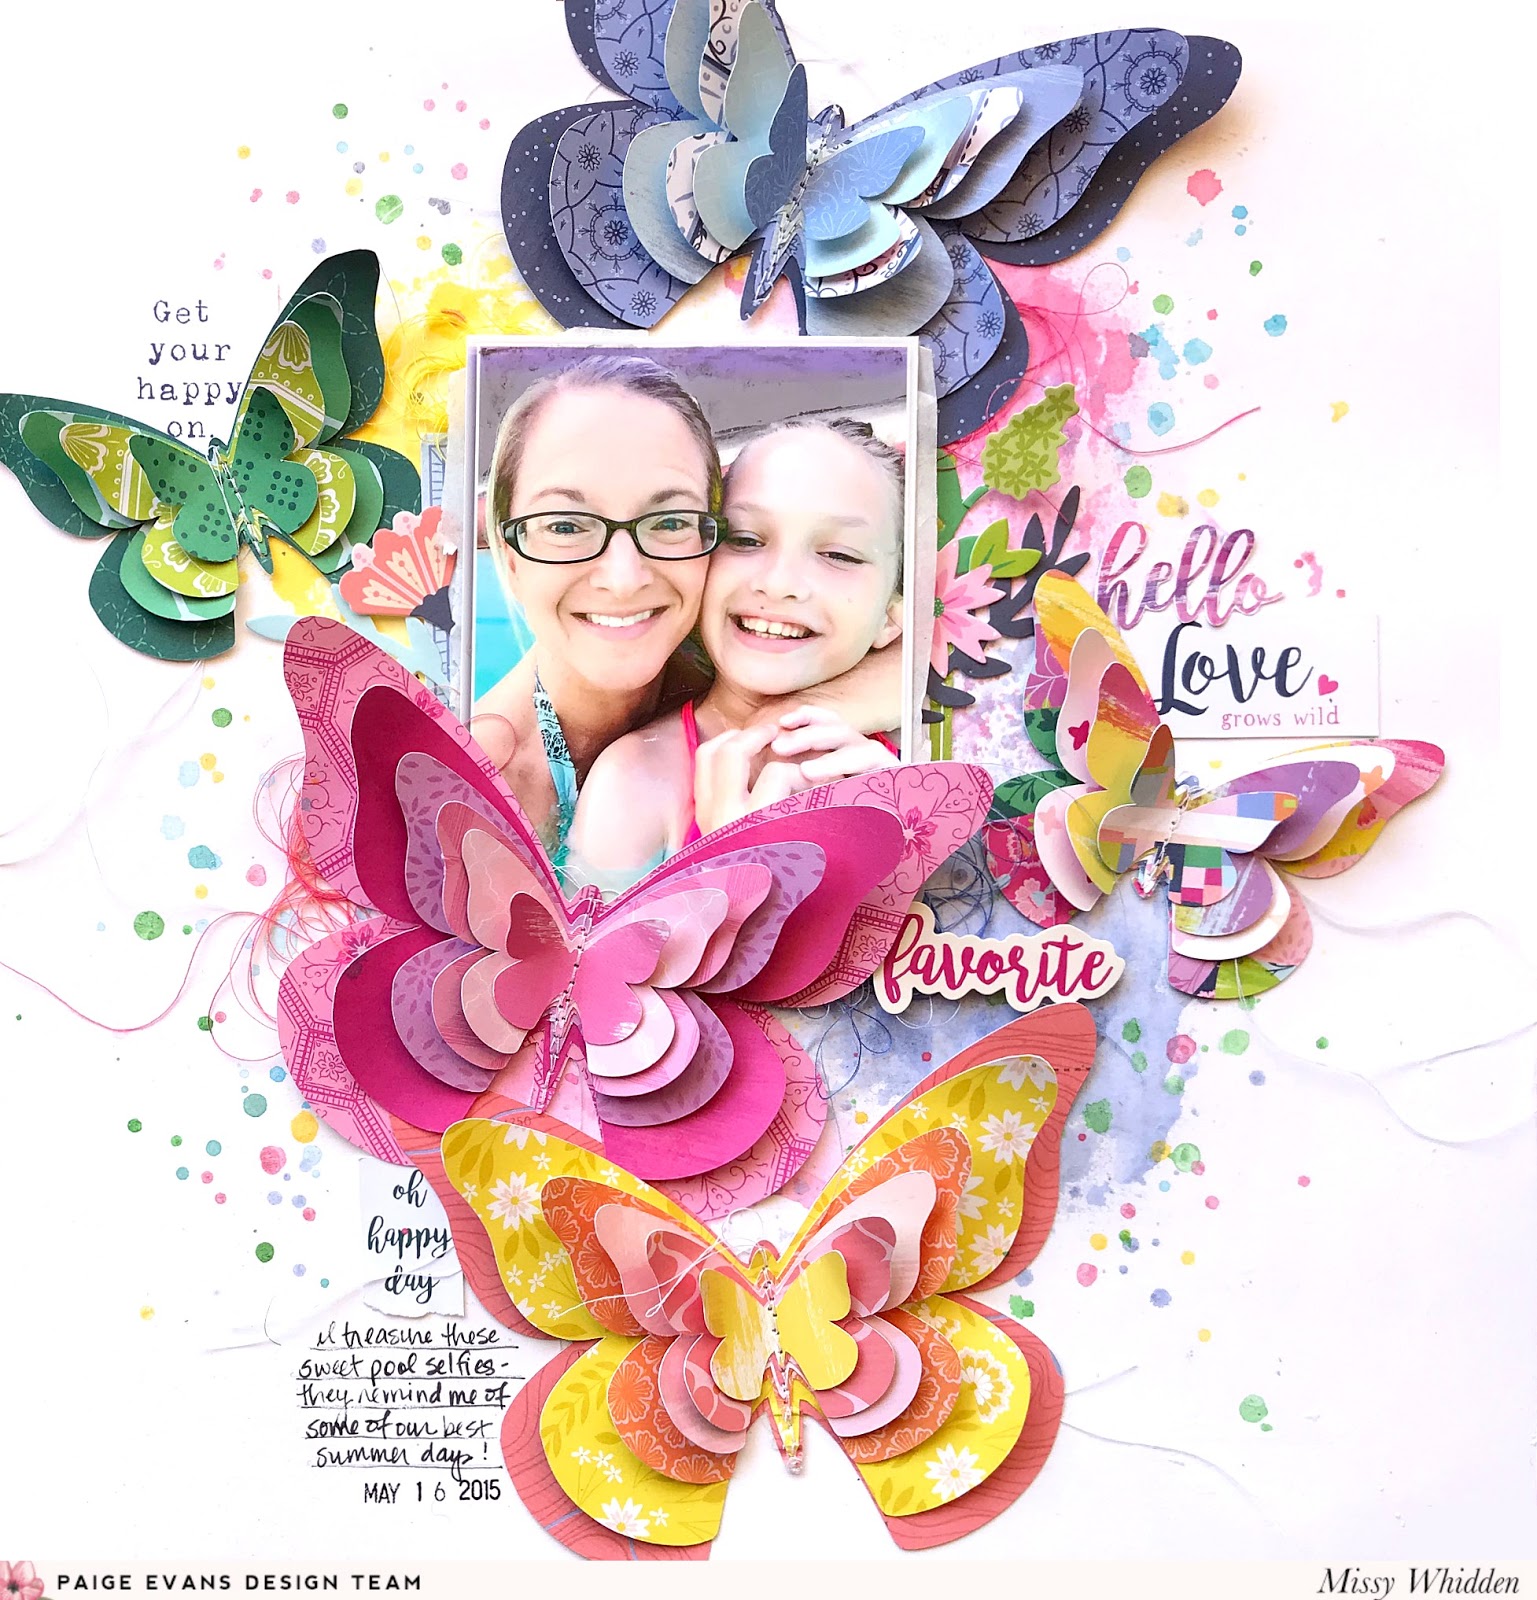
Here you can see how dimensional they are. The wings are easily curled up to give them a realistic look. I used thick white cardstock as my background and used clear gesso on it first. I used some coordinating colors of ink sprays to add some color splotches down. I used the packaging technique to spread the color around behind my photo. I also added lots of splatters. I didn’t want to go too crazy with embellishments since the butterflies took center stage. I used a few phrases from the 2x2 Paper Pads that I cut out and I went simple with the title using one of the Stickers. I also tucked in some tangled thread to add more pops of color and texture around the photo and butterflies.

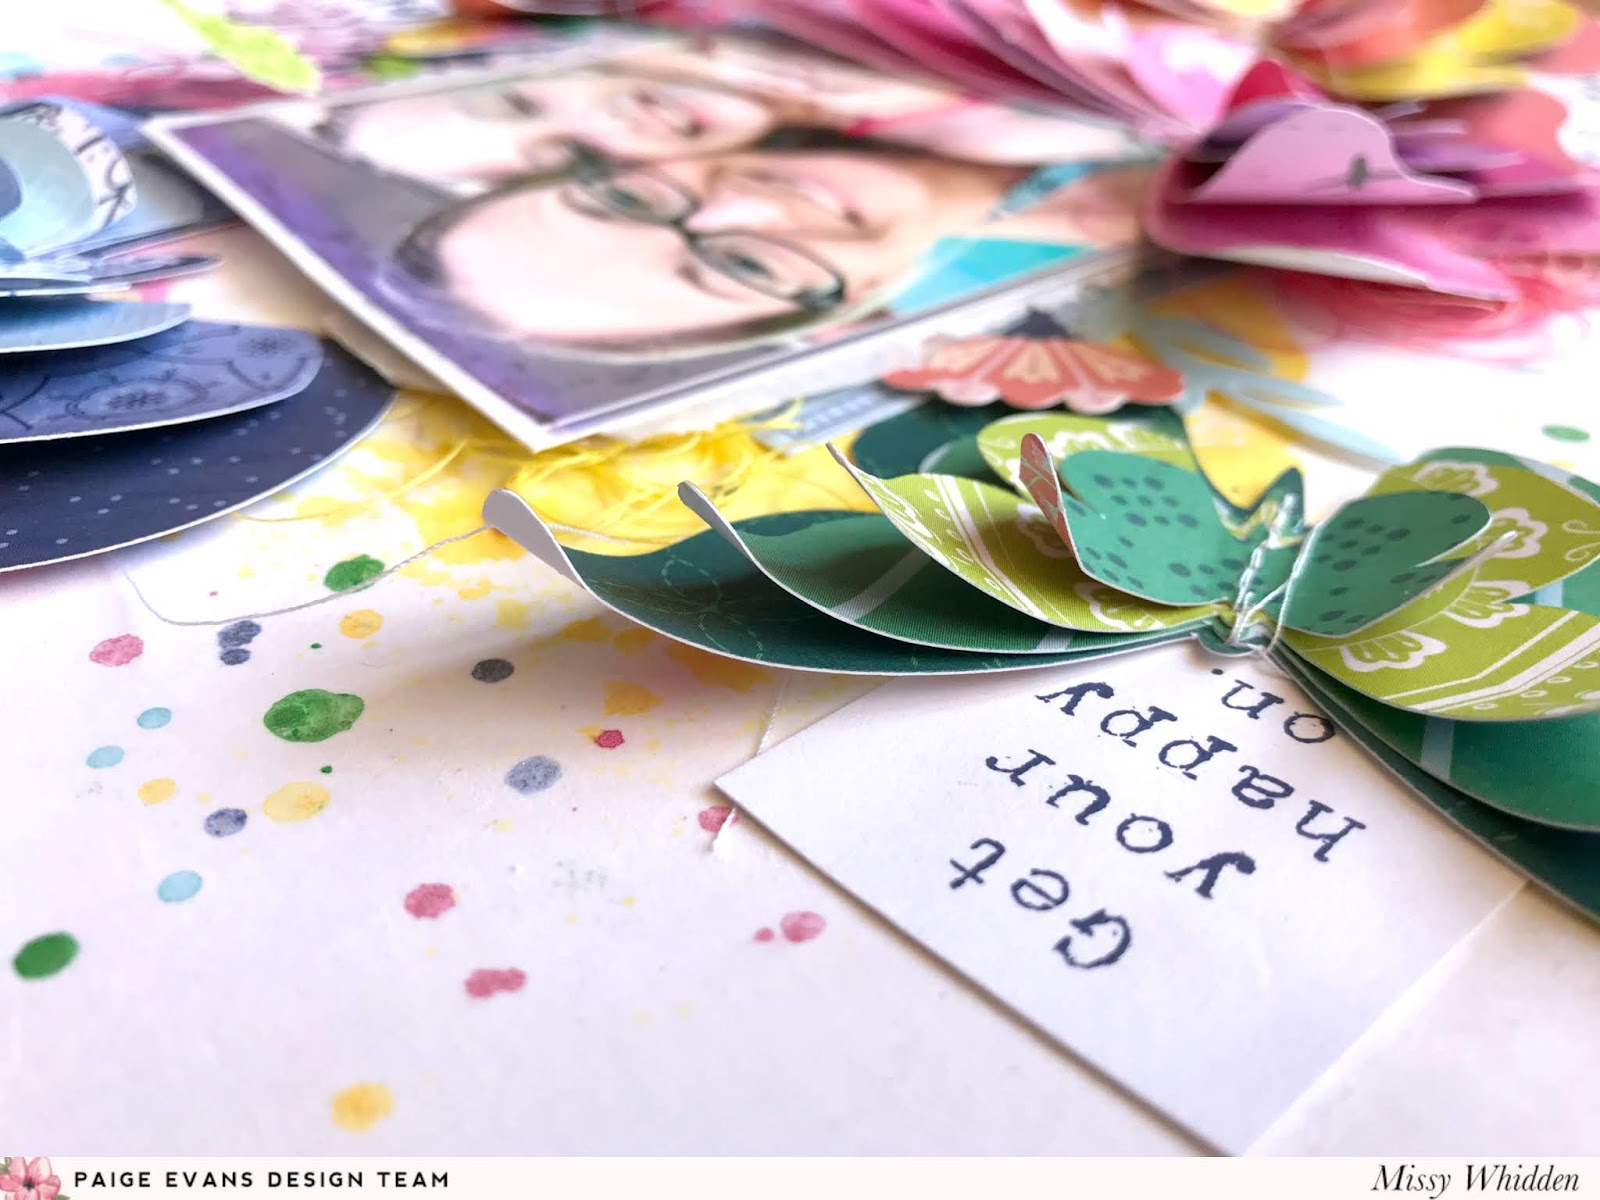
I embellished a little bit around the sides of the photo. Here I used pieces from the Ephemera Die Cuts. I didn’t want to crowd up the white space and have it compete with the butterflies. I also fussy cut the “hello” from Paper 04.

These butterflies were very easy to create. It was fun going through all the patterned papers and deciding which ones to use. They definitely create a huge impact on the page and I love how easy it was to create dimension with them!

I get asked a lot about sewing through papers that I've used glue on. I use the Scotch Tacky Glue, and it dries pretty fast. Once it's dry, I have no problems sewing through it. I would advise against using a tape runner where you want to stitch. That will gum up the needle. I love how these wings rise up off the page! I added a bit of adhesive foam behind my title sticker and tucked in some tangled thread for more texture.

I also get asked a lot if I'm worried about this kind of dimensional layout going into a page protector. Honestly, no, I'm not. Everything gets smushed down anyway, so that is just part of it. I can always pull it out and fluff up the wings if I want :) Here you can see some of the die cuts I tucked under the side of the photo.

I loved pulling some sentiments from the 2x2 Paper Pads here for the background. Remember, you don't have to use the papers "as is." Feel free to trim them up or cut them up...make them work for your layout and space on the layout.

Paper 04 is just full of possible titles! You just have to be patient for a few minutes and cut them out. But it's worth it because they're so pretty!

Okie dokie...here are the last few close-ups. You know I take a lot of them...haha!

I cannot stop going GAGA over these colors! Bravo, Paige, on a stunning collection once more!

I hope this inspires you to give this Layered Butterfly cut file a try. It’s one of my new favorites! I couldn’t wait to make some pretty rainbow butterflies and the Horizon collection is just perfect for that. Be sure to check out my video for even more details!
Thanks so much for stopping by, and I'll see you again soon with more scrappy goodness!

No comments:
Post a Comment