Wednesday, August 29, 2018

Love You So Much / Hip Kit Club

Happy Wednesday, friends!  I have a new Hip Kit Club layout to share today.  I created more of a masculine layout featuring the 2018 August Hip Kits.  There are a lot of pretty blue elements in the kits this month, so I decided to go monochromatic for this and scrap a photo of me and my husband.  I began by fussy cutting some of the large dark blue and white flower clusters from a Maggie Holmes paper in the Main Kit.  I also used one of Audrey’s Geometric Rosettes cut file to create some blue flowers and green leaves.  My idea was for all of these flowers to come bursting out from behind the photo.


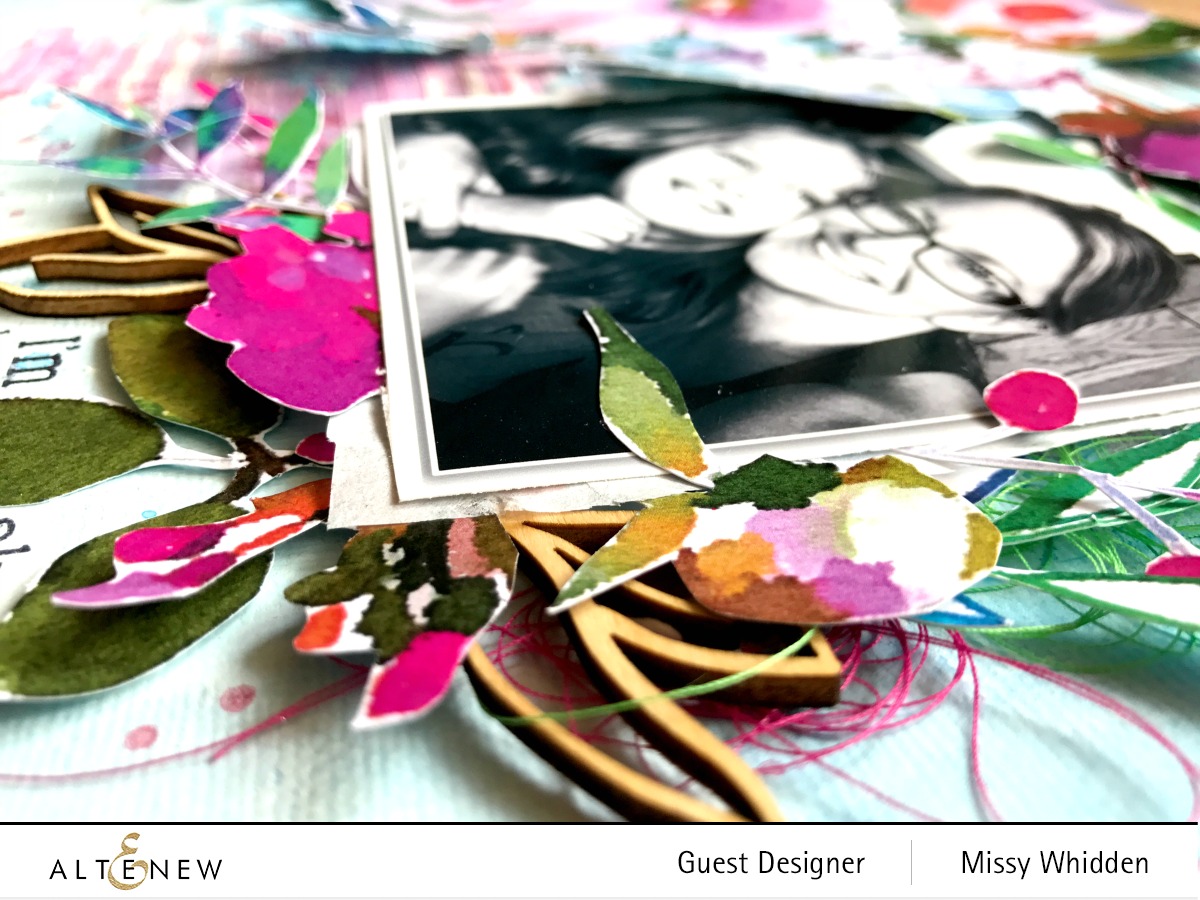
I used the Robin’s Egg cardstock from the Cardstock Kit for the leaves.  I also used one of the Maggie Holmes Willow Lane Pom Pom Frames as a layer behind the photo.  I used some of the Willow Lane Stickers and Gold Clear stickers as well.


I tucked in a Willow Lane Ephemera tag here and added some cord through the circle.  I really love the Willow Lane Fringe.  I layered the light blue piece under the bottom of the photo.


I went subtle on the background since the flowers were pretty busy.  I covered my white cardstock with clear gesso first and then used everything from the Color Kit.  I sprayed the Well Blue Me Down Shimmerz on top of the stencil and then flipped it over and used it as a stamp.  It’s more of a messy look, which I love.  I also painted on some of the Oakie Bear Blue Inklingz and stamped that.  I finished off the background with some Miner Miner 49er Inklingz, which I splattered and painted on with a brush.  I did tuck in some Amy Tangerine puffy heart stickers, some Willow Lane black and gold clear stickers and some of the metallic gold star trim from the Project Life Kit.


I love all of these fun layers!  They make it easy to create awesome texture and dimension.  I went simple with my title and combined some of the Willow Lane stickers with the black foam Thickers.


Here’s another close-up of the background work.  I did add some machine stitching for more detail with gold metallic thread.


And a few more close-ups of all the fun details!  I tore a bit of a Project Life card here at the bottom and added a few Willow Lane puffy stickers to finish it off.


I hope this inspires you to go monochromatic on your next layout.  It’s fun to pull out all the pieces of one color and work with them only.  It limits your choices so everything in the kit isn’t so overwhelming.  Everything is so pretty, and this just helps you to narrow things down.  Be sure to check out my process video here:


Thanks so much for stopping by!  Have a fabulous day :)

Friday, August 24, 2018

We Got That Zest / Paige Evans DT

Hey friends, it's FRIDAY! Yesssss!  I have a new layout to share for the Paige Evans Design Team.  As soon as I saw Paige’s Lemon Slice cut file, an idea popped into my head and I just had to get started on a layout. Actually, a title to go with this cut file sort of happened first and I went with it. I scrapped this fun photo of my mom, my sister, and me and went with lots of fun colors and flowers. I cut the lemon from Pick-Me-Up Paper 07 and backed most of it with Oh My Heart Paper 06. I backed the rest of it with vellum. I really liked the colors and how it just jazzed up the lemon. I embellished with lots of bits and pieces from both of these collections.


To add some texture to the lemon, I machine stitched through the vellum parts and around the curved edge. I didn’t want to overload the lemon with lots of extra embellishments, but I did use some Pick-Me-Up Chipboard Stickers and Oh My Heart Chipboard Stickers around the bottom area of the photo. I also added adhesive foam under the lemon for more dimension.


I fussy cut several flowers from Oh My Heart Paper 13 as well as a cute lemon from Pick-Me-Up Paper 07. I love all the pinks, yellows, and oranges together.


I combined some of the Pick-Me-Up Mini Thickers with the Oh My Heart Thickers to create my title. I added a bit of color to the white alphas by smudging some periwinkle Distress Oxide on them - that helps them stand off the page a bit more. I topped it off with a cute lemon sticker from the Pick-Me-Up Puffy Stickers. I also tucked in a few floral stickers from the 30-page Paige Evans #StickerBook.


Here’s one more close-up of the background work. I used clear gesso first and then used Vicki Boutin Art Crayons and some Shimmerz to create this watercolor look. I used the crayons on plastic packaging first and then smudged the color onto the background with my fingers.


I decided to write my journaling up near the top cluster instead of along the bottom.  There was just more room up there, and I didn't want to have it curve around the bottom of the lemon.


I love the challenge of going through all of Paige's collections and mixing and matching different pieces together.  You never really know what may coordinate until you pull it all out and start playing!  I love how these flowers from different lines look together.


I hadn't planned on backing this lemon with floral paper.  I was going to do it all yellow, but this paper was just on top of a stack and I tried it and loved it!  Sometimes great ideas are all on accident...haha.


I really need an endless supply of these white Mini Thickers.  They are so  perfect for almost every layout, and I love that you can add color very easily.


One more close-up of all the gorgeous flowers and colors!


I had a blast making this...I hope you are inspired in some way!  Be sure to watch my process video here if you want to see how this all came together.


Thanks so much for visiting me today...see you again soon!  Have a great weekend :)


Thursday, August 23, 2018

I'm Always Here For You / Altenew Guest Designer

Hello again, friends!  I am thrilled to be one of the Guest Designer at Altenew this month!  This is the second layout I created using some beautiful Altenew products.  A huge thank you to the Altenew Team for inviting me!


There are so many gorgeous florals in the Our Family collection, and I couldn’t resist starting my second layout with this giant flower cluster.  I fussy it from a patterned paper and ran it off the upper left corner of the page.  I used a light blue sheet of cardstock from my stash as my base.  There are so many bold colors in the flowers, and I thought the light blue really made everything pop.  I used the Classy Stripes Stencil again with modeling paste.  It is officially my new favorite stencil!  I used some of the Northern Lights 6 Mini Cube Inks on the background.  I stamped them onto some plastic packaging and watered them down to add some splatters.  I did bring in some distress oxides and gelatos from my stash to add some darker tones.


Look how gorgeous this is!  I honestly stared at it for a quite a while before cutting it out.  I used a black and white photo to tuck under some of the leaves over on the right side.  I just adore all of these beautiful colors.  And the stripes on the background really give the page some nice texture.


Again, I went crazy with fussy cutting!  I pulled out more floral and leaf papers from Our Family and cut bits and pieces out to tuck in here and there.  I also used some of the wood veneer leaves from the collection.  One of my favorite things to add is tangled up thread.  It gives pops of color as well as texture.


When I added ink to the background, I tried to make sure the colors weren’t the same.  For example, I added blue on the background here since there wasn’t blue in the flowers here.  I like to spread color around the page.


These leaves and flowers are great for dimensional projects.  The key is to not glue everything down completely flat.  Leave some of it unglued so you can bend the edges up and let it create some depth.


Here are a few more close-ups of all the beautiful colors and textures...


I love those wood veneer leaves!


These layout were so much fun to make!  The products made them come together rather quickly, and that’s saying something for me since I’m a slow scrapper.  I hope you enjoyed these and gained some inspiration from them!  Thanks again to the Altenew team for having me this month!

Here's my process video if you'd like to check it out:


Thanks so much for stopping by!!  Have a great day, and I'll be back again tomorrow :)