Friday, October 31, 2014

Happy Halloween with My Mind's Eye!

I hope you're having a great Halloween!  I love seeing everyone's kids dressed up on Facebook...such fun and creative costumes out there!  I am up on the My Mind's Eye blog today with two Halloween layouts.  I couldn't resist making a few pages with the new Frightful collection.  I love that it's classic Halloween patterns and colors.

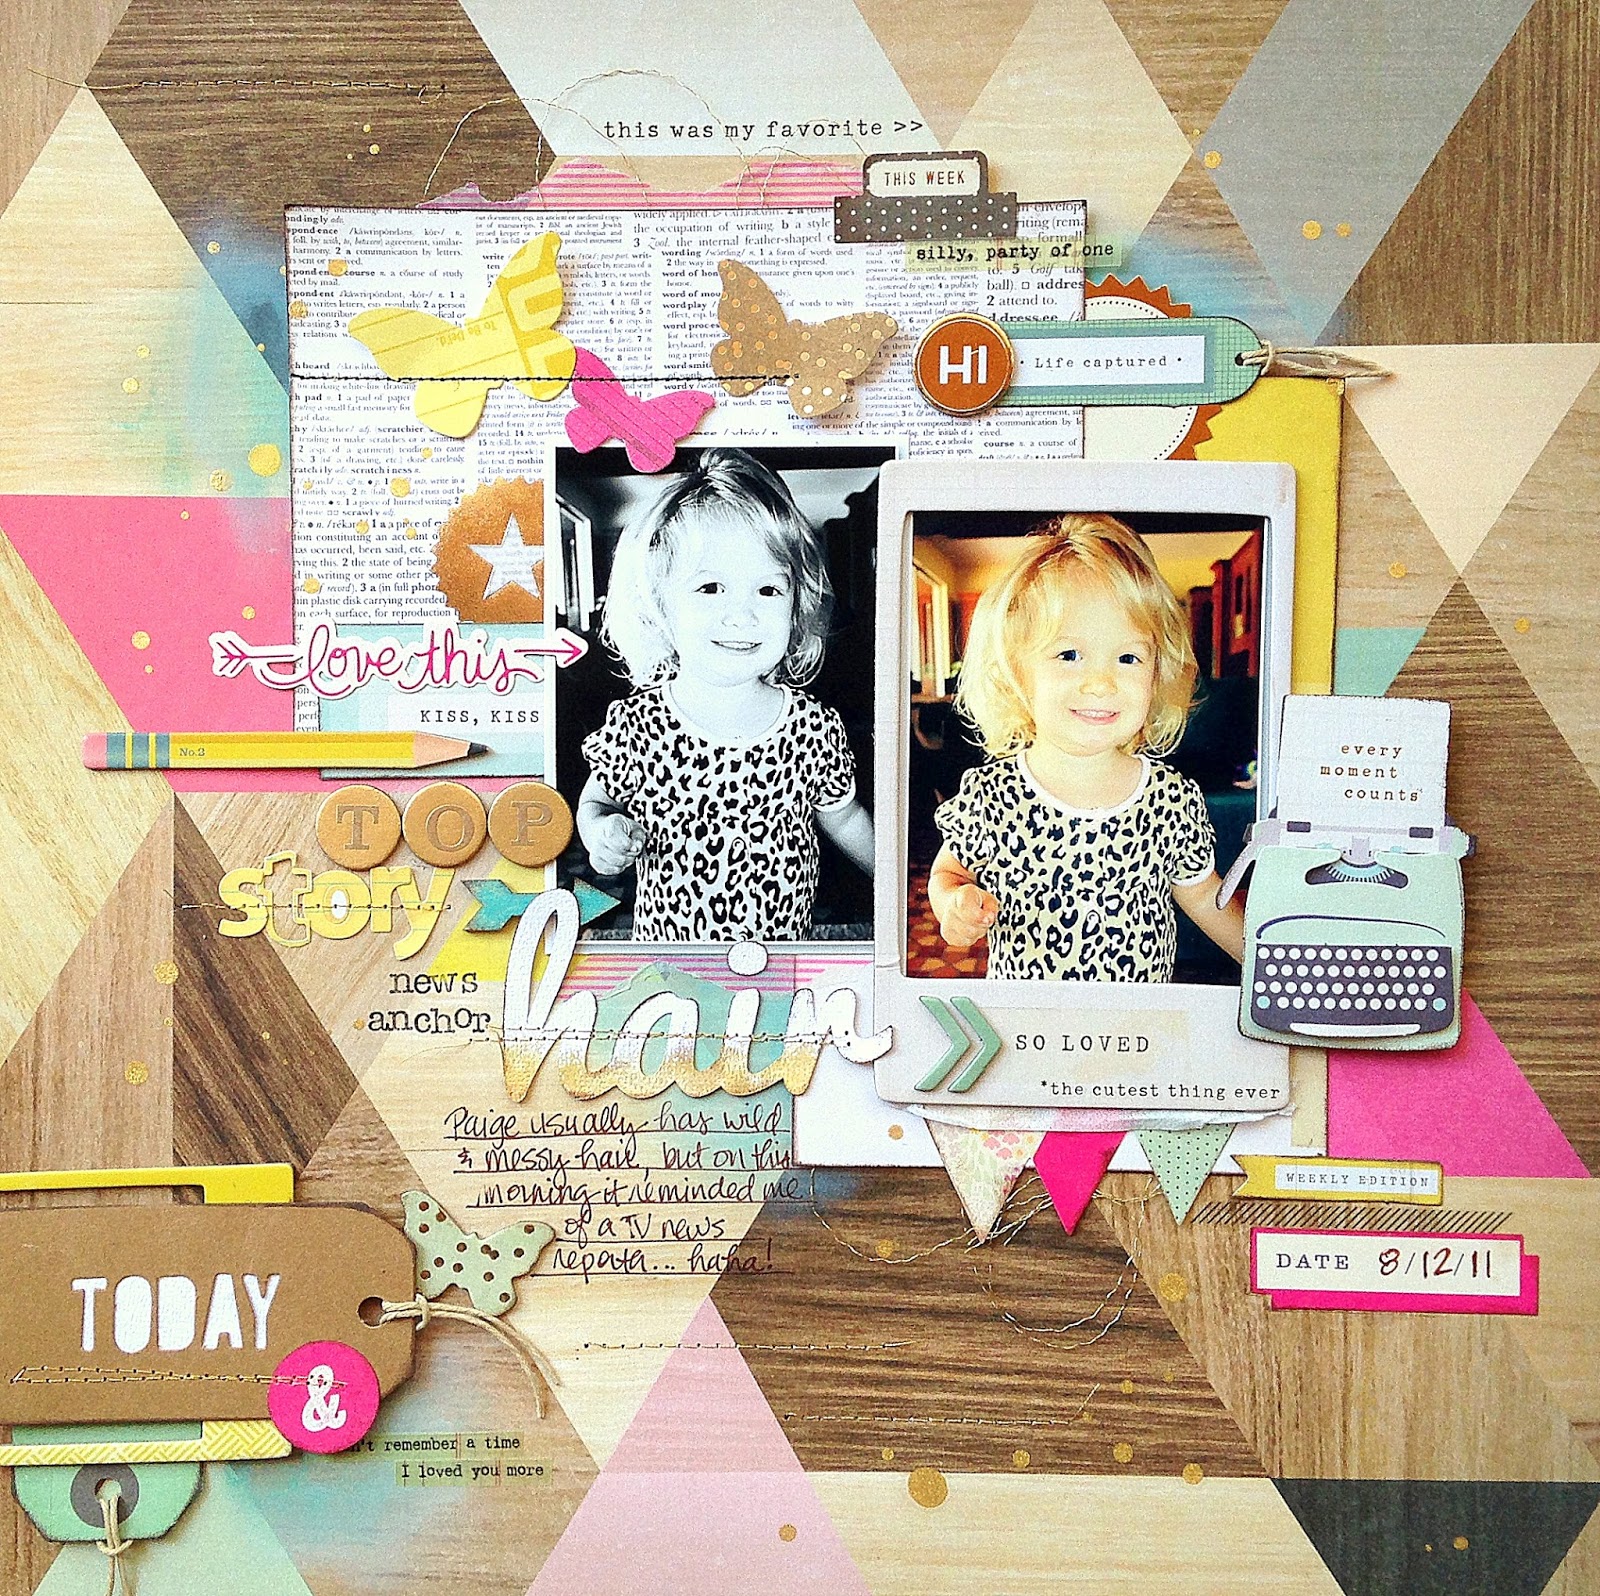
This first page focuses on photos from my oldest daughter at her school's Fall Festival a few years ago.  I used a square punch to create lots of patterned paper squares.  I stitched around the edges of most of them and then just layered them in a staggered fashion behind my photos.  I only needed a few embellishments to finish it off, and I added some messy stitching around the edges.


I love this fun banner.  I anchored it with two black enamel dots and layered my die cut title above it.  Here you can also see some of the modeling paste I used on the background.


These little squares layered together really nicely.  Stitching adds so much texture and fun to layouts...I can't get enough of my machine!


This collection has enamel bats!  Yes!  Super adorable.  The chipboard pieces are also really cute, as well as the embellishment stickers.  And.....more stitching :)


My second layout showcases my other little stinker.  She was Wonder Woman a few years ago.  I love that her cape is totally crooked in these pictures, hence the title of this page :)  She was running around all over the place and didn't seem to care one bit about her twisted costume. 

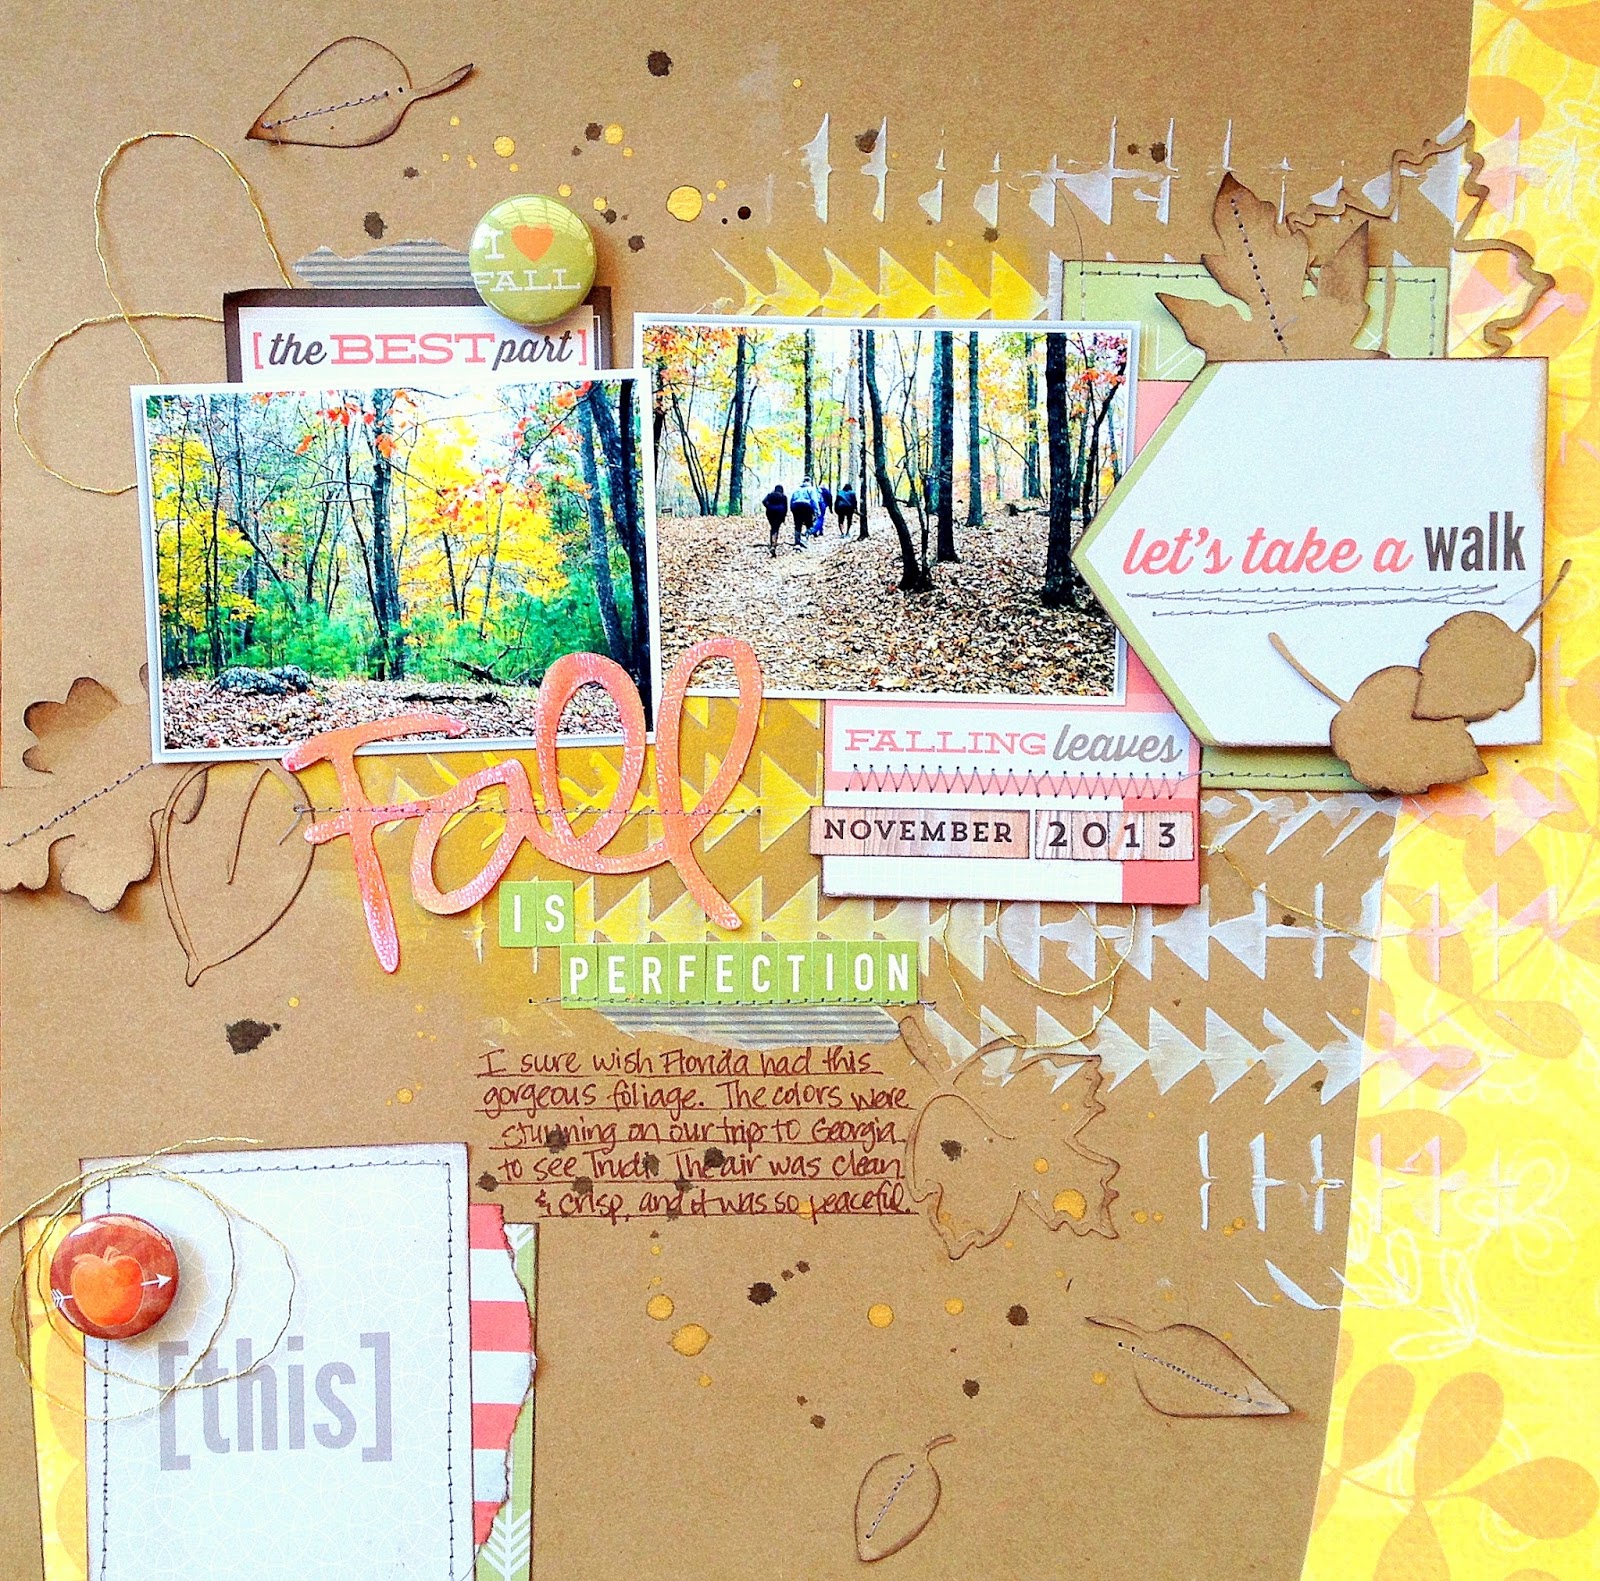
I started with white cardstock and a cut file from The Cut Shoppe.  I backed it with lots of patterned paper and then stitched in between each chevron.  This pattern reminded me of super heroes and the waves that come off their gadgets when they're zapping a bad guy :)  I layered my photos on top of more patterned papers and used a fun chipboard frame on top of one photo.  I had to add in some gold Thickers at the top.


I hope I never run out of this Gold Decorative Tape....omg.  It's so gorgeous, and I really have to restrain myself from sticking it on everything I see!  I love the dimension created here with all the layers.  Pop dots make this happen!


I had that black cardstock circle piece cut out from a previous project, so I made it work on this layout.  I used some of the Alpha & Word Stickers from the Necessities line for the second part of my title and added a fun brad and die cut.


More fun die cuts and bats...it's so fun tucking these fun pieces in here and there to finish off a page.


I hope you have a great Halloween and a great weekend!  So glad you stopped by today.  Thank you so much!

Wednesday, October 29, 2014

News Anchor Hair / My Scraps & More

Hey there!  I'm sharing a fun layout today that I created for a challenge over at the My Scraps & More forums a few weeks ago.  I had so much fun making this one...mostly because the pictures make me smile :)

The challenge was to use the words "story" and "news" on a layout.  These pictures of Paige were just random, but her hair was the cutest.  It reminded me of a news anchor's hair...haha.  That helped create my title.  I used all Crate Paper for this....I believe it's mostly Notes and Things.  I had both of them scattered all over my desk and a lot of it coordinates, so I don't really remember which is which.

I LOVE this background paper and couldn't wait to use it.  I added a bit of gesso and gelatos around my big cluster to just to give it some interest.  I love the little typewriter, too....it goes with my news theme :)


This stitched butterfly card came already assembled...so easy to use! 


One of my favorite parts of the layout...using gold paint on the bottom half of this die cut!  And then I stitched through it with gold thread....whoever invented gold thread, gold paint....gold glitter....I love this person!


I used one of the chipboard frames as a layering piece here with one of the kraft tags.  I backed it with white paper and stitched through it.  I added that cute little pink ampersand sticker.


I think this is one of my favorite layouts these days...it just came together so easily and it just makes me smile looking at it :)

Thanks so much for stopping by!  Have a great day!

Tuesday, October 28, 2014

Scrapbook Generation CREATE Team 2015!

Hey there, and happy Tuesday, friends!  I'm so excited to share today that I was asked to be a member of the 2015 CREATE Team for Scrapbook Generation Magazine!  I was quite taken by surprise when Debbie emailed me asking to be a part of this!  I eagerly responded YES!  The new team for next year is huge and contains a variety of styles.  I can't wait to get started in January!!

Thanks to Debbie and the rest of the SG family for having me!  You can click HERE to read more about all the new team members :)  Some of them I have known for a while and others are brand new friends.  Can't wait to work with them all!


Thanks for stopping by, and have a great day!

Monday, October 27, 2014

We're So Corny / Chickaniddy Crafts

Happy Monday, friends!  Hope you had a great weekend :)  Today, I'm sharing my take on the October sketch on the Chickaniddy Crafts blog.  It went up last week, so be sure to check it out!  I really love working with sketches.  For me, they usually inspire me to create a project I wouldn't have come up with on my own.  Here's my take on this month's sketch using the gorgeous Scrumptious collection.


Supplies Used:  SC140S05 Hay Ride, SC140S08 Friends and Family, SC140S04 Back to School, SC140S02 Home Sweet Home, SC140S06 Autumn Haze, SC140S01 Fall Bouquet, SC140S10 New Harvest, SC14EB02 Sticker Sheet, SC14EB02 Alpha Stickers, SC14EB04 Die-Cut Tags, SC14EB08 Mini Brads, SC14EB09 Enamel Stars, SC14EB03 Journal Tags, SC14EB05 Mini Sticker Banners, SC14EB06 Mini Sticker Tags, SC14EB07 Mini Sticker Sentiments; Other--cardstock, watercolors, Heidi Swapp Color Shine, thread, sewing machine, Stampabilities Ink.

I decided to use three photos and one of the Die-Cut Tags that is perfect for journaling.  I really wanted to find a way to use those adorable corn stickers, so I scrapped these "corny" selfies of me, my sister and my parents!  This was their first time taking selfies, so they were quite intrigued...haha!  I used quite a bit of the Scrumptious collection for this...little bits and pieces of almost all of it.  I wanted to tie in more of that beautiful light blue tone, so I added some watercolors to my cardstock background.

Using gesso is a great idea for toning down a busy background.  I simply used my finger to smudge some around my background papers, and once it dried, I added some orange watercolor.  I like that it separates the busy stripes from the photo and the stickers.  These stickers are so great for layering, and I just love all the gorgeous bright colors!


Aren't these enamel stars so cute?!  I used one here on top of my layers.  I sort of went thread and stitching crazy... :D  I also added some yellow watercolor to that big banner piece.


Another close up of the layers, watercolor and stitching.  I really love how this turned out!


I hope this inspires you to use a paper or sticker in a way that it wasn't intended...like I did with this fun corn!  Happy Scrappin'!

Thanks for stopping by!

Friday, October 24, 2014

Fall is Perfection / My Scraps & More

It's Friday!  Yesssss!!

Here's a layout I created a few weeks ago for a challenge at My Scraps & More.  Every Tuesday we issue a challenge around our monthly theme, and this month it's Fall.  I'm just excited that I actually have Fall photos to scrap!  Living in Florida doesn't really give much opportunity for Fall color.  Last November, some friends and I took a weekend road trip to Georgia to visit a friend.  We spent a day hiking and the scenery was just so pretty.

I started with some kraft cardstock.  I ran a piece through my Cameo and cut out several different leaf shapes.  That yellow piece of patterned paper is from my random stack of yellow papers...who knows what brand it is or how old it is.  I added some texture to the background with some modeling paste and a stencil, and then I ran a yellow gelato over it to add more pops of that bright yellow.  I used a lot of the Urban Autumn collection from Lily Bee with a few bits from October Afternoon and My Mind's Eye.


I love these outlined leaves, and I love how they look tone on tone.  I also added some gold thread...pops of gold are my favorite these days :)


I also stitched a lot here and there.  I love how the leaf stitching turned out!


I cut my title in white cardstock and then used a gelato and my finger to dab color onto it.  I love how you can see the texture of the cardstock.


I just love how this turned out...and it came together pretty quickly.  I hope you've gained some inspiration from this in some way...I really loved putting it together :)

Thanks for visiting me, and have a great weekend!

Wednesday, October 22, 2014

Eeeeek!! American Crafts Guest Designer!

Hey, friends!  I can't believe I'm actually getting to make this post today...omg!  I am this week's Guest Designer at American Crafts!!  What!?!?  Yep!!  I'm beyond excited to share some fun Haunted Hollow projects with you!  I was so thrilled when I was asked to do this, and I'm very happy with how all of my designs turned out.

Thank you so Paige and the rest of the team for having me!

I knew I wanted to use this spider web die cut on one of my layouts.  I decided to cut three in different sizes.  I used mostly the 6x6 paper pad for this and backed each opening with a different patterned paper.  It took some time....not gonna lie....but I love the end result!  I also added some gesso and watercolor to my background.


Here's a close up of one of the webs.  This was really fun to create!


My next layout features my lovely little daughter, AKA The Hulk.  Haha!  If you know her, then you know this costume suits her perfectly.  I love how the bold orange and black background papers really allow the purple & green in the photos to pop.  I added some gesso to the background to make the black a little foggy here and there, and then I added some modeling paste through a stencil and added watercolor for interest.  I used a lot of the stickers in the collection on this page.  They're so cute and fun!


I love tearing the edges of my patterned paper.  I just like the uneven look of it.  And for my "Hulk" cut, I combined a few letters from different fonts to create it.


I think I'm becoming more and more obsessed with die cuts these days!  This one is from The Cut Shoppe.  I love the overlapped circles & hearts, and I knew it would make these sweet photos of Reese stand out.  I didn't want to make a scary page, so this helped sweeten it up!  I filled in a few of the circles and embellished with the wood veneer, die cuts and stickers.  I did add some gesso and watercolor to my background (surprise...haha).  I also added lots of stitching.


Here you an see the paste and watercolor in the background.  These glitter Thickers are so pretty in person...very sparkly!  I adhered them to a light colored piece of patterned paper to make them stand out more.


I used some fun orange thread here and some black thread for around the edges.  And I added some orange ink to the edge of this round wood veneer...you can do a lot with those.


Here's the card I made.  I used papers from the 6x6 pad and cut them into oblong triangles and stitched them down.  I added the full moon die cut and the fun Happy Halloween banner die cut.  And lots of stitching :)  I love how this turned out.


Lastly, I created a few home decor frames.  The stickers and tags are really easy to use for something like this.  These add a festive kick to any shelf during October, and you can easily do this with a Christmas line or Fall line...and change them out each season!  These are 5x7 frames, and it took me no time at all to embellish these.


I am so honored to be on the AC blog today sharing these projects!  I had a blast creating them, and I hope you've gained some inspiration from them somehow.  Thanks again for having me!

And in case you missed my earlier post, I made The Cut Shoppe Design Team!  Yay!  You can see the full post, some of my sample layouts, and the rest of the team HERE...or just scroll down to my previous post :)

Thanks for looking, and have a GREAT day!

The Cut Shoppe Design Team!!

Happy Wednesday, friends!  I'm so excited to share the news that I have been asked to join The Cut Shoppe Design Team!  I have loved Ashley's amazing cut files for a while now, and I'm so thrilled to get to design with even more of them now!  I was the September Guest Designer, so I'm really happy to get to work with Ashley again and this fun team.  If you haven't checked them out yet, go visit her store HERE. The team is just bursting with talent, and I can't wait to get started.  Thank you to Ashley for having me this term!

Check out this awesome group of scrappy ladies!


Here is the layout I created for my Guest Design spot.


Here are a few more layouts I created for a few of my other teams using some of The Cut Shoppe's cut files...


Thanks for checking in, and have a great day!  Stay tuned for another blog post coming soon...with even more FUN news!

Have a great day!

Tuesday, October 21, 2014

My Scraps Sketch #92

Hey there, and happy Tuesday!  Have you seen the newest sketch over on the My Scraps Sketch Blog?  It's by our own DT member, Tracy, and it's a great one.  I've been trying to get through my massive stash of Crate Paper goodies lately.  I have the new Open Book collection ready and waiting on me, but I still have so much of the Styleboard line.  I tried to use as much as I could on this layout.  If you'd like to play along with us, you can see the sketch HERE.

I pulled out some of my acrylic paint for this and added lots of blue to the background.  I created lots of layers with embellishments around my photos.  The bottom was fun to create with lots of paper strips.


Layers, stitching and die cuts....it doesn't get any better than that!  Love all of this combined.  The "sweet" and "Paige" stickers are really old Glitz that I've had for a few years.


I couldn't wait to use up some of the CP chipboard frames.  I used a couple of them on this page.  They're great for adding dimension.


Stitching...can one possibly get tired of stitching?!  Not me!  I love it so much and now that I've learned how to do it, I can't imagine not stitching on my pages.


Thanks so much for stopping by....have a great day!  

Sunday, October 19, 2014

Creative Scrappers #280

Happy Sunday, everyone!  I'm so excited to share the newest sketch from Creative Scrappers!  That's right...it's reveal day, and there's an awesome sketch by the wonderfully talented Juliana Michaels today.  I just love it!

I created this layout using the Styleboard collection from Crate Paper.  When I saw the circles on this sketch, I immediately thought of using pie charts.  They're really popular right now, and I just can't get enough of them.  I love backing die cuts with patterned paper, so that's what I did here.  I love the look of the color and pattern mix.  I also added some gesso and watercolor to the background.  I embellished with a chipboard frame and flowers, along with vellum and cardstock die cuts.


I am in love with gold thread...oh my goodness.  Metallics are my favorite right now!  Isn't this cute arrow paper clip adorable?  It's from Freckled Fawn.


Lots of fun chipboard layers here.  I love the primary colors together here up against the kraft striped background.


Lovely watercolors...always one of my favorites!  I used some gelatos to color my cardstock title.  The texture of the cardstock makes for a really cool look.


Our sponsor this month is Pretty Little Studio, and if you upload your layout, you could win a prize pack from there!

Also, don't forget about this!  Go HERE to order your copy.


Can't wait to see what you create with this one!  Thanks for stopping by!

Friday, October 17, 2014

Thankful Layout / Chickaniddy Crafts

Hey there, everyone!  I'm so excited to share a layout I created for Chickaniddy Crafts that centers around being Thankful.  There is nothing I am more thankful for than my two sweet girls!  It's a rare occasion that they're in a photo together, so I just had to scrap these.  This layout was up on the Chickaniddy blog a few days ago HERE.


Supplies Used:  SC140S06 Autumn Haze, SC140S02 Home Sweet Home, SC140S05 Hay Ride, SC140S03 Pumpkin Spice, SC140S11 Frolic in the Leaves, SC140S08 Friends and Family, SC14EB02 Alpha Stickers, SC14EB02 Shape Stamps, SC14EB08 Mini Brads, SC14EB07 Mini Sticker Sentiments, SC14EB02 Sticker Sheet, SC14EB03 Journal Tags, SC14EB04 Die-Cut Tags; Other--cardstock, Silhouette Cameo, thread, sewing machine, Heidi Swapp Color Shine & Ink, Tiny Attacher, Stampabilities Ink, washi tape.

Here is how I created my layout:

1.  I just had to start with this gorgeous Autumn Haze paper as my background.  The denim paper is another favorite, and I love how the pretty blue contrasts against those Fall colors.  I created lots of patterned paper layers first, and then decided where to place my photos.  I had the circle die cut laying on my desk from another project, so I layered that in as well.

2.  I used a few of the flowers from the Sticker Sheet and then used stamps to create the blue flowers. I wanted to mimic that denim color, so I pulled out a blue Heidi Swapp ink pad and stamped the image onto cardstock.  I was very pleased that the texture of the cardstock made the flower look denim!  VERY cool!  I like how it ties in that blue color around the page.

I don't know if you've seen these new stamps, but they're so much fun to play with!  Check out how I used the flowers on this layout.


3.  I added one in this corner cluster on top of a die-cut frame, journal tag and sticker.  And the mini brads make perfect centers for these flowers!


Here are the coordinating brads.  Aren't those colors so yummy?  Yes!


4.  I used more of them here.  Something I just added to my scrapping style is machine stitching!  I finally gave it a try, and now I'm hooked.  Love how it ties the whole layout together.


I hope this inspires you to scrap what you're thankful for!  And I hope this has shown you some fun ways to use this amazing collection!

Thanks for stopping by!