Monday, April 17, 2017

Life Long Friends / Hip Kit Club

Happy Monday, friends!  I hope you all had a wonderful Easter weekend.  Today I'm sharing a new layout for Hip Kit Club.  I used the 2017 March Hip Kits, and I love how it turned out.  My theme for this day was "Creative Titles," so I decided to mix and match some items to make a really big and bold title.  I actually started this page with the title...even before I chose the photo.  I fussy cut "friends" from one of the Shimelle papers and paired it with one of the Shimelle stickers and some Thickers.  I had been wanting to use that cute Dear Lizzy house paper, so I made it my background.  I added a big strip of white cardstock down the center to give me some white space to work with, and it breaks up the busy house pattern.  I lined the edges of the cardstock with some of the bright yellow floral Maggie Holmes paper.

I did a little bit of mixed media work on the background.  I used white gesso first and then used some blue, aqua and pink Shimmerz on the background.  I wanted to keep this light, airy and simple, and I think I achieved that look.


To make my title pop a little more, I lightly outlined the letters with a black pen.  I love the the "life" sticker and Thickers above the big letters.  I added in that adorable "Yay!" banner sticker and that cute cloud, which both came from the Shimelle sticker sheet.


I layered some vellum, patterned paper and a Project Life card behind my photo.  I tucked in a few of the Paige Evans Oh My Heart heart die cuts here along with a Shimelle tree sticker and some cute Pinkfresh Studio puffy stickers.  I also added some aqua tangled thread.  I love how it adds a bright pop of that aqua color.  That little Rubber Charm is also from Pinkfresh Studio as is the Leatherette sticker & cardstock sticker underneath the cluster.


I think light kraft / soft gold goes so well with this soft pink color.  I think it looks really pretty with the aqua in the background.  I did do a little bit of machine stitching up and and down the edges of the cardstock.


I also used some Heidi Swapp Gold Color Shine on my background.  Here you can see the pretty shimmer it gives!  You can also see how some of the house pattern is a little faded.  That's the gesso doing it's magic :)


Here are more Pinkfresh Studio flower stickers.  I think they looked cute right here by the photo.  I did add some foam behind my photo to raise it up off the page.


Here's one more close-up...I really love all the colors and textures from all of these awesome products!


I have a process video for you...I hope you enjoy and gain some inspiration!


Thanks so much for stopping in today...have a wonderful day!


Thursday, April 13, 2017

Totally Grown / Precious Remembrance Shop Guest Designer

Hey, friends!  I'm back today with my third layout as the Guest Designer for Precious Remembrance Shop.  A huge thank you to Dyane for inviting me!  The stamps I worked with are just amazing!


Here's my page.  I used the Totally Stamp Set and the Date Stamp Set.  I decided to sort of create my own patterned paper using one of the patterned stamps.  I used black archival ink on white cardstock in a vertical line down the page.  I coated the paper with white gesso first, and I really love how the texture of the paper shows through the stamping.  I chose a photo with some dark and bright colors, so I used those same colors of Shimmerz sprays on my background.  My pattern wound up being slightly busy, so I softened it up by adding some vellum over part of it.  I think this makes the photo stand out while still being able to see it.

I didn't use too many embellishments...just a few fussy cut circles from a Paige Evans Fancy Free paper, some Thickers, a flair button, a clear sticker from Amy Tan On a Whim, and a random glasses sticker from Hobby Lobby.


I really love how this turned out.  These brush strokes with triangles are such a great design.  I love the bright colors of ink on top of the stamping.  I used a few MAMBI Project Life cards as layers behind my photo as well as some tissue paper.


I used another stamp to create part of my title.  I stamped "totally" on some scrap cardstock and then fussy cut it out so I could move it around.  I love how you can see the texture of the cardstock through the stamping. I paired it with some bright pink Thickers.  I used a Fancy Free circle with some yellow thread behind it and tucked in a glasses sticker under the photo.  I stuck that down on vellum and cut it out so the lenses would look more realistic.


Here's the Date Stamp...I love that it includes the days of the week, all the months and all numbers.  Plus the font is awesome!  I added some blue stitching above the journaling.


Here's another shot of the watercolor and stamping.  I added a flair button from A Flair For Buttons.


I stitched back and forth through the vellum here to add some texture and pop of color.  I added another Fancy Free circle and thread to the right of the photo.


I've had those glasses stickers in my stash for so long...this was the perfect page to use them on!  I love how they look, and they give the title something to rest on.


The "Wicked Smart" clear sticker is from the Amy Tan On a Whim sticker sheet.  I love how the letters are open and give a fun pop of black.


This was so much fun to create...I hope you've enjoyed reading about it.  Here's my process video if you'd like to check it out.


Thank you so much for visiting me...have a great day!

Wednesday, April 12, 2017

Spring Snapshots / Cocoa Vanilla Studio

Hello again!  I have a new layout for Cocoa Vanilla Studio to share today.  Our theme this week is Spring or Easter, so I decided to go with Spring.  I pulled out some of the Life is Beautiful collection.  It matches my photos perfectly.  My daughter was out running around and playing, so of course I had to get some pictures!

I decided to go with a large impact title, so I created the word "Snapshots" using the Open Letter Alpha cut file from The Cut Shoppe.  I used various patterned papers to back those letters and added some foam to raise it up.  I love the dimension it creates!  I went pretty mild with the blue watercolor on the background.  I used some blue Shimmerz to create a pretty sky color behind everything.  I embellished with some flower die cuts, wood veneer, a flair button and some fussy cut flowers.


I love how this turned out.  I tucked in a pretty flower cluster die cut in between the title pieces and then layered "spring" on top of it.  I cut that on my Cameo as well using the Shoreline font.  I added some blue tangled thread underneath the title, too.


I added another flower die cut here as well as a wood veneer flower and more thread.  I fussy cut a few smaller darker blue flowers to layer on top of the title.  I love that pop of darker blue.  Did I mention that I love this awesome dimension? :)


I added in a fun flair button here for another pop of that darker blue.  It's so pretty up next to all the lighter colors.


Sometimes I like to alter wood veneer and add some color to it, but these butterflies looked great as they were.  I like the natural color of the wood, and I like how it looks with all these other pretty light colors.


Here's one more close-up of the journaling area.  I added a fun little sticker down at the bottom and machine stitched through it with the same blue thread.


Here's my process video if you'd like to see it...I hope you enjoy it!


Thanks a bunch for stopping in!  Have a great day!

Tuesday, April 11, 2017

Fantastic Day / Paige Evans DT

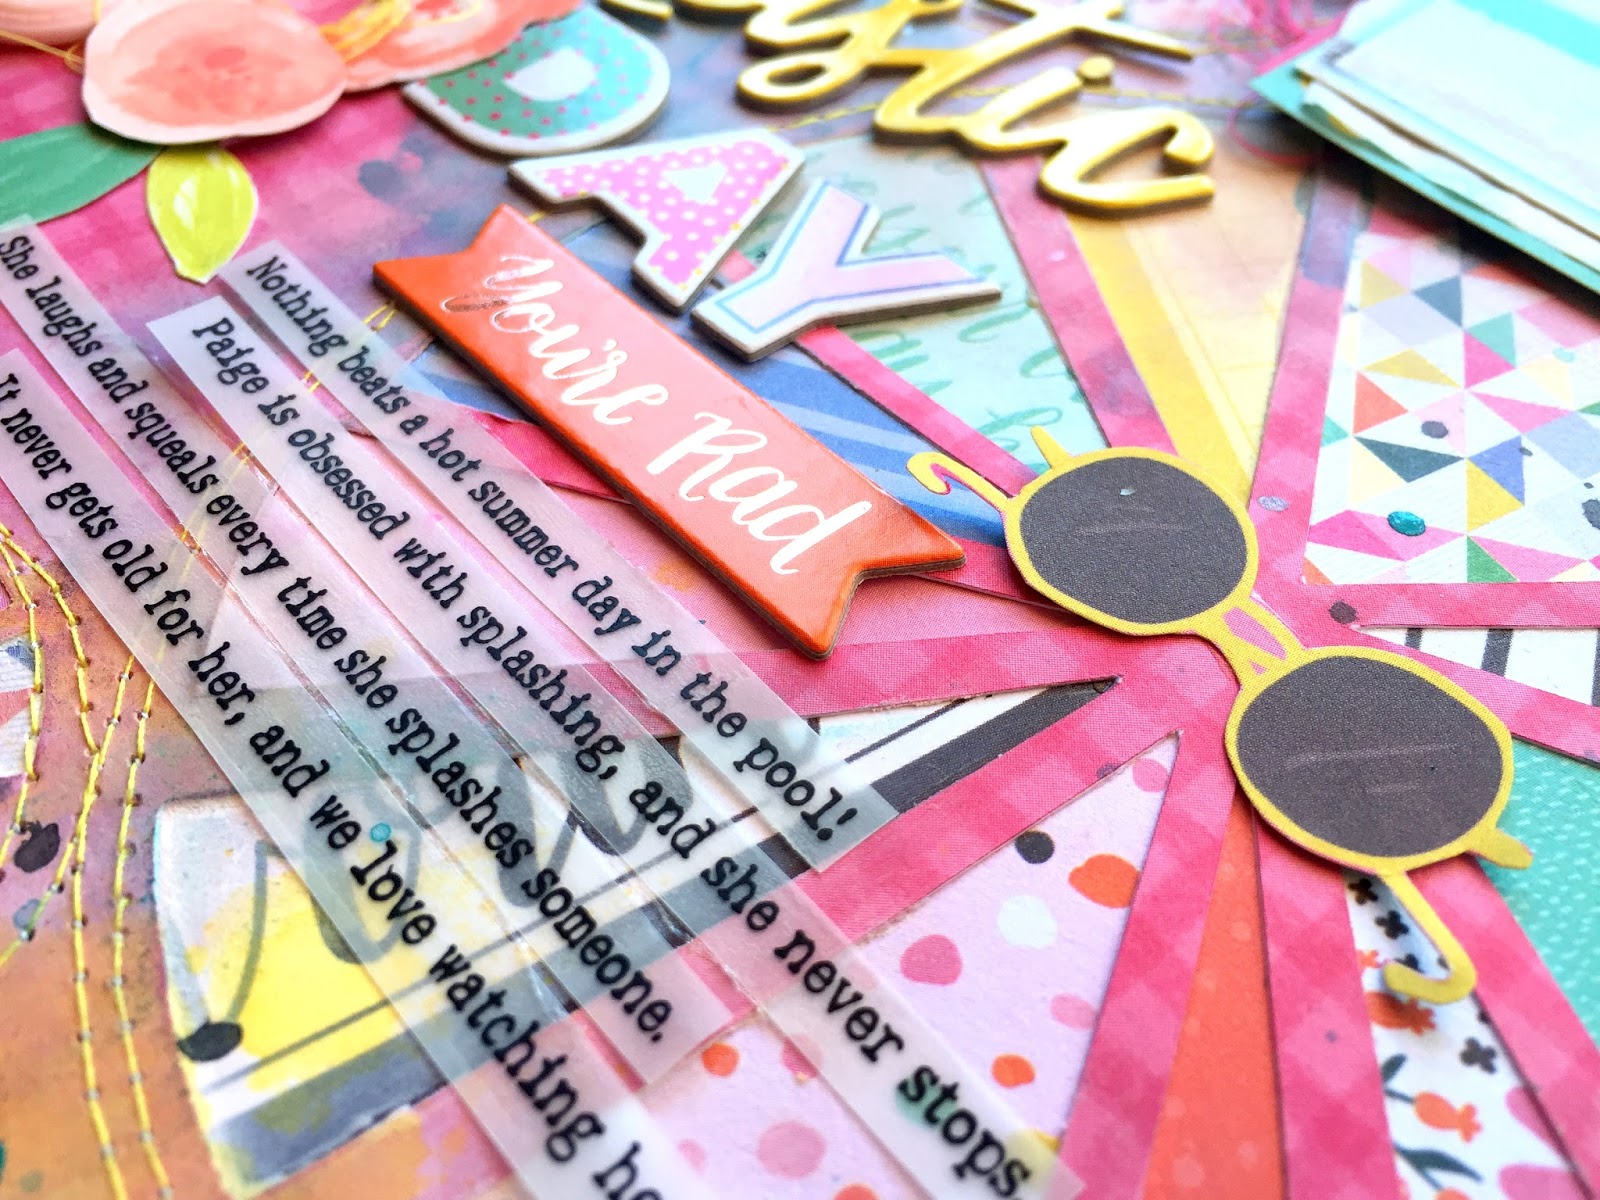
Happy Tuesday, lovely friends :)  I'm back today to share my newest project for the Paige Evans Design Team.  This week we're focusing on using our Silhouette Cameos.  One of my favorite techniques is backing the open spaces of die cuts, so that's what I did for this layout.  I found a cute pie chart cut file in the Silhouette Store and arranged four of them in various sizes.  I cut them on this gorgeous pink plaid tone-on-tone paper from Oh My Heart...it's Paper 19.  I wanted something bright and bold.  I use white backgrounds so much, so I thought I'd challenge myself to go bold :)

I used lots of papers from the Oh My Heart 6x6 Paper Pad to back the pie charts as well as Paper 01, Paper 07 and Paper 16.  After they were backed, I smudged a lot of white gesso around all the circles with my fingers.  I just wanted a subtle white haze around them.  I used some Shimmerz sprays and gelatos to create some messy color on top of the gesso.  I like to use blue watercolors a lot on my pool layouts to mimic water.  I embellished with lots of chipboard, fussy cut flowers, ephemera and buttons from all three of Paige's collections.


I combined some of the Take Me Away Chipboard Stickers with the Oh My Heart Chipboard Stickers and Thickers to create my title area.  I couldn't really write my journaling because of the paper's texture, so I printed it on vellum and cut it into strips.  I love how it looks, and you can still see the colors behind them.  I fussy cut those cute sunglasses from Oh My Heart Paper 16 and used the bigger piece as a layer behind my photo.  I also fussy cut those cute flowers from Fancy Free Paper 01.


I added some wonky machine stitching around the pie charts using yellow thread.  I love how it turned out!  I also added some black splatters and some Fancy Free Buttons.


Swoon at these gorgeous colors!  I added some foam and yellow thread in this little flower cluster to add dimension, color and texture, as well as another button.  I love to overlap items, and my title overlaps just a bit onto the flowers and chipboard.


I added some tissue paper behind my photo as well as a few cut apart pieces from Oh My Heart Paper 16.  I added another Fancy Free Button and one of the die cut Ephemera pieces right onto the photo.


This was lots of fun to make...I really loved playing with all the bright colors!  I hope you get some ideas from this.  I have a fun process video of this layout if you'd like to watch.


Thank you so much for stopping in today...enjoy your Tuesday!


Sunday, April 9, 2017

Reese Love / Hip Kit Club

Hello and Happy Sunday, friends!  It's been a few days, but I'm back today with a new layout for Hip Kit Club.  I used the bright and colorful 2017 March Hip Kits, and I started out with a beautiful flower cut file designed by DT Member Jana McCarthy.  I enlarged it and created two of them to use as a big background design element.  I cut them on white cardstock and then used various patterned papers and a few Project Life cards to back the open petals.  To make them stand out against my white background, I used white gesso first and then traced around the flowers with a pencil.  I used blue gelatos to trace around the pencil lines and used a dab of water on my finger to smudge the color until it had a faded edge.  I used some Shimmerz and Heidi Swapp Color Shine to create some splatters.

I embellished with pieces from the Paige Evans Oh My Heart collection from the Main Kit, some Pinkfresh Studio Puffy Stickers and Cardstock Stickers from the Project Life Kit  as well as a few exclusive enamel dots from the Main Kit.


Backing cut files is really an easy technique.  This one wasn't too intricate, so it didn't take that long to do.  The longest part is going through all the papers trying to decide which ones you want to use.  After I had everything backed and my background finished, I adhered the big flowers and then machine stitched through all the petals using white thread.  I had to be careful to guide my page through the machine without messing up.  I love how this gives some subtle texture.


I used a Project Life Card under my photo as a layer as well as some tissue paper.  I tucked in some ephemera from the Oh My Heart collection, and this "feel beautiful today" piece is also from Oh My Heart.  I added some foam under it to create some depth, and I love how it fits right in over the negative space in the photo.  I also added in some pink and yellow tangled thread for extra pops of color.


For my title, I combined some of the kraft & gold dotted Thickers with this Dear Lizzy foiled die cut.  I love overlapping things, and I angled the "love" piece so it would overlap her name.  I added some pink thread just to make it stand out a bit more.  I love the shine on that foil!  The Dear Lizzy ephemera is in the Project Life Kit.


I used one of the Dear Lizzy tickets up top here as well as a few Pinkfresh Studio puffy stickers.  Those little hearts are adorable!


Here's another look at the title area.  I did do some stitching here through the Pinkfresh Studio sticker with some aqua thread.


I hope this has inspired you in some way...just to have fun and play around with color and cut files.  There's no right or wrong way to do this.  It's all in what you love to create and make!

Here's my process video if you'd like to check it out:


Thanks so much for stopping by!  Have a wonderful day, friends :)


Wednesday, April 5, 2017

Explore Summer Days / Precious Remembrance Shop Guest Designer


Hey there, friends!  Happy Wednesday :)  Today I’m sharing another layout as the Guest Designer over at Precious Remembrance Shop. I used stamps from the New Day and Date Stamp Sets for this Summer page. I decided to not use any specific collection and just let the stamps guide my design. I created four photo frames using the brush stroke stamp from the New Day Set. I used some colored inks I have in my stash including pink, blue, yellow and a reddish pink color. I stamped them on textured white cardstock and then fussy cut them out. I layered them behind my photo and added foam under it to give it some dimension. I also added some tissue paper in there. I used the various sized circles from the New Day Set to create lots of confetti-like dots on the layout, and I also did some embossing with clear powder to create some subtle circles.


I absolutely love how you can see the texture of the cardstock in the stamped image. I like that it makes it look somewhat distressed and imperfect. I fussy cut all the circles out and glued them in a diagonal fashion around the photo. Later, I decided to add a third small cluster of the circles to the right of the title. Here you can see the dimension from the photo cluster. The shadows created are awesome!


Here’s a great close-up of the stamped frames. I love how these turned out! I machine stitched around the inner edges with some blue thread. On the background, I used some of the same colored inks and some plastic packaging to create some watercolor splotches. I love using lots of blue on Summer layouts!


Here’s another shot of the third cluster of circles. I felt like that area of the page needed some more of those same shapes and colors. I love how the title turned out. Lots of different fonts and dimension. I added another stamp from the New Day Set right above my journaling that says “Simplicity is Beauty,” and I thought that was perfect for my photo of my daughter looking for leaves.


Again, the texture from the cardstock just really makes these stamped images so detailed and interesting. It was fun creating a shape using one stamp four times! I added some tangled thread around the photo a few times in coordinating colors. This adds some great texture to the layout.


Since this was an outside photo, I decided it needed some sun bursts and some clouds. I lightly sprayed some yellow mist over a sunburst stencil at the top of the page and then used the same blue thread to stitch along the edges. I hand cut some cute clouds from white cardstock and layered them in.


Finally, here’s a look at the title. I mixed and matched a Bella Blvd chipboard piece with a Crate Paper piece and added in some Hip Kit Club exclusive blue alpha stickers. Down below that, I added my journaling. I also added a small stamp for the date from the Date Stamp Set.


Here’s my process video if you’d like to see how I created this layout. These stamps really made this layout really fun to put together!


Thanks so much for stopping by!  Be sure to check out all the awesome Clear Stamps in the Precious Remembrance Shop!

Sunday, April 2, 2017

Wonder On / Hip Kit Club

Hey there, scrappy friends :)  I'm back today to share my newest layout for Hip Kit Club featuring the 2017 March Hip Kits.  I was part of the sketch challenge earlier this week, and I was so inspired by it.  Fellow DT member Anna Komenda designed the sketch, and you can find it over on our FB Forum and play along with us!

I flipped the sketch vertically.  I love all the circles and wanted to mimic that, so I cut several of them using my Cameo.  I used different patterned papers and some cardstock for the circles, and I used this beautiful lilac cardstock from the Cardstock Kit as my background.  I used a lot of white gesso first and then used my palette knife to smudge lots of Shimmerz over it.  I used the two Paste-eez from the Color Kit as well as some sprays from previous kits.  I wanted some bold and rich colors, and I love how they look up against the light purple.  I chose a photo that complimented all the colors, and I think it turned out really pretty :)


I went through all the pieces in the kits and took out everything that was a circle.  I used a few of the Dear Lizzy circle die cuts like this one here from the Project Life Kit.  I also used lots of the exclusive enamel dots and some of the Pinkfresh Studio gold mirrored pieces from the Embellishment Kit.  I used some foam under these die cuts and added thread under them for more texture and pops of color.  I also did a little bit of machine stitching.


I fussy cut my title from one of the Crate Paper patterned papers and paired it with one of the Pinkfresh gold mirrored words.  I also added a smaller subtitle using a Pinkfresh sticker.  I layered one of the Paige Evans Oh My Heart floral die cuts from the Main Kit under it before stitching it all down.


Here you can see how the background turned out and how it created lots of texture.  I love these colors...oh my gosh.  So pretty together.  I also added some Heidi Swapp Gold Color Shine!  We got that in a kit over a year ago.  It never goes out of style :)


I worked my journaling in around everything here.  I used one of the exclusive flair buttons with some tangled thread here...again, it's a circle element.  Oh, and here's something I discovered.  All of the gold mirrored pieces have a protective film on them...if you don't want your gold to be super reflective and shiny....just leave it on there.  I had already taken them off the "O"s and then decided they were too shiny for this.  So I smudged a tiny bit of white paint on them, and it made them less shiny again.


Here's the other Dear Lizzy circle die cut.  Again, I added foam and thread under it.  Just raising it up slightly gives it such depth and interest.  I fussy cut that beautiful floral ampersand from a 4x6 Project Life card and tucked it under my photo along with some yellow thread.  I also used a few of the Pinkfresh Leatherette circle stickers.


Here's one last close-up...I added another Oh My Heart flower here, more thread, more enamel dots and another gold mirrored heart.


I hope this gives you some inspiration today...be sure to check out my process video if you'd like to see how I created this!


Thanks so much for stopping by today.  You can join in the sketch challenge over on the Forum if you'd like. We have one every week!  Have a great day!