Wednesday, March 13, 2019

Relax Smile Enjoy / Hip Kit Club

Happy Wednesday, friends!  I have a new layout for Hip Kit Club to share today.  I used the 2019 February Hip Kits again, and I did lots of fussy cutting.  First, I cut all those floral and leaf wreaths from one of the Pinkfresh Studio patterned papers.  Then I cut out the oval shaped wreath around the photo from an exclusive Project Life card.  Lastly, I fussy cut the hearts from more patterned papers.  I love making my own embellishments!  I love all of these gorgeous colors.


I began on thick smooth white cardstock, and I coated it with clear gesso first.  I used the small floral stencil from the Color Kit along with the Art Basics Modeling Paste from the January Color Kit.  It created some great bumpy texture.  Once that dried, I used the Opal Magic Paints from the Color Kit to create some yellow and blue color splotches on the background.  I mixed in some of the Shimmerz Frost Bite from the 2018 June Color Kit to match that pretty blue color.  I  knew I was going to have lots of pink in the embellishments, so I didn't add anything other than pink splatters on the background.


After creating the circle design with all the wreaths, I glued them together so I could move all of it as one piece.  I layered some pink patterned paper and a yellow & white Project Life card behind my photo.  I continued with the circle theme and used lots of the Pinkfresh Studio circle stickers.  I also tucked in some fussy cut flowers from one of the Carta Bella papers to give a pop of that dark pink color.


Here you can see all the layering and texture.  It's so fun to mix and match different things to make it really dimensional.  I mixed and matched the title here using two different Pinkfresh Studio Puffy Alpha stickers.  I just love that script font! 


Here's a good look at the background texture created with the paste and stencil.  I just gives that little something extra, I think :)


One of my favorite embellishments this month are these adorable Pinkfresh Studio fabric tags!  Again, they're great for adding dimension and texture.  And this blue one is so pretty!


More details...


I decided to create a little cluster in the top right corner, so I cut a chunk of the background out and used a border punch to add a scalloped shape.  Then I just pulled some embellishments in all the colors and layered them together.  The flowers and that little banner were fussy cut from papers.


A few more close-ups just because :)


I hope this inspires you to try some fussy cutting for your next project.  I know a lot of people don't care for it and say that it's too much work.  But I can tell you that I have never regretted a page where I used lots of fussy cutting.  It's a great way to use your patterned papers with fun images on them, and it just takes a bit of time.  But it's worth it ;)

Check out my video if you'd like to see more details!


Thanks so much for stopping by, and have a great day!
 

Saturday, March 9, 2019

So Many Reasons / Vicki Boutin Color Kaleidoscope

Happy Weekend, friends!  I have a fun layout to share that I created just for me!  I was excited to get my hands on the new Vicki Boutin Color Kaleidoscope collection, and man is it amazing!  I was inspired by so many of the papers, stickers and embellishments.  I was drawn to these pretty number stickers from the Sticker Book.  I didn't know what I was going to do, but I knew I wanted to use them in some way.  I stuck them to some scrap white cardstock and then fussy cut them out so I could move them around and use them as die cuts.  Then I got the idea for my title...focusing on all the reasons I love my daughter.  That ties in to the numbers, right?  I mainly just wanted to get messy and make a random page just for fun, so that's what I did :)


I used some thick white Bazzill cardstock as my base, and I coated it in clear gesso first.  I used lots of gelatos to create some watercolor effects behind my photo.  I decided to have all the numbers spaced out to the left of the photo in random order.  I wanted lots of texture and color and "messiness" on this page, so I wound up tearing half the white cardstock off and layering other patterned papers behind it.


Here's a look at the gelato work.  I also used a touch of some Jane Davenport Mermaid Markers I got on clearance at Michael's.  I also used a few Shimmerz.  I wanted most of the mixed media work behind the photo.  I used a few Vicki Boutin Puffy Stickers, Chipboard Stickers and Cardstock Stickers.  I also used a big "Say Cheese" die cut up above the numbers mainly because it fit perfectly there.


These cute banners are in the Ephemera pack, and I thought they looked cute down at the bottom of the page.  I used some very old and cheap black alpha stickers for my title.  I decided since the page was so colorful and busy, and small title was in order.  Anything bigger would've just been too much, I think.


I decided to add a bit of messy color to this area in the upper left corner.  I used a few gelatos to smudge some color down and wound up creating a little cluster in that area.  I also machine stitched along the lines of the torn papers.  I used an aqua and a black & white patterned paper on the left side.
I also felt like using a few of my border punches, so I punched a few papers and tucked them in on the sides.


Yellow always makes me happy!  I added a puffy heart Thicker and a cute little camera on top of the photo along with some black tangled thread.


Here are several more photos of all the texture, color and detail...I just love it :)


Look at that holographic shine...so cool.


I hope this inspires you to get bold, crazy and messy on your next layout!  This collection is perfect for that.  I loved making this, and I can't wait to make another page using it.

I do have a video here showing how I made this from start to finish, so check it out!


Thanks so much for stopping by, and have a fabulous weekend!

Friday, March 8, 2019

Love This Dad Selfie / Hip Kit Club

Happy Friday, friends!  I'm so excited to back on the Hip Kit Club Design Team for another term!  This marks four years I've been on the team, and I've loved every second of it.  Kimberly is a true master at creating the most amazing kits.  This DT was what inspired me to start creating process videos over on YouTube, and I haven't looked back since.  Here's the new DT in case you haven't seen the announcement yet.  I'm in awe of so many of these talented gals!


Today I'm sharing a new layout featuring the 2019 February Hip Kits, and my assignment this week was to incorporate punches.  So I pulled out three scalloped border punches from my stash and created a very textured and layered design.

I hadn’t used my border punches in a very long time, and I forgot how awesome they are.  I began by choosing several papers from the Main Kit.  I used three different scalloped punches to create three strips from each paper.  I layered them to create one big square of textured strips.  I used that as the basis for my design and built the rest from there.


I attached the big square then smudged a lot of white gesso over a lot of areas.  I pulled out some of the Prima Opal Magic Paints from the Color Kit and used a brush and some water to add some color to the coordinating areas.  I wanted a tone-on-tone look, so I kept all the blue in the blue area and so forth.  I also used a few Shimmerz colors from previous Color Kits.  I went through all the embellishments and chose pieces that matched my four main colors.


I used a lot of the Pinkfresh Studio Joyful Day puffy stickers, die cuts and stickers in various places.  I used some of the Pinkfresh Studio mutli-colored puffy alphas for my title, which I also did according to color.  Before I glued any embellishments down, I machine stitched through some of the strips using white thread.


I love this soft peachy pink color.  Here I created a little cluster using all Pinkfresh Studio pieces and a fussy cut heart that came from a Crate Paper sheet.  I love how all the scalloped edges are folded up and create some awesome dimension.


My photo is of a seflie that my husband took of him and our girls while out riding in the golf cart one day.  It shows real life, and it makes me smile!  That little Carta Bella truck die cut made me think of going for a leisurely ride down a country road, so I thought it was perfect for this page.  And it matched that color area!


Here are a few more shots of all the texture, colors and dimension.


I love color blocking like this because it kind of limits what you can use in what areas.  If you only use blue things in the blue section, you only have so many things to choose from.  I think this helps to narrow down choices and makes it less overwhelming.


I hope this inspires you in some way!  I had lots of fun putting it together with the February Kits.  Pull out those old punches if you have some and see what you can come up with!  Be sure to check out my process video here for more details!


Thank you so much, friends!  See you soon!


Tuesday, March 5, 2019

Good Times With My Girl / Paige Evans DT

Hello again, friends!  I'm here with some new Whimsical inspiration for the Paige Evans Design Team. How often do you start a layout with a cut file and let it create your design for you? I’ve been wanting to use Paige’s Half Flower cut file on a page, so I cut it really big on some white cardstock with a Silhouette Cameo 3. I wanted to use all the colors from the Whimsical collection, so I used papers from the 6x6 Paper Pad as well as several other papers to fill in all the flower spots. I didn’t actually back the cut file. I traced each shape onto a different paper and then placed the shapes on top of the cut file. I glued down the inside edges so the outer edges could be bent up for dimension.


I placed three horizontal photos along the bottom of the flower so all of the petals were above them. Here you can see all the dimension created from the petals. This is a fun and easy way to use lots of different colors and patterns on one layout without it becoming too busy.


Flowers are one of my favorite design elements because of the dimension they can create.  I just dabbed a bit of glue to the inside line of each piece and then bent up the outer edges.  It gives it just a little more of a realistic look.


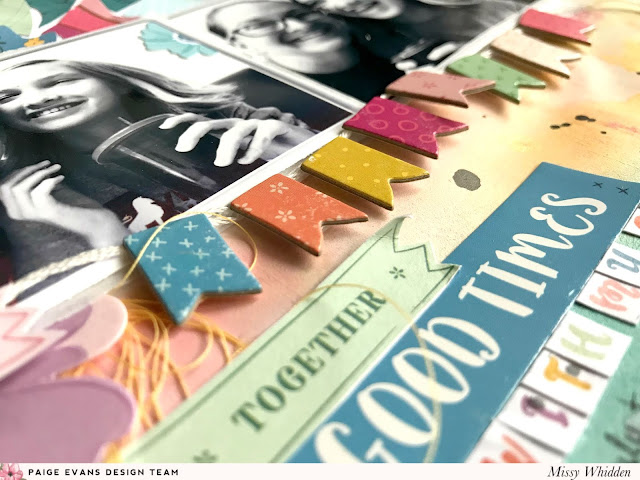
I wanted to bring some of the colors down below the photos, so I did some mixed media work on the background here. I used Distress Oxides and spray inks to add in yellow, blue, and pink shades. I have been waiting for the right page to use these pennant shaped Chipboard Stickers. I used them all and added adhesive foam behind them to create a fun little banner. I glued white embroidery thread behind the tops of them to make it drape below the photo. I used Stickers for my title as well as a few small alpha stickers from the Sticker Book.


My photos had lots of white space behind our heads, so I added a few flower stickers over to the sides to give a pop of color.


I love layering products...here I layered a flower Rub-On, a flower Die Cut and some thread.  I love the colors against the pink mixed media on the background.


Here are a few more details!


I continued adding bits and pieces below the photo over to the right side as well. I tucked in a big purple flower from the Floral Die Cuts and added a Rub-On, a Sticker Book sticker and another flower from the Floral Die Cuts. I also added in more texture with tangled thread.


I hope you inspired by this in some way! The colors in Whimsical just instantly inspire me every time I look at them and when you add a cut file in with it and it’s like magic! Next time, try using a big cut file like this to help your design get started. It’s great because it limits where you can place everything else and helps you to narrow down what products to use.

Here's my process video:


Thanks so much for stopping by!


Friday, March 1, 2019

The NEW Missy Whidden Kit / Shimmerz Paints

Happy Friday, friends!!  Today I'm here to share some fun and awesome news!  I'm so excited to announce the NEW Missy Whidden Kit from Shimmerz Paints!  I'm quite honored to be putting together new monthly kits, starting with this one.  It contains FOUR Shimmerz colors:

Vibez Razzeldazzle Berry
Inklingz Miner Miner 49er
Creameez Red Necking
Shimmerz Colder Than Ice

It also contains a NEW product...Dotz!  They are adorable epoxy buttons.  These feature beautiful watercolor hearts!

The kit also has an exclusive cut file designed by Paige Evans!!  Yes!  She has partnered with us to create a cut file each month.  You get access to download it when you purchase the kit.

The kit is $17.95, which is a steal!  You'd pay way more than that if you bought these products individually.  I hope this excites you as much as it does me...woo hoo!!


Here's a layout I created using the new Kit.  I cut the beautiful flower heart on white cardstock first.  I decided to use lots of color on another sheet of white cardstock and let the cut file shine on top of that.  I coated the background with clear gesso first and then went to work with the color.  I began by spraying some Razzeldazzle Berry first.  I spritzed it with water and just let the color run.  I added some splatters of Red Necking and let it blend.  I tilted the page so the color would spread.  I came in next with the Colder Than Ice to add some blue.  I did pull two extra colors from my stash for come color variations (Vibez Jeni B Bleu & Vibez Sweetheart).


I kept working on the background by adding color and letting it dry.  I also added in some splatters of the Miner Miner 49er, which is a gorgeous shimmery gold.  Here you can see it shining in the light!  I fussy cut a few flowers from a Webster's Pages paper and tucked them in around my photo.  I also added some blue thread.


I created a little cluster up in the upper left area of the design.  I used the blue Dotz here with some tangled thread, a punched leaf and a sentiment sticker.  I punched some leaf stems from white cardstock and painted them with Colder Than Ice and a touch of Jeni B Bleu.


I never get tired of seeing the gorgeous shimmer of these paints!  And look at the detail on this cut file.  There are so many possibilities with it.  I left it blank, but you could also back it with paper and it would look amazing.


I think the gold looks so pretty here on top of the pinks.


More details here...I wanted a pop of blue here amidst all the pink, so instead of searching my stash for something blue, I just made my own embellishment with the leaf punch.


I used a new Heidi Swapp puffy sticker here for my title.  It matched perfectly, and I layered it over the very bottom of my photo.


I hope this gives you some fun ideas to try on your next layout!  Be sure to check out the new kits HERE.  There are also two other new kits up for grabs to day, so there are lots of new goodies to play with.

Here's my video showing you more of the contents of the Missy Kit, plus the process of this layout.


Thanks so much for stopping by, and I'll see you next month with a new kit!  Have a great weekend!