Tuesday, February 14, 2017

Love Love Love This / Hip Kit Club

Hello there and Happy Tuesday!  I hope you all had a wonderful weekend :)  Today I'm sharing another layout for Hip Kit Club using the 2017 January Hip Kits.  I was inspired by one of the exclusive patterned papers...the one with the blue and white triangles. I decided to go with that shape and I cut several triangles out different sizes.  There are specks of orange-red and light yellow in the paper, so I made that my color scheme.  I tore a big chunk of white cardstock to place on top of my background paper, which is another exclusive paper.  I smudged a lot of white gesso over all of that...you can see how some of the plus signs are faded.  I used one of the cut triangles to trace some over the background, and then I used some of the Teal & Pink Heidi Swapp Texture Paste from the Color Kit to paint in those triangles.  I just added a bit of water to make it more liquid and painted it on with a small brush.  Once it all dried, I hand-stitched around each one with matching embroidery thread.


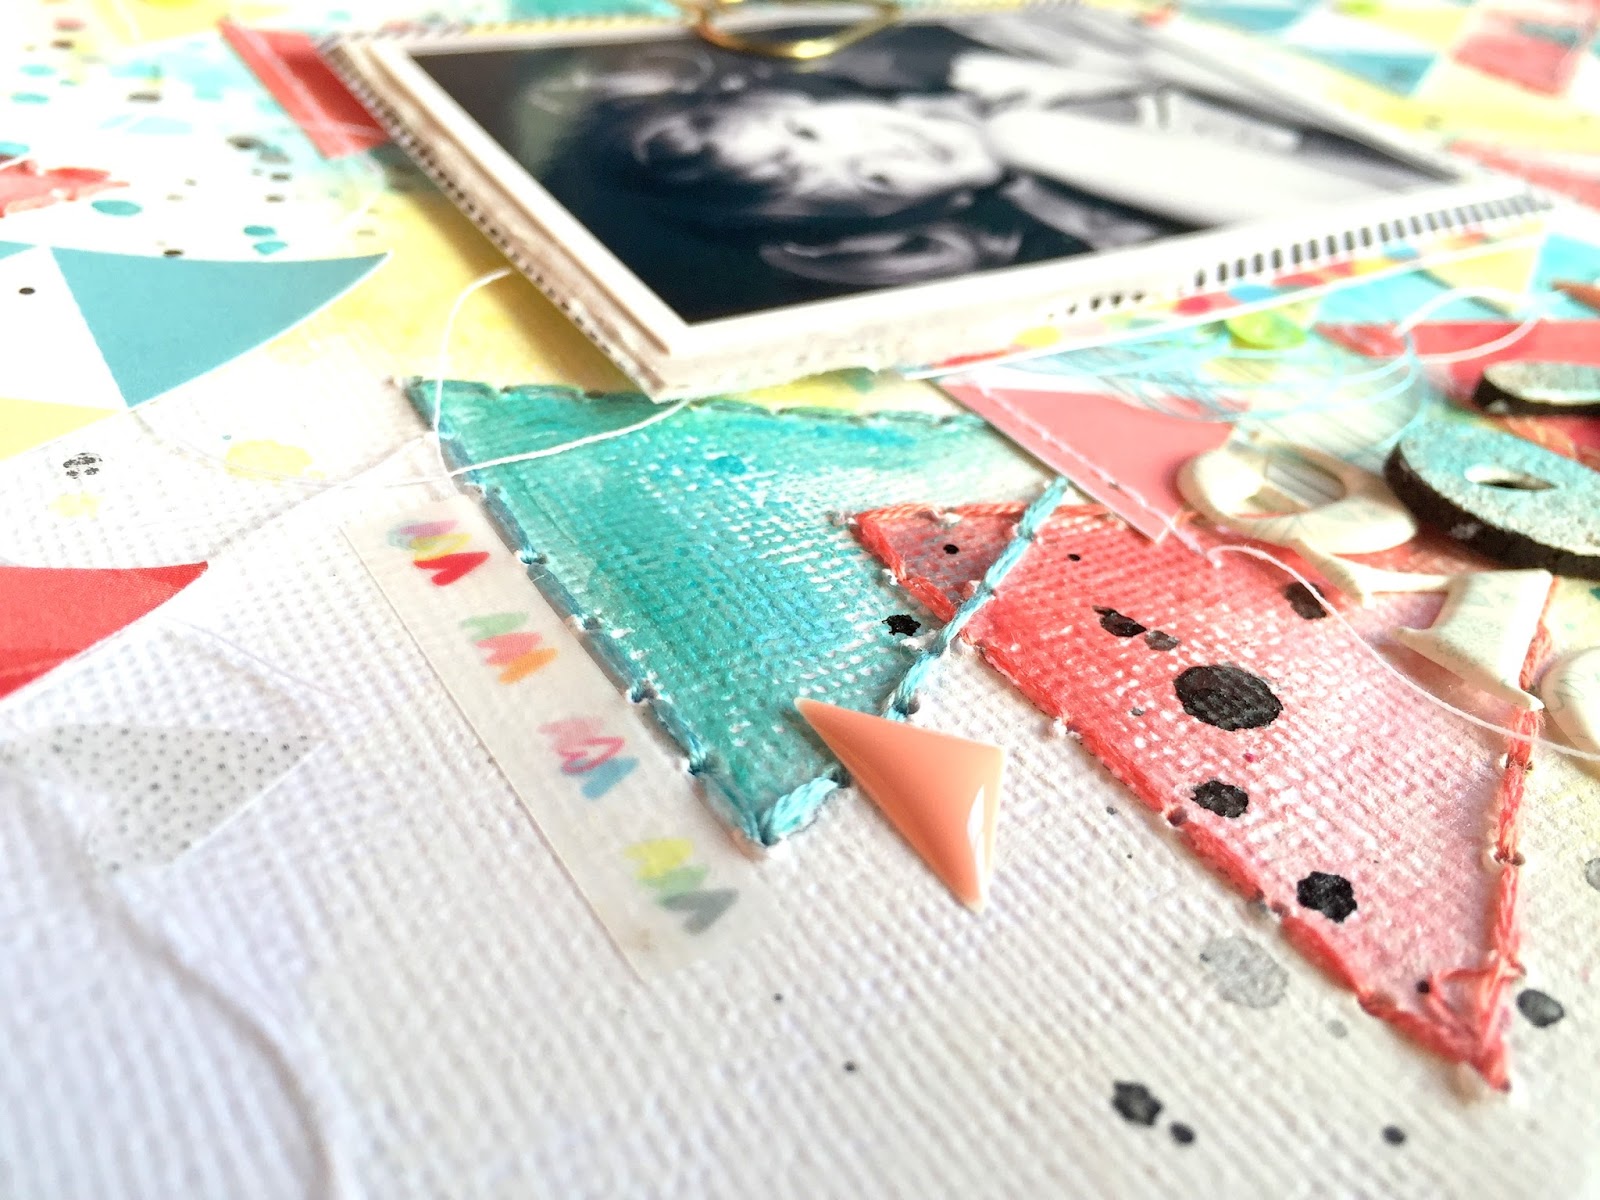
I love how all the triangles turned out.  You can really see the texture of the cardstock showing through the texture paste.  I place the paper triangles in random places and then machine stitched through the tops of them with white thread. I left the strings hanging just to add to the messy factor.  I also did a little bit of plastic packaging with some Shimmerz and gelatos and then added some grey splatters.  I also added in some of the exclusive washi tape and some sequins from last month's kit.


I decided to repeat "Love" three times for my title.  I used some of the Pink Paislee Moonstruck Puffy Stickers, the big One Canoe Two Hazelwood "love" cork piece and the Hazelwood "love" sticker from the Sticker Sheet.  The "this" wood veneer is an exclusive piece this month.  I added some tangled thread here as well.  For the cork piece, I covered it with white gesso and then used a gelato to add some blue shading to it.


Do you ever tear your papers?  I love tearing them sometimes, and I did that to this cardstock.  I like that it's uneven, and the way the edges curl up makes it look dimensional and fun.  I added some of the Hazelwood enamel triangles here and there, too.


Here's another angle...I really love how those triangles turned out!  I'm so glad I hand stitched around them...such a great detail.

I used some of the Project Life cards behind my photo for layering, and then I used a few pieces of the washi tape as well.  I finally used one of the gold metallic clips here, too.


Here's my process video if you're interested in watching how I made this.  I hope you enjoy and get some fun inspiration!


Thanks a bunch for stopping by!  Have a great day!


Sunday, February 12, 2017

I Love You / Bella Blvd

Happy Sunday, friends!  Today I'm sharing my newest layout for Bella Blvd.  Our theme last week was LOVE, of course, and we featured the Illustrated Faith You Are Loved collection.  The focus was on using the Gift Tags.  I used four of the circle tags here, and I also fussy cut the word "LOVE" from another tag.  There are so many uses for tags...and you don't just have to use them on gifts.  I love turning them into embellishments!

I used the Exclusive Kit Collection Bonus Paper as my background.  I love the light soft pink watercolor wash on it and those fun black dash marks.  I saw this beautiful circle heart cut file from Just Nick and knew I had to use it for this page.  I cut it on the beautiful pink Eden paper and then used papers from the 6x8 Paper Pad, Gift Tags and other various papers to fill in the circles.  I used my circle punches a lot.  I added black thread to the tags and raised them up using adhesive foam.


I usually back cut files from behind it but these circles worked perfect right on top.  I love that a lot of the pink is still visible around each one.  I tend to cut big files like this on white, but I love how the pink looks here.  I love all these colors and patterns...oh my goodness!  I chose a black & white photo since I knew it would pop against all those bright colors.  I used a few bits of patterned paper behind it as layers.


Here's a close-up of one of the tags.  It was the perfect item for this circle, and to keep it in true tag fashion, I added the thread.  I also used some of the Clear Stamps from this collection.  I stamped "i" for my title.  It fit perfectly in that circle!  Some of the circles I did back from behind...you can see a bit of both in this photo.


Here's where I cut "LOVE" from another tag.  It makes a great title piece!  I also stamped "you" from the stamp set.


Here's another tag raised up with foam adhesive.  I also added some tangled thread under my photo as well as a cute red heart sticker. I did add white gesso to my background before adding in some pink and orange watercolors.


The piece at the bottom of the photo that says "I Love You" is part of a tag, too.  I layered in a few die cuts here and more tangled thread.


I hope this inspires you to pull out your gift tags and get creative with them!  You never know what you may come up with!

Have a great day!

Saturday, February 11, 2017

I Love Us / Cocoa Vanilla Studio

Happy Weekend, friends!  I'm excited to share my very first layout for the Cocoa Vanilla Studio Design Team today :)  I used the gorgeous Make A Wish collection for this.  If a collection was ever made to suit me, this is it.  All the bright colors and gorgeous patterns...be still my heart!  And even though it has a lot of birthday themed things in it, it is very versatile and can be used in so many different ways.  I just received my DT box of the new Wild At Heart collection, and it is simply stunning!  I'm still over the moon excited that I received a box all the way from Australia!!

Okay, so for this layout, I used one of the Cocoa Vanilla cut files.  I repeated the XO a few times and created a design and then welded it together in sort of a vertical / diagonal design.  I knew I wanted to place my photo in the upper right corner, so this created a space for it.  I used papers from the collection to back all those lines in the XOs.  I love how it turned out!  I did a little bit of watercoloring on the background to soften up all the white and keep it light and airy looking.  My photo has a lot of white in it, so I wanted to keep it in color.


Backing cut files like this does take some time, but it's always worth the end result.  I think using white as a base like this for the cut files allows all those other colors to really pop.  I machine stitched through each row once I was finished backing.  I added in several die cuts and stickers as embellishments, and my journaling fit nicely over on the lower right.


I love tucking in die cuts, and the florals in this collection are just gorgeous.  They have a watercolor look to them, and the colors are just beautiful.  I also used one of the flair buttons here, which I layered right on top of the photo with some tangled thread.  I also used one of the chipboard pieces...that pretty pink and white frame.  I also used some label-type stickers as layers.


I went simple and subtle with the title since the page is filled with big XOs.  I used the alpha sticker sheet for this and it fit perfectly right in this space.  There is another cluster under that consisting of die cuts and stickers and even a little vellum heart.


Speaking of vellum...check out these gorgeous flowers!  There is a whole pack of vellum die cuts, and these flowers...oh my gosh!  They are amazing.  I had to layer a few here under my photo.


Here's my process video showing how I made this from start to finish if you're interested to watch.  I hope you enjoy!


Thank you so much for watching and for stopping by!  Have a great day!

Friday, February 10, 2017

You Are My Bright Side / Paige Evans Design Team

Happy Friday, friends!!  I'm so ready to get this weekend started...woo hoo!  Today I'm sharing my newest layout for the Paige Evans Design Team.  I am seriously in love with her new Oh My Heart collection.  It contains all my favorite things...bright colors, amazing patterns, lots of fussy cutting opportunities...flowers, hearts, scripty words...you name it.  I knew right away I wanted to fussy cut out the hearts on Paper 02.  It's filled with a rainbow array of little hearts, and so I got busy cutting some of them out.  I had an idea of making them look like confetti coming out from behind my photo, so that's what I went with.

Our theme this week is LOVE, so to celebrate that, I scrapped this photo of me and my husband eating lunch at a beach shack right on the water in Aruba.  I love the colors in the photo, and these papers complimented it perfectly.  I used Paper 04 for my background.  That gradient inky blue is so gorgeous.  I already had a lot of pink in the layout, so the blue is a nice contrast.  I cut a giant wonky heart on the blue paper using my Cameo and then used white cardstock behind it.  I used some Shimmerz Paints from my stash to create a rainbow wash of color behind the hearts.  It dried a little too bright for what I wanted, so I went over it with some white gesso to fade it out a bit.  It was the perfect backdrop for all those hearts.


The fussy cutting did take some time, but these are easy shapes to cut.  Plus the end result was totally worth it :)  I placed them closer together at the base and then dispersed them out wider as they went up.  I used a few die cuts from the Ephemera pack as layers behind my photo as well as some of the flower cluster die cuts.  I also added a bit of tangled thread under there.


I'm obsessed with these colors...ahhhhh!  I tried to bring in all the colors down here in this cluster.  I used a very colorful tag as a layer and then added in another flower die cut.  That yellow flower is from the Chipboard Stickers, and there are a few Puffy Stickers in there as well.  I fussy cut a few of the scalloped borders from Paper 17 to used here as well.  My journaling fit right underneath there.


More hearts....sigh.  I love the added navy blue color here.  Here you can see that I machine stitched around the heart using pink and orange thread.  I originally was going to use all the colors, but I liked how it looked with just two outlines.  I used another chipboard piece here above the photo.


The upper left part of the big heart was wide open, so I created a cluster here.  I used several die cuts, chipboard pieces and puffy stickers.  I love that ticket piece, and so I used that as my title.  Again, I brought in all the colors here for this cluster.  I like to try and repeat the colors used in each of my clusters and finish it off with some tangled thread.


Here's my favorite part...the process video!  I hope you enjoy it and get some fun ideas.


Thank you so much for stopping by today!  Have a wonderful weekend, friends!

Monday, February 6, 2017

Beautiful Friends / Hip Kit Club

Hello again, friends!  I'm back today to share another new layout for Hip Kit Club featuring the 2017 January Hip Kits.  I decided to created some vertical strips on my background using a few patterned papers.  I went with the beautiful pink and soft orange watercolor paper from Pink Paislee Moonstruck and combined it with two of the exclusive papers.  I love the contrast in the two colors.  I covered a lot of the area with white gesso and then came in with some of the teal Heidi Swapp Texture Paste.  I watered it down a bit and used the packaging technique and then came in with the Carta Bella Houndstooth stencil to create some texture.  I also added in a little bit of pink and some gold Color Shine.

I went with a diagonal design.  I layered up some Project Life cards & a little bit of patterned paper behind my photo.  I fussy cut those pretty flowers from another exclusive paper and layered them along with some of the exclusive die cut flowers.  I also added several of the One Canoe Two butterfly rub-ons.


I love these beautiful colors!  So so so pretty.  The HAPPY letters are included in the exclusive die cuts, and I stitched through them.  I typed my journaling this time and glued it to one of the One Canoe Two label stickers.  I added one of the One Canoe Two metal clips and an exclusive wood veneer.


Here you can see all the texture from the paste and stencil.  I added some foam under the label here to give it some depth.  I also added some tangled thread, an exclusive phrase cut apart piece and a Moonstruck puffy sticker.


I love all the dimension going on here.  This is the perfect place for adding tangled thread :)  Here you can also see where I machine stitched along the edges of the vertical paper strips.


More lovely layers going on here...I love the dimension on the butterflies!  Instead of rubbing them right onto the background, I adhered them to white cardstock first and then fussy cut them out.  This allowed me to move them around and add a dot of glue to the center so I could bend up the wings.


I combined a Moonstruck die cut word here with a watercolor banner for my title.  I added the Studio Calico puffy alpha stickers here to complete it.  FRIENDS fit perfectly on it!


Here's my process video for this layout if you'd like to check it out.  I hope you are inspired!


Thank you for visiting me, and have a great day!

Sunday, February 5, 2017

Today is a Good Day Canvas / Bella Blvd

Hey, friends!  I hope you're having a great weekend.  Today I wanted to share another project I created for Creativation 2017 (CHA) for Bella Blvd.  I used the beautiful new Make Your Mark collection for this 8x8 canvas.  This collection has so many gorgeous bright floral elements in it, and I love that they all have this watercolor effect.  I cut a big chunk from a patterned paper to use on the left side of the canvas.  I used some clear gesso on the canvas and then use lots of yummy blue Shimmerz Paints.  I used a small circle stencil and some Dazzlerz Texture Paste to create those dimensional circles.


I LOVE these colors...on my gosh.  Here you can see the texture and dimension.  I also splattered on some Heidi Swapp Gold color Shine and added a few pink sequins from my stash.  The big shiny metallic gold words are from the Clear Cuts pack, and I just cut around the words and adhered it to the canvas.  Easy peasy!  I added a floral die cut cluster to the upper right area and added some tangled thread under it.


Puffy Stickers are in this collection...yesssss!  Check out that gorgeous floral cluster!  I added some blue thread under it for an extra pop of color.


Here's the bottom area.  This was really easy and quick to put together...especially with all these gorgeous papers and embellishments.


I hope you give this a try...it's a great project on a small scale.  Plus it will look great hanging up in your craft space :)

Thanks for stopping by, and have a wonderful day!

Friday, February 3, 2017

Using Older Supplies / This is Incredible

Happy Friday...woo hoo!  I'm back today sharing a new layout in my Using Older Supplies series I started several months ago on my YouTube channel.  I haven't done one of these in a while.  I got so busy during the holidays and then making extra projects for CHA last month.  I finally had a little bit of a break to create something just for fun, so I did just that.

For this page, I started off with the photo.  It's me and the Incredible Hulk!  I was so fortunate to meet Lou Ferrigno a few years ago at a MegaCon event in Orlando.  He was one of my favorites growing up, and my 7-year-old self was jumping up and down to meet him!  I never missed a Friday night of that show :)  I wanted to compliment all the blue in the photo but also add some green since he is the Hulk...haha :D  I also wanted to showcase what you could do with just a few supplies...so I maximized my white cardstock and washi tape in a few different ways.


I started off with an older heart stencil by Heidi Swapp and some Tidy Widy Shimmerz Texturez paste.  I just wanted some subtle texture and interest on the background.  Once that dried, I used some Prima Oil Pastels and some Shimmerz to create the watercolor effect.  The Texturez sort of acted as a resist so they still stood out.  I used the packaging technique as well as my finger to smudge all the color around.  I had the big white scribbly circle and big white hearts lying in my stash bin from previous projects, so I decided to use them.  I jazzed up the plain hearts by stitching around the edges with blue thread.  I came in with blue and green washi tape, which I tore first.  Then I created little confetti circles with it by placing strips onto some scrap cardstock and punching them out.  I had to glue each one down one by one...but it was worth it :)


I did add some foam under all the big hearts to give them some dimension.  I also added some green and blue tangled thread as well as some sequins from SpiegelMom Scraps.  Here you can see the awesome texture from the background hearts.  I wanted to create a fun confetti look with the small circles, so I glued them tighter together around the photo and then spaced them out as they went away from the picture.


I wasn't sure at first about covering up a lot of the background mixed media work, but I absolutely love how it turned out.  What you can see of the background is just the right amount of blue to compliment the photo.  Since the photo is so bold with all that blue, I didn't want to overpower that by making the background too busy.  All the white really balances it out.


Here I added more torn washi tape strips.  I used some of the DIY Thickers, which have a fabric texture to them.  You can alter them and add pretty much anything to them to change the color.  I used a blue gelato at the bottom and then dipped my finger in water to smudge the color.  I added an older Technique Tuesday stamp above it to complete my title.


I had to use the word "incredible" in my title somewhere, and I just love this phrase sticker from Tim Holtz.  It jumped out at me and reminded me of the show.  David Banner was always just a normal man...an ordinary man.  When he transformed into the Hulk, he always did extraordinary things by helping those who needed it.  What a perfect quote! <3 p="">

Here's the process video for this page.  It's one of my favorites, and I am really loving how it all came together. 


And this goes to show that you don't HAVE to have a ton of products to create something fun and awesome.  I feel like this page is full of color, texture and interest and I just used a few things from my stash.  You just have to look at your products in a different light, and you'll be surprised by what you can come up with!

Thanks so much for stopping by, and have a GREAT Friday!