Thursday, May 19, 2016

Awesome Sunny Day / Hip Kit Club

Happy Thursday, friends!  Today I'm sharing my newest layout for Hip Kit Club.  I used the absolutely stunning 2016 May Hip Kits to create it.  Kim Watson designed so many of the papers and embellishments this month, and they are truly gorgeous!  Just look at the colors!

This background paper was designed by Kim, and I decided to center my photo and do some layering and mixed media behind it.  I did add some white gesso on the background before doing some watercolor work with the Shimmerz Jeni B Bleu Vibez.  The Shimmerz are in the Color Kit this month as well as the Dazzlerz Spun Sugar.  I used that to created those textured clouds.  All of the gorgeous flowers are part of the exclusive die cut pack included in the Main Kit, and they're all exclusives.


I used some of the light yellow cardstock in the Cardstock Kit to cut these background flowers.  I used one of the Jillibean Soup wood veneers, some fussy cut letters and some exclusive die cut letters to create my title.  That blue banner chipboard piece is from the Illustrated Faith chipboard sheet from the She Blooms collection.    Aren't these colors so pretty?


Squeal!  It doesn't get any more beautiful than this...I can't even handle these colors together!  I added some yellow tangled thread here for an extra pop of color and texture.


This background paper makes it really easy to make a layout because it has so many gorgeous flowers on it already.  I added a few enamel dots and some sentiment die cuts.


These clouds turned out so cool!  I used the exclusive cloud stencil from the Color Kit.  You could even add some of the blue Vibez to this and make blue clouds.


Here's my process video if you'd like to check it out.  Hope you enjoy!


Thanks so much for stopping by!

Wednesday, May 18, 2016

Oh, Summer We Love You / Bella Blvd

Hello again!  Today I have another layout for Bella Blvd to share.  I was up on the blog last Thursday sharing how you can use punches to create a fun layout.  I know a lot of us get carried away with our electronic die cutting machines like Cameos and Cricuts.  But what if you don't have one of those?  If you have some punches, you can create something just as fun.

I have several different sized square punches.  I wanted to create a bright Summery layout, so I pulled out several patterned papers from Sweet Baby Girl, Color Chaos, Fresh Market, Simply Spring, Classic Calendars, and Illustrated Faith's Whatever is Lovely and She Blooms.  I punched squares from all these papers and even a few Clear Cuts.  I used a light minty teal cardstock as my background since it matched the water in the photo.  I added some white gesso to the cardstock first and then used a few shades of teal Shimmerz to create a watercolor effect.  Pool pages are my favorite because I love creating "water" on the background.


I love how this turned out!  I used some of the Ciao Chipboard Elements here and used a few gelatos to create a faded ombre look.  I paired it with some alpha stickers to create my title.  I added a She Blooms die cut heart and a few yellow Enamel Hearts as well.


I love the Bella Clear Cuts!  They punched very easily, and I love the look of the random dots.  I added some pink machine stitching to most of the squares for added detail.


I think the colors in the photo really accentuate the squares...the colors are a perfect match.  I added a bit of aqua thread for an extra pop of that darker color, and I used a white dotted Clear Cut as a layer behind my photo.


Here's one more close-up of the left side...more squares, more tangled thread, and more lovely little hearts!


I hope you are inspired to use your punches to create a layout.  This technique kind of reminds me of backing an intricate die cut with bits of patterned papers.  You still get a lot of color and pattern without being too busy.

Thanks so much for stopping by!

Tuesday, May 17, 2016

Different Not Less / A Flair For Buttons

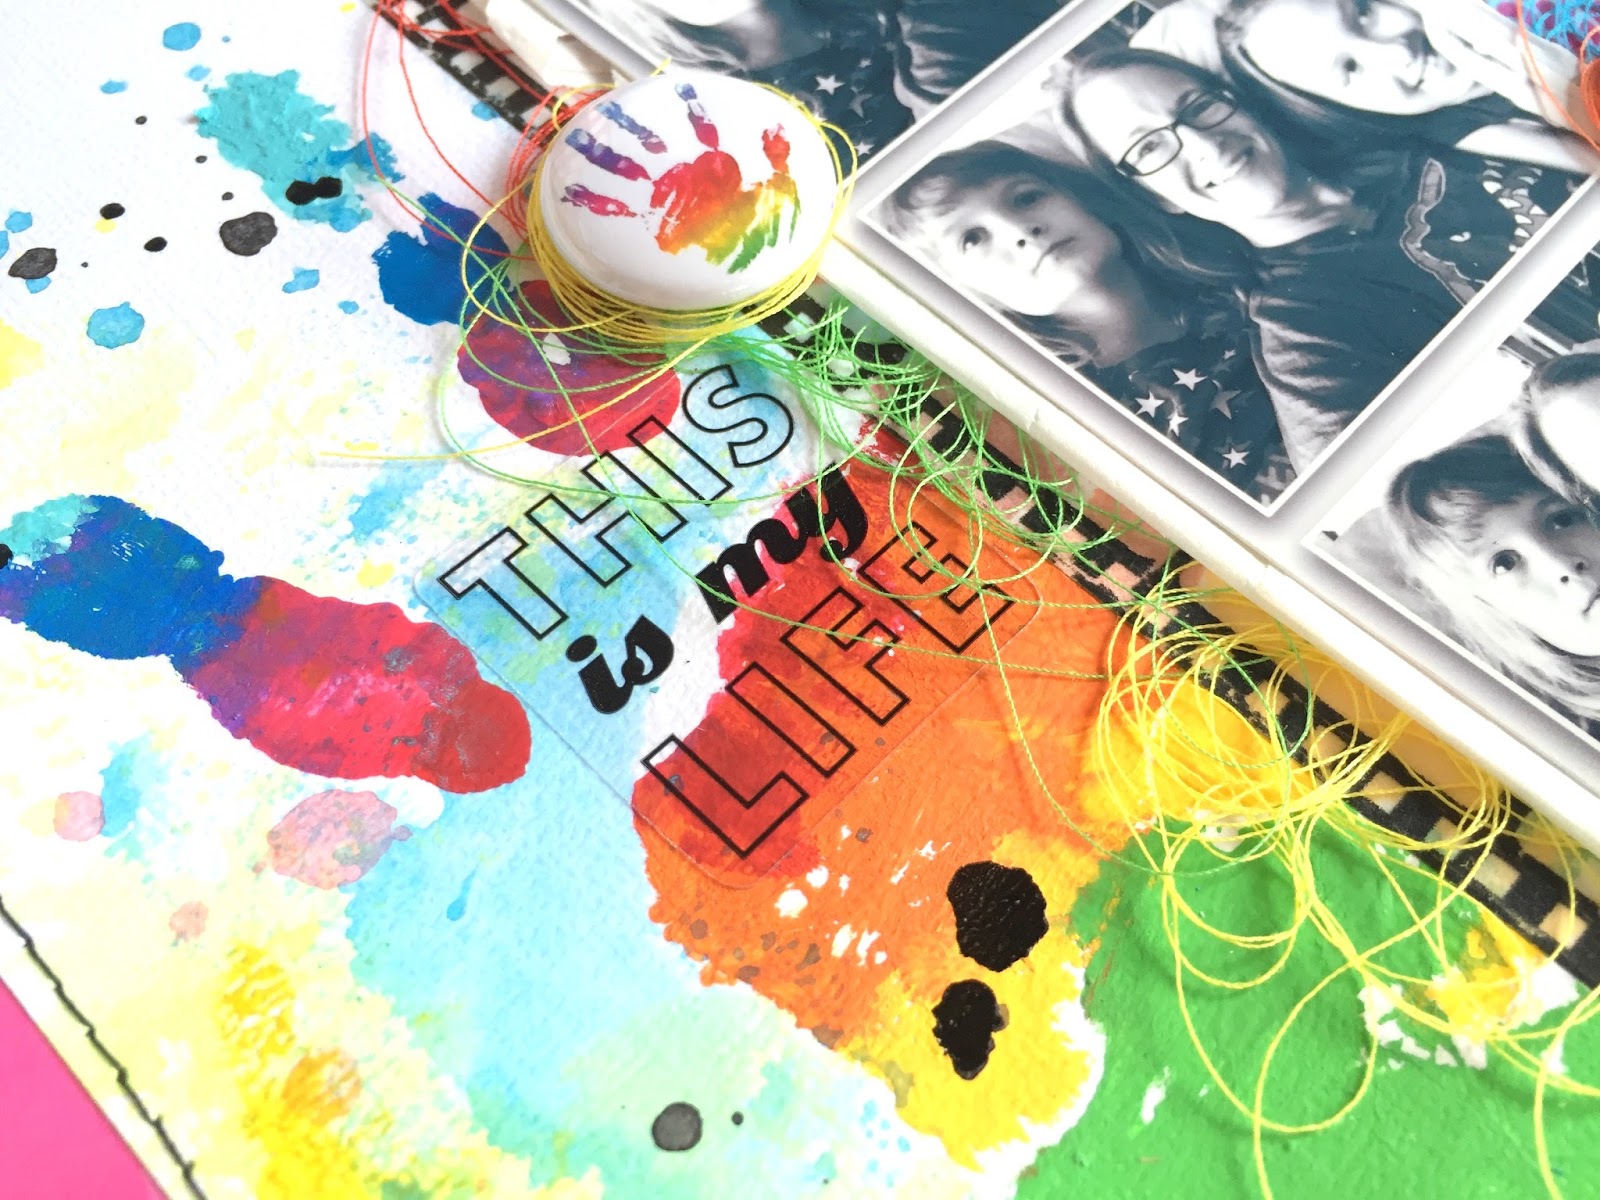
Happy Tuesday, friends!  I'm back today to share a layout for A Flair For Buttons using the Autism Flair set.  I had to have this set right away since both my daughters are autistic and nonverbal.  I was immediately inspired by that rainbow hand print flair, and I decided to create a fun and bright layout showcasing what autism means to us and our family :)

You can find these flair HERE.


I just had to create my own rainbow hand print, so I pulled out my acrylic paints and made a stripe of each color on a piece of plastic packaging.  I just stuck my hand right into it and then stamped it onto my cardstock.  You can watch exactly how I did this in my process video below.  Once it dried, I came in with a few of my Shimmerz sprays to add a bit more color.  I used these adorable photos of me and my girls from last month since April was Autism Awareness Month.  I created a little film strip and used some film strip washi tape behind them.  My stickers are all from MAMBI and Simple Stories.


I'm completely obsessed with how this turned out!  I love the colors, and I love that this symbol for Autism is so cool and colorful!  I added lots of rainbow colored thread, too....you know, because I love it and because Autism is chaotic and messy.  So it was perfect!  Maybe this explains my obsession with messy scrapbook pages...haha!  Isn't that flair the cutest?!


I just had to add this one over here...because I love 2 someones with Autism <3 a="" again="" any="" colors...i="" day="" for="" i="" love="" m="" nbsp="" p="" rainbows="" sucker="" the="">


My title comes from Dr. Temple Grandin.  She's probably the most famous person on Earth with Autism.  She's in her 60s now, and she's a professor of Animal Science in Colorado.  You should definitely look her up.  You'll be baffled and amazed at how much she has accomplished in her life.  She didn't speak until she was 4, and she fell in love with cows at a young age.  This inspired her to go into Animal Science, and now she's a professor!  She single-handedly designed many cattle shutes for ranchers because she didn't like how inhumane the cattle were being treated.  Her designs are in ranches everywhere...it's really an amazing story!  One of her many books is entitled "Different Not Less."

I used some Queen & Co. washi tape here, and I used my red paint to color those white Thickers.  I cut "less" on my Cameo and added another awesome flair.


Watercolor, thread, stickers..you name it!  Aren't my girlies so adorable? <3 p="">

I added a fun rainbow paper from Michael's as a border and stitched around the edges.  I've been adding borders lately....I love how it looks.


Here's my process video if you'd like to check out how I made this!  I hope you enjoy!


Thanks so much for stopping by today!  See you soon!  Be sure to check out the A Flair For Buttons Etsy Store...so many cool flair to pick from!

Monday, May 16, 2016

My Happy Family / The Cut Shoppe

Hey, friends!  I'm back today to share another fun layout for The Cut Shoppe.  I used Ashley's new digital & printable Snapshots collection and two cut files: A Way With Words and Zig-Zagged. This collection is so fun and bright, and you can print it as many times as you want!


Here's the layout I created.  I cut the Zig-Zagged design on white cardstock and backed with some of the Snapshots papers.  I left some of the spots  white and then added some white gesso over a lot of the page.  I used some Shimmerz and a blue gelato to get that pretty blue watercolor look.  I added ink splatters in pink, orange and black, and I machine stitched through all the chevrons.


I love the texture that cut files give, and they look great with mixed media over them.  I cut the word "happy" on blue cardstock and paired it up with some Elle's Studio black alphas.  I pulled in some stickers from my stash.  These are from Me & My Big Ideas, American Crafts Amy Tan Rise & Shine and Heidi Swapp.


I fussy cut several die cuts and ephemera pieces from the collection here and added a flair button and some tangled thread.  I love all of these colors together...so prettu!


Here are more of the die cuts and ephemera.  I printed mine pretty small, but they can be printed larger to fill the entire 8.5x11 page.


Here's one more look at the cut file...I think using patterned paper to back a die cut plus adding mixed media may be my most favorite thing ever!


Here's my process video if you'd like to see how this layout came together.  I hope you enjoy and gain some inspiration!


Thanks for stopping by, and have a great weekend!


Sunday, May 15, 2016

I Could Squish You / Pink Paislee Guest Designer

Hey there, and Happy Sunday!  I hope you've all had a great weekend so far.  Today I wanted to share one of the layouts I created for my Guest Design Spot over at Pink Paislee last week!  I was over the moon thrilled when Paige asked me to create some projects with her gorgeous Fancy Free collection.  Of course I said YES without a second thought!

Here's the first layout I made.  The patterned papers and colors are just so beautiful, and I wanted to use a lot of them together.  My first instinct to do that is to use a cut file with lots of open spaces.  I used the Open Letter Alpha cut file from The Cut Shoppe to create this awesome quote I found on Pinterest.  I backed each letter with a different paper, and I'm loving how it turned out!  I used a light pink cardstock as my background, and I smudged some white gesso and some pink watercolors on it.  I added a bit of tangled thread and then glued and stitched all the words down.


I used some of the beautiful aqua glitter Thicker hearts as accents on some of the letters.  I just can't get enough of this technique.  Backing die cuts is such a great way to get lots of pattern and color on your page without it being too overwhelming and busy.  Plus having a solid color background makes it all stand out a little more.


If you know me, then you know I love tangled thread!  I glued it down under the words and then stitched over it.


Here's one more close up.  I added a cute puffy cloud and heart sticker and a little die cut heart here in this open area.  I didn't want to add too much more since the words where the focus.  There is such a thing as "too busy" and I didn't want to detract from the quote.


Thanks so much for stopping by today!  Stay tuned for more of my Pink Paislee projects coming soon!
 

Friday, May 13, 2016

Wild Thang / Bella Blvd May Sketch

It's Friday...woo hoo!  Today I wanted to share the May Sketch over at Bella Blvd and the layout I made using it.  The sketch leaves lots of room for a creative background.


I pulled several different pieces from various collections for this page.  I didn't use a lot of patterned papers...just a few strips from Color Chaos and Just Add Color, and one of the 3x4 cut apart cards from Color Chaos.  I created a fun and colorful mixed media background using watercolor spray inks and distress inks with a heart stencil.  I used some of the big Amorie Alpha Chipboard for my title and did some rainbow machine stitching through it.

These pictures crack me up.  Paige had a huge bruise on her head from banging it on the floor in one of her temper tantrums, and she was making some silly goofy faces in the tub.  She's definitely a wild child...haha!  This cut apart card fits her perfectly!


I distressed a piece of black paper to put behind this since there was so much color on it.  I wanted it separated from the colorful background to make it stand out a little more.  I stitched around it for added detail.  I also used some of the washi tape from Wild Things.


I love that you can stitch through these chipboard letters!  I used lots of different colors here, and I love how it turned out.  I added some extra black thread behind them to make them stand out against the pink paint.  My journaling fit perfectly here under the title.  I used a few different Tiny Text alpha stickers to make "WiLD" on top of the photo.


I added more washi tape here as well as some stickers and enamel hearts.  These enamel hearts come in almost every color, and I could stick them on everything!  They are the perfect little accent.


Here's one more look at the right side.  More washi tape, enamel hearts and tangled thread.  And that crazy face...haha!


I'd love to see you use this sketch for a layout...it's really fun, and you can get creative and use three photos or two like I did.  Sketches are great for jumping off points.

Thanks for stopping by, and have a great day!

Thursday, May 12, 2016

Sweet Life / Hip Kit Club NSD Layout

Hey there again!  Today I am sharing the layout I created for Hip Kit Club's National Scrapbooking Day Crop.  That took place last weekend, and the entire team created fun challenges for all the members.  My challenge was to use stencils in at least two different ways on a layout.

I used the 2016 April Hip Kits for this and the exclusive butterfly stencil from the Color Kit.  I used it in four different ways.  I used it the most common way, which was to lay it down and spray mist over it.  I also dipped it into spray ink and flipped it over and used it as a stamp.  I used glass bead gel over it and I used a black pen to trace the butterflies.  There really are a lot of things you can do with stencils...you just have to think outside the box!


Here's a close up look at the stencil work.  You can see the glass bead gel here...it's like a clear gel but it has these tiny glass bead in it.  It's really pretty and gives amazing texture.  Once it dried, I used a small paintbrush to add a bit of Shimmerz to them.  The inks I used for this are all from Shimmerz.  Some of the butterflies were a bit messy and abstract from the stamping, but I love how that turned out.


I combined lots of kit goodies here.  A lot of Pinkfresh Studio -- the puffy green striped frame, the acetate SWEET and the washi tape strips.  I fussy cut a few of the Crate Paper Maggie Holmes butterflies and added a Simple Stories "life" wood veneer.  I've said this a million times, but I LOVE these three colors together!


When I thought of using the stencil as a stamp, I envisioned the butterflies being white with all the ink color around them.  It didn't turn out that clean...it was more of a blob of color.  The stamping idea works better if you lay the stencil down and spray it from above and then flip it over.  I love the messy abstract look, though, so I actually like how it turned out.  I used some of the exclusive Hip Kit papers and one of the Amy Tan papers behind my photos.


Another look at the mixed media work here...more glass bead gel and lots of Shimmerz!  I used Coloringz No Yoking (from the Color Kit), and the rest is from my stash.  Coloringz Pretty in Pink, Vibez Jeni B Bleu and Sweetheart.  Some of my all-time faves, for sure!


I decided to add this exclusive yellow flair button right onto the photos.  I layered with one of Pinkfresh Studio puffy frames and some tangled thread.


Thanks to everyone who played along with my challenge and all the other ones...there were A LOT of beautiful projects posted!  I wish we could do NSD more than once a year!

Here's my process video for you...


I hope you all have a fabulous day!