Hey, friends! Happy Weekend...yay! I have a fun Summer layout for the Shimmerz Education Team to share today. I decided to create an artsy background using several different Shimmerz products. I chose three colors to start with: Spritz Caribbean Sunset, Vibez Pop Art Pink and Coloringz No Yoking. I used two different stencils and sprayed through them. I decided to add a brighter pink, so I brought in Coloringz Pink Stilettos and used the packaging technique. My photo has a lot of blue in it, so I added just a small amount of blue to the background. I also used a few gelatos and smudged them with my fingers.
I used bits and pieces from the Fancy Pants Joy Parade collection. It's perfect for Summer photos! I layered in a few tags and die cuts as well as a few epoxy stickers from the Amy Tangerine Rise & Shine collection.
I used a small grid stencil here. Once I sprayed through it, I flipped it over and used it as a stamp. I love the blending of colors. I didn't even know what I was going to embellish with until I got the background colors down. I love when things just match without even trying :) I added some different colors of sequins from SpiegelMom Scraps. They matched perfectly, too!
Layering is such a great way to create dimension on layouts. I tucked in a few tags, circles and fun wonky stars. I love that cute cloud from Amy Tan.
I used the packaging technique with the No Yoking here. I used Creameez Ride the Tide and Shimmerz Winter's Mist to create these blue splatters.
Here you can see how different the gelatos look on the cardstock versus the ink sprays. I didn't use any gesso on my cardstock, so the texture of it shows really well through all the products.
Here's a close-up of the bottom cluster. I love all the mix of colors :)
Here's my process video if you'd like to check it out. I hope you're inspired and get some fun ideas!
It's Friday...yay! Thank goodness, am I right? :D I have a new layout and process video to share today for Bella Blvd. Our focus this week is the new Illustrated Faith Delight in His Day collection. Right away I was inspired by all the fun hot air balloons in the Clear Cuts Pad. I got the idea to create several different sized die cut balloons and create a fun sky background. I found a few digital cut files in the Silhouette Store. I backed the large one with papers from the 6x8 Paper Pad and cut the three medium sized ones from different 6x8 papers. I pieced them together and machine stitched through them. I think they turned out so cute! The two tiny balloons are from the Clear Cuts Pad.
I created a fun sky by adding lots of blue spray ink to my background. I did coat my white cardstock with white gesso first since I knew I'd be adding a lot of liquid to the paper. The gesso protects the cardstock and gives it some strength and texture, and it allows your mixed media products to blend really well together.
I love how you can see the cardstock's texture through the gesso and spray inks. Such a cool look! I think these balloons turned out so cute. I added a fussy cut heart on top of it. My title comes from the Fundamentals sheet. I added some tissue paper and adhesive foam under my photo as well as another Fundamentals sticker.
I did a bit of machine stitching in white on this balloon and raised it up with foam. I also added some yellow and aqua thread under it for some added color and texture. That cute pink scalloped border piece is a Fundamentals sticker.
Here is a closer look at a few of the balloons and the fun background. I added another Fundamentals sticker right above the photo.
This actually came together really quickly for me...the hot air balloons did all the work! Here's the process video if you'd like to see how I put it all together.
Thank you so much for stopping by today. Be sure to check out the Bella Blvd YouTube channel for more inspiration and more information on all their collections.
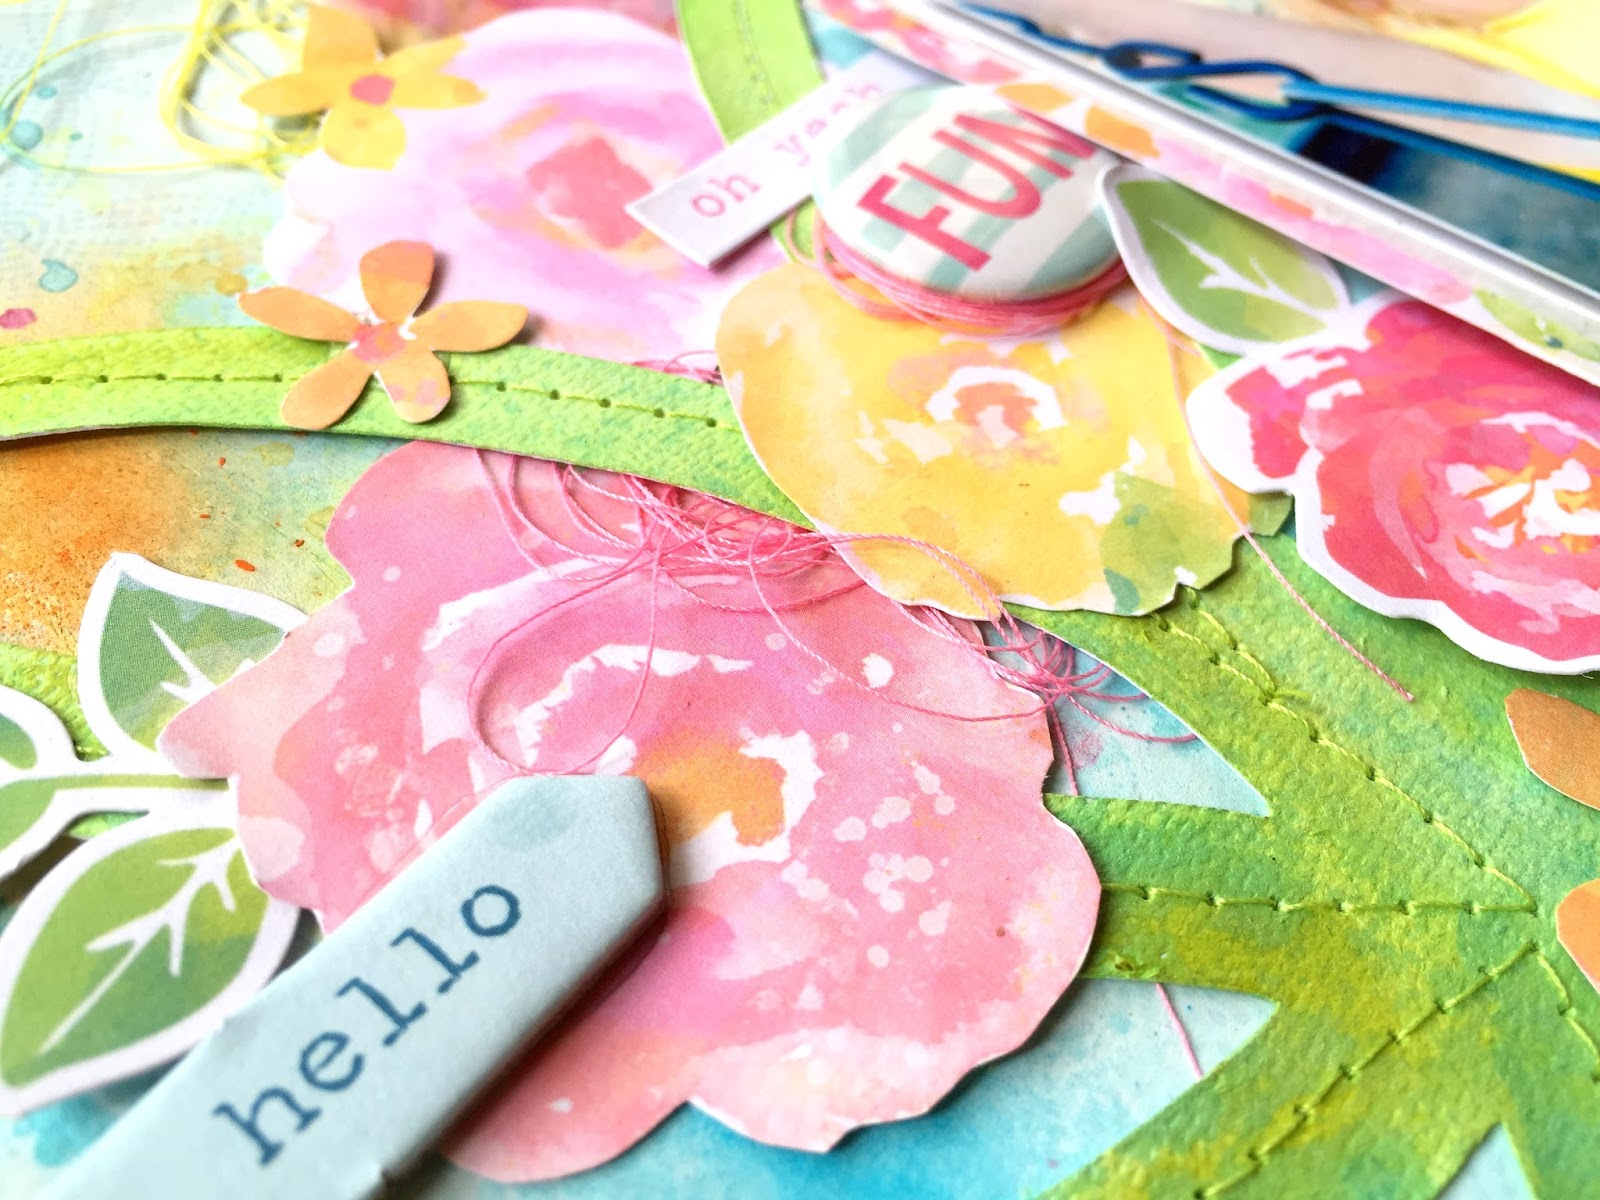
Happy Thursday, friends! I'm back again today to share my newest layout for Cocoa Vanilla Studio. I mean it when I say that I just love every single thing about the Make a Wish collection. The colors are right up my alley, and these watercolor flowers are gorgeous. I did use a patterned paper from the Love Always collection, but everything else is from Make a Wish.
I started with an enlarged leaf cut file from the Cocoa Vanilla store. I cut it on white cardstock and then painted it with a few shades of green Shimmerz. On my background, I added lots of white gesso to fade away some of the background pattern and give me a white base. I used some blue, yellow and orange Shimmerz over it. My photo is a perfect match with all the pink and yellow, so I fussy cut a lot of the watercolor flowers to scatter around the picture and leaf cut file. I also used a lot of die cut and vellum flowers from the collection.
Just look at these colors....so stunning! I layered a lot of the flowers in and around the leaf and photo and then added some tangled thread. I used green thread to machine stitch all around the leaf. I love the detail and texture that gives. I layered in a flair button, a sticker and a chipboard arrow.
For my title, I fussy cut "LOVE" from a patterned paper and layered a sentiment sticker over it. I added a strip of foam under the sticker to raise it up and added some yellow thread under it all before gluing it down. My journaling fit nicely right underneath the title. I love those little fussy cut flowers...it's so much fun to create your own embellishments from paper!
I wish I had an entire pack of these vellum flowers...they are just so pretty. I know I sound like a broken record, but I just love these colors together and how the background looks.
More beautiful colors! I layered some tissue paper and patterned paper under my photo as well as some foam.
Here's one more close up of the texture, dimension and detail.
I do have a process video if you'd like to check out how I made this page. I hope you enjoy!
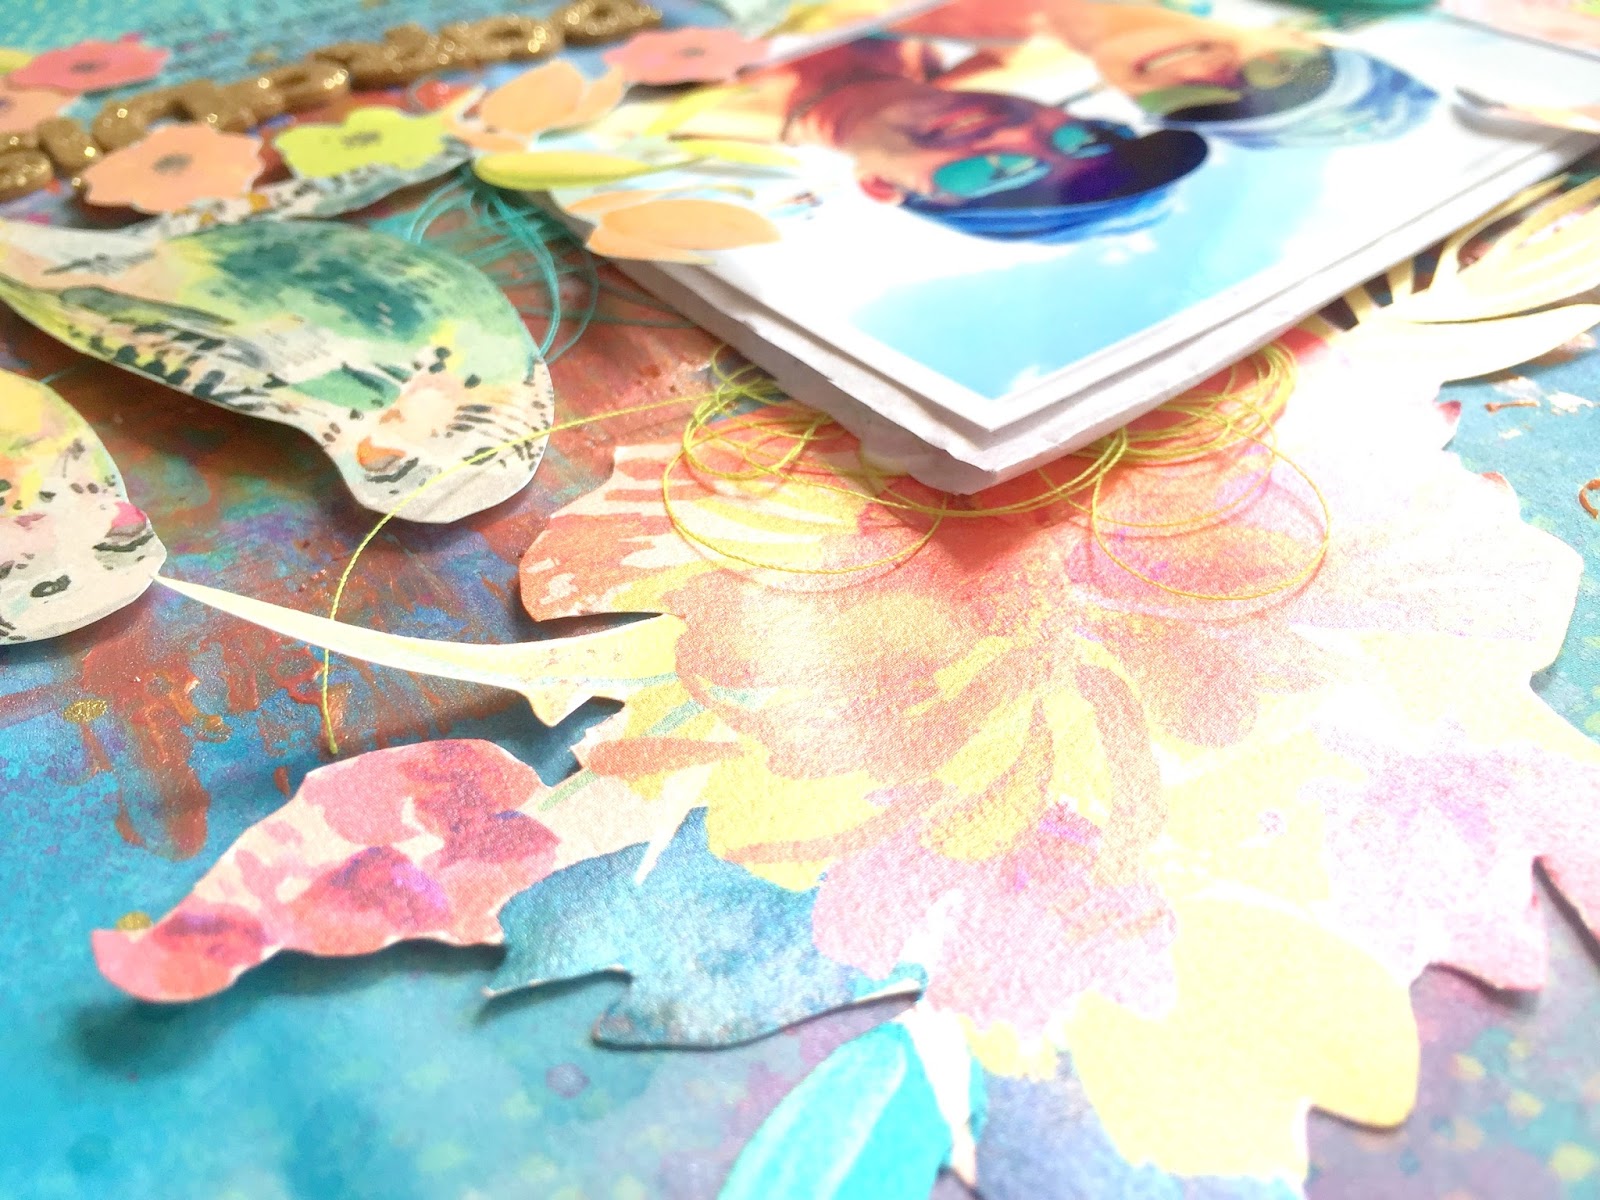
Hello again! I'm back today with a new layout for Hip Kit Club. I used the gorgeous 2017 April Hip Kits. I love everything about them! I'm super excited that I created a bright tropical layout. There are so many fun items like pineapples, flowers and flamingos. I decided to scrap this photo of me in Aruba sipping on a fruity beverage :)
I started with one of Kim Watson's cut files and enlarged it. I used some of the Vicki Boutin Art Crayons from the Color Kit and some Shimmerz sprays to color it. I backed it with the gold glitter polka dotted specialty paper in the Paper Kit (from Crate Paper). I did add white gesso to my white cardstock background so I could smudge the Art Crayons around with my fingers. I love how it turned out! I embellished with some of the Project Life cards, some of the Vicki Boutin stickers, some of the Crate Paper die cuts, some Pink Paislee Paige Evans Oh My Heart chipboard, some Crate Paper gold alphas, a few My Mind's Eye puffy stickers and and exclusive flair button. All gorgeous pieces! These are all available in the various kits HERE on the website.
Okay, I'm in love with these colors! There is a lot of mixing and matching going on in this layout. I colored the cardstock sticker flower using the Art Crayons and a dab of water. I just smudged the color around with my fingers. I fussy cut that cute pineapple from a PL card and layered the flair button over it with some tangled thread. I colored "escape" using the crayons and created a pink to orange gradient. I love how it looks paired with the gold "vacation" alphas. Lastly, I added a Paige Evans Oh My Heart chipboard flower and a few MME puffy stickers.
I absolutely LOVE how you can see the texture of the cardstock through the art crayons. You can see here that I machine stitched around the body of the pineapple with gold thread. I fussy cut that bright flower cluster from a PL card and layered it under my photo. Aren't the colors just beautiful?! I also layered in some yellow tangled thread as well as a Vicki Boutin sticker and a matching gold heart sticker.
I added more Paige Evans and MME flowers at the top here. I love the combination of paper stickers and chipboard stickers. Everything creates such awesome dimension! I couldn't resist using that shiny gold flamingo from Crate Paper. I also used a few of the 3x4 PL cards as layers behind my photo.
I didn't glue down the top part of the pineapple just because of this...the dimension! I love how the leaves curl up and look more realistic. I also added some Heidi Swapp Gold Color Shine...it's always gorgeous.
I added another Vicki Boutin sticker as well as a piece from the exclusive cut apart sheet. Then I added my journaling under that.
I just love how this turned out! These kits make it so easy to create something awesome :) I do have a process video if you'd like to check out...
Thanks a bunch for stopping in, and have a wonderful day!
Happy Tuesday, friends! I'm back with a new layout for the Paige Evans Design Team. Our theme this week is the Oh My Heart12x12 Paper Pad. It has all of the patterned papers as well as more rose gold foiled papers and laser die cut papers. I used one of the laser die cuts as part of my background design here. If you don't have an electronic die cutting machine, these are perfect! All the work is done for you.
I used the Oh My Heart 6x6 Paper Pad to back some of the open spots and then adhered the entire thing to some white cardstock. I left the right side open so it would be more tone-on-tone with the white. I love how you can still see the die cut shapes in a more subtle way. I covered a lot of the area with white gesso and then used ink sprays and gelatos to add smudges of color that matched all the papers. I couldn't resist documenting this hilarious photo of my child crossing her eyes in the swing...haha!
I love mixing and matching all three of Paige's collections. I used a few of the Fancy Free Wood Veneer pieces here and then topped it off with a Take Me AwayChipboard Sticker. I combined some Oh My Heart Chipboard Stickers with some Take Me Away Thickers for my title. I love how the mixed media in the background turned out. You can still see a lot of the cardstock's texture through the gelatos.
Here's a closer look at the title. I fussy cut "sugar" from one of the papers from the 12x12 Paper Pad and used it as part of the title. Again, look at the fun texture! I love overlapping pieces like this, and paired with the mixed media background is my favorite! I also did a little machine stitching around all the hexagons with white thread.
More layering around the photo here. That's a fun Fancy Free Wood Veneer piece and a fussy cut flower from Oh My Heart. I added some tangled thread for added color and texture. I think I could fussy cut these flowers all day long....they're so pretty!
I decided to create a fussy cut flower cluster in the upper right corner. I layered some thread in there and popped up the little orange flower. I am completely in love with how this turned out!
I used one of the open hexagons to write my journaling. I used the Oh My Heart Acrylic Stamps to create the lines.
Here's one last close-up of the laser die cut paper. It really simple to use these...very easy to back the open areas with patterned paper.
I do have a process video for you...I hope you enjoy!
Thank you so much for watching and stopping by! Have a wonderful day, friends :)
Hey friends! I'm back today to share another layout I created as a guest for Trimcraft. I'm also using a flair button from A Flair For Buttons. I used the Storyteller paper pad for this, which is available in Michael's stores. I only had the paper pad to work with, so I added in some embellishments from my stash. Since I wound up with a busy and colorful design, I went light on the embellishments. Flair buttons are always my go-to items for embellishing, and I had the perfect one for this page!
I used the Rosette cut file from Just Nick and backed it with lots of patterned papers. The colors are so vibrant and the patterns are really cool. There is a lot of gold glitter accents as well. I love how these roses turned out! I used a purple patterned paper as my background. I smudged a lot of white gesso around the edges of the cut file with my fingers so it would create a faded look. I used some Shimmerz and gelatos to create the watercolor effect coming out from behind everything.
All the sequins I added around the page are from SpiegelMom Scraps. I love how they give small yet beautiful detail. I also added some foam under the cut file to create a lot of dimension...and what a difference it makes!
Here you can see the pretty sequins as well as the shiny gold elements. To bring out more of the gold, I added some splatters of Heidi Swapp Gold Color Shine. Look how awesome it reflects on the purple paper!
Here's my cute purple heart flair button. It's from the Just Hearts 2 flair set, and I added some aqua thread under it for a pop of color. I also added some vellum and a scrap piece of patterned paper under my photo.
I couldn't resist adding some metallic gold thread under the roses :) That "shine on" sticker is from a MAMBI sticker book. All the fun epoxy stickers are from the Amy Tangerine Rise & Shine collection.
Here's another angle of the cut file...such pretty colors!
I went simple with the title. I pulled out some older pink glitter Thickers from my stash and traced around them with a white gel pen.
Here's my process video if you'd like to see how this was made...I hope you enjoy!
Thanks for stopping by! Have a great weekend, friends!
Hey, friends! I'm back today to share a layout I created for Trimcraft. I was contacted by Claire from Trimcraft and she asked if I'd like to design a few layouts using a few of their beautiful paper pads. Of course I said yes! This a UK based company, and the Paradise Crush and Storyteller paper pads are available now in Michael's stores. My first layout features the Paradise Crush pad which is right up my alley. There are lots of fun and bright tropical colors and patterns.
I chose to scrap a photo of me and my husband on the beach in Aruba last summer. I sorted through the papers and chose the ones that screamed "tropical paradise" to me. I did a lot of fussy cutting, and I love how it turned out. I used lots of Shimmerz products on my background.
I love this bird paper! It's super shimmery, and I decided to cut them out and layer them on top of the photo. They're lovebirds...haha! I added some foam under them to raise them up a little bit. My background has a lot of product on it...gesso first and then I used some Shimmerz Dazzlerz and Texturez along with several sprays. I also added some Heidi Swapp Gold Color Shine. It looks gorgeous on the aqua background!
Here you can see the awesome texture on the background. To add to that, I added some tangled thread. Isn't this flamingo gorgeous? It's another fussy cut piece from one of the papers. I love how it looks like it's about to peck my head...haha :D I added foam under it, and I also added a flair button from A Flair For Buttons.
I fussy cut a few big flower clusters from another paper...you can really see how shimmery and shiny those papers are when they hit the light! I went simple with my title...just "paradise," and I used some gold glittery Thickers from my stash.
Another beautiful shimmery shiny flower here...they are really beautiful in real life!
Here's another shot of the dimension and texture of all the products together. I did use a stencil with the Texturez, but I wound up smudging a lot of it with a palette knife. I love how it turned out.
Here's one more close-up of the journaling and title area. I created another little flower cluster down at the bottom.
Here's the process video for this layout if you'd like to check it out. I hope you are able to get your hands on this paper pad if you have a Michael's close by...it's a great stack!
Happy Monday, friends! I hope you all had a wonderful Easter weekend. Today I'm sharing a new layout for Hip Kit Club. I used the 2017 March Hip Kits, and I love how it turned out. My theme for this day was "Creative Titles," so I decided to mix and match some items to make a really big and bold title. I actually started this page with the title...even before I chose the photo. I fussy cut "friends" from one of the Shimelle papers and paired it with one of the Shimelle stickers and some Thickers. I had been wanting to use that cute Dear Lizzy house paper, so I made it my background. I added a big strip of white cardstock down the center to give me some white space to work with, and it breaks up the busy house pattern. I lined the edges of the cardstock with some of the bright yellow floral Maggie Holmes paper.
I did a little bit of mixed media work on the background. I used white gesso first and then used some blue, aqua and pink Shimmerz on the background. I wanted to keep this light, airy and simple, and I think I achieved that look.
To make my title pop a little more, I lightly outlined the letters with a black pen. I love the the "life" sticker and Thickers above the big letters. I added in that adorable "Yay!" banner sticker and that cute cloud, which both came from the Shimelle sticker sheet.
I layered some vellum, patterned paper and a Project Life card behind my photo. I tucked in a few of the Paige Evans Oh My Heart heart die cuts here along with a Shimelle tree sticker and some cute Pinkfresh Studio puffy stickers. I also added some aqua tangled thread. I love how it adds a bright pop of that aqua color. That little Rubber Charm is also from Pinkfresh Studio as is the Leatherette sticker & cardstock sticker underneath the cluster.
I think light kraft / soft gold goes so well with this soft pink color. I think it looks really pretty with the aqua in the background. I did do a little bit of machine stitching up and and down the edges of the cardstock.
I also used some Heidi Swapp Gold Color Shine on my background. Here you can see the pretty shimmer it gives! You can also see how some of the house pattern is a little faded. That's the gesso doing it's magic :)
Here are more Pinkfresh Studio flower stickers. I think they looked cute right here by the photo. I did add some foam behind my photo to raise it up off the page.
Here's one more close-up...I really love all the colors and textures from all of these awesome products!
I have a process video for you...I hope you enjoy and gain some inspiration!
Thanks so much for stopping in today...have a wonderful day!